




















61-1021 Tappan Dishwasher - Instructions
Keep searches simple. Use keywords, e.g. "leaking", "pump", "broken" or "fit".
upper dishrack would not stay in place
Ordered the new roller assembly and in no time the upper rack was back together, up and running. Now to see about replacing the other two rollers and the side rails as they are showing wear and tear.
Thanks for the quick ship.
Thanks for the quick ship.
Parts Used:

-
Nancy from Ocean Park, WA
-
Difficulty Level:Easy
-
Total Repair Time:15 - 30 mins
Was this instruction helpful to you?
Thank you for voting!
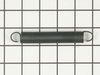
Broken Door Counter Balance Springs
Removed lower panel; unmounted fill valve assembly. Installed two springs. Remounted fill valve assembly and reinstaslled the lower panel. Door must be in a near closed position to gain access to the door "L" spring brackets.
Parts Used:
-
Edward from Bristol, RI
-
Difficulty Level:Easy
-
Total Repair Time:15 - 30 mins
-
Tools:Pliers, Screw drivers
Was this instruction helpful to you?
Thank you for voting!
wheel missing
2 wheels were missing and I replaced them in 2 seconds. The diagram online was a huge help!
Parts Used:

-
WILLIAM from KENNESAW, GA
-
Difficulty Level:Easy
-
Total Repair Time:15 - 30 mins
Was this instruction helpful to you?
Thank you for voting!
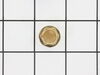
My dishwasher was leaking from and electrical connection at the heating element
There was an excellent "how to" video on the internet which also pointed me to the part I needed. I did not even remove the dishwasher as recommended. I removed the lower kick plate, removed the power connector at the leaking input, removed the bad nut and installed the new nut.
Parts Used:
-
Kevin from Old Orchard Beach, ME
-
Difficulty Level:Easy
-
Total Repair Time:15 - 30 mins
-
Tools:Screw drivers, Wrench set
Was this instruction helpful to you?
Thank you for voting!
Plastic bolt strips
This dishwasher has a plastic bolt that holds the actuator on. The action loosens the bolt and it wobbles and eventually comes off. After enough attempts the bolt will strip and need to be replaced. I took some 3M loctite this time to hold it in place. It is 24 years old, but still kicking
Parts Used:

-
Steve A. from Lake Mary, FL
-
Difficulty Level:Easy
-
Total Repair Time:15 - 30 mins
Was this instruction helpful to you?
Thank you for voting!
Door would not stay up unless locked, springs broken.
Simply remove the bottom panel below the door. The owners manual (22 year old model) showed the proper hole in which to attach the spring. Attach spring to door and then to frame of dishwasher, as illustrated in manual. It is a tight fit to get your hands in there, but once you do it is a snap. We have replace these springs several times over the life of this appliance, this is the first time we have actually found the proper springs, should last a long time. Thank you Parts Select for having the inventory for such an old model!
Parts Used:
-
Sherry from Ronan, MT
-
Difficulty Level:Easy
-
Total Repair Time:15 - 30 mins
-
Tools:Pliers, Screw drivers
Was this instruction helpful to you?
Thank you for voting!