




















5KSM180RCAMB0 Whirlpool Mixer - Instructions
Keep searches simple. Use keywords, e.g. "leaking", "pump", "broken" or "fit".
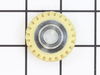
Plastic worm gear gave way (as designed) when the grain mill over-worked it.
I did exactly what the PartSelect video demonstrated after watching other DIY videos on the Internet, thus I did not remove the stand which seemed like a little too much for a simple straight forward repair. This is the second time I have replaced this gear. The first time was about 10 years ago when the bakelite gear broke on a 30 year old KitchenAid K
-45. That mixer made hundreds of loaves of bread after grinding many pounds of wheat berries. The only reason we had to replace it was that it walked off the flour dusted counter and landed on its head when my wife had her back turned. Otherwise we would still be using it. :-)
Thanks for the excellent service and instructions.
-45. That mixer made hundreds of loaves of bread after grinding many pounds of wheat berries. The only reason we had to replace it was that it walked off the flour dusted counter and landed on its head when my wife had her back turned. Otherwise we would still be using it. :-)
Thanks for the excellent service and instructions.
Parts Used:
-
Robert from CEDAR CITY, UT
-
Difficulty Level:Really Easy
-
Total Repair Time:30 - 60 mins
-
Tools:Screw drivers
1 person
found this instruction helpful.
Was this instruction helpful to you?
Thank you for voting!
Mixing bowl was no longer locking in place
Unscrewed the existing screw cap, put the new one in place, replaced the screws. So easy!
Parts Used:

-
Amelia from AURORA, CO
-
Difficulty Level:Really Easy
-
Total Repair Time:30 - 60 mins
-
Tools:Screw drivers
1 person
found this instruction helpful.
Was this instruction helpful to you?
Thank you for voting!
old stand mixer mixing bowl base will not firmly hold newer mixing bowls
With a screw driver remove the screws holding the old base in place. With a flat head screw driver carefully pry and remove old mixer base. With 600 grit sandpaper clean and make smooth any burrs or rough spots in the mixer base recessed area. You can use some light grease and coat the outer edges of new mixer base and place in the now cleaned mixer base recessed area. The new base maybe a tight fit and not be fully seated in the recess. If a tight fit, place the piece of 2x4 piece of wood over the new part that is in the recess and carefully tap the base home using the sledge hammer. Check to see, if the base is fully seated. If not fully seated, tap again When fully seated replace the screws. You may have to adjust the height of the stand mixer head with mixer paddle attached for proper clearance between bowl and paddle. See your mixer manual for adjustment procedure
Parts Used:
-
Susan from BATTLE GROUND, WA
-
Difficulty Level:Easy
-
Total Repair Time:30 - 60 mins
-
Tools:Screw drivers
1 person
found this instruction helpful.
Was this instruction helpful to you?
Thank you for voting!
Teeth on the gear were worn off.
-
Curt from SHELBY, MI
-
Difficulty Level:Easy
-
Total Repair Time:30 - 60 mins
-
Tools:Pliers, Screw drivers
1 person
found this instruction helpful.
Was this instruction helpful to you?
Thank you for voting!
Hard to knock out pins, and connecting the top to the bottom after repair

-
Sheldon from RICHMOND, TX
-
Difficulty Level:Easy
-
Total Repair Time:30 - 60 mins
-
Tools:Socket set, Wrench (Adjustable)
1 person
found this instruction helpful.
Was this instruction helpful to you?
Thank you for voting!
My stand mixer stopped mixing!
I watched a YouTube video all the way through, then watched each segment and followed along with the video. It was messier than the professional repair guy, but it worked out fine. This is not a difficult repair when you can watch a video and follow along. It saved me about $130.
Parts Used:

-
Carl from HAMPTON, NH
-
Difficulty Level:Really Easy
-
Total Repair Time:30 - 60 mins
-
Tools:Screw drivers
1 person
found this instruction helpful.
Was this instruction helpful to you?
Thank you for voting!
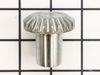
EXTRUDER GEARS GROUND DOWN AND STOPPED WORKING
-
Matthew from MILWAUKEE, WI
-
Difficulty Level:A Bit Difficult
-
Total Repair Time:30 - 60 mins
-
Tools:Pliers, Screw drivers
1 person
found this instruction helpful.
Was this instruction helpful to you?
Thank you for voting!
No rotation on mixer
You tube has great instructions! I would suggest when you buy a part to let customer know that they need a food grade gear grease ordered to complete the reinstall of all gears and body parts!
Parts Used:
-
Linda from ELY, MN
-
Difficulty Level:Really Easy
-
Total Repair Time:30 - 60 mins
-
Tools:Screw drivers
1 person
found this instruction helpful.
Was this instruction helpful to you?
Thank you for voting!
KitchenAid Mixer was leaking oil/grease
Replaced gasket and O-ring. Problem solved. POC (Piece of Cake).
Parts Used:

-
Russ from Lawrenceville, GA
-
Difficulty Level:Easy
-
Total Repair Time:30 - 60 mins
-
Tools:Screw drivers
1 person
found this instruction helpful.
Was this instruction helpful to you?
Thank you for voting!
Leaking Grease
First i went to the Kitchen Aid web site and found a video on how to take a part the mixer. Followed the instructions from the video and it was very easy. The grease in the machine was black so i cleaned it out of the transmission and repack it with hi-heat wheel bearing grease that i got from a auto parts store it took about a 1/2 lb. then put the gasket in and back together and put the o-ring on. Have run for awhile and it is ok. Want to say that these are very well built machine.
Parts Used:
-
Larry from Salina, KS
-
Difficulty Level:Really Easy
-
Total Repair Time:1- 2 hours
-
Tools:Screw drivers
1 person
found this instruction helpful.
Was this instruction helpful to you?
Thank you for voting!
grease from housing leaking into bowl
Followed instructions found onllne at Kitchenaid.com and replaced seals with parts obtained from PartSelect.
Parts Used:
-
Marvin from Hemet, CA
-
Difficulty Level:Easy
-
Total Repair Time:1- 2 hours
-
Tools:Pliers, Screw drivers
1 person
found this instruction helpful.
Was this instruction helpful to you?
Thank you for voting!
The threads on the plate that holds the bowl had stripped and the bowl flew off when mixing
Removed old plate, screwed in new plate and works like new! Was so happy I wouldn’t have to replace my 30 year old mixer.
Parts Used:
-
Christine from CHARLESTON, SC
-
Difficulty Level:Really Easy
-
Total Repair Time:Less than 15 mins
-
Tools:Screw drivers
1 person
found this instruction helpful.
Was this instruction helpful to you?
Thank you for voting!
Burnt brushes
The brushes are located on each side of the tilt head of the mixer. I used a screwdriver to remove the screws, removed the brushes & replaced with the new ones. Runs great again!!
Parts Used:

-
Sabrina from BUNKIE, LA
-
Difficulty Level:Very Easy
-
Total Repair Time:Less than 15 mins
-
Tools:Screw drivers
1 person
found this instruction helpful.
Was this instruction helpful to you?
Thank you for voting!
cap screw was worn out and would not hold the bowl
-
Frank from Locust Grove, VA
-
Difficulty Level:Really Easy
-
Total Repair Time:Less than 15 mins
-
Tools:Screw drivers
2 of 4 people
found this instruction helpful.
Was this instruction helpful to you?
Thank you for voting!
The mixer broke the worm gear(the only plastic gear inside the mixer) and needed replaced.
I took apart the mixer housing and removed all the screws. The most difficult part was the two pins that needed to be removed with a metal punch. They were in fairly tight. The mixer came apart pretty easily and it was obvious which part needed to be replaced as it was broken and missing teeth. After replacing the gear and applying new grease for smooth operation, I simply put it back together and it has worked like new ever since.
Parts Used:
-
Dustin from JACKSONVILLE, NC
-
Difficulty Level:Easy
-
Total Repair Time:15 - 30 mins
-
Tools:Screw drivers
1 person
found this instruction helpful.
Was this instruction helpful to you?
Thank you for voting!