




















5KSM177ANK0 Whirlpool Mixer - Instructions
Keep searches simple. Use keywords, e.g. "leaking", "pump", "broken" or "fit".
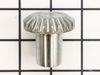
Gears stripped
-
Spencer from New Braunfels, TX
-
Difficulty Level:Easy
-
Total Repair Time:15 - 30 mins
-
Tools:Pliers, Screw drivers
Was this instruction helpful to you?
Thank you for voting!
Replaced main gears
1. Removed the mixer from the base by removeing the pivot pin at the mixer base support. 2. removed the retainer ring from the housing. 3. removed the pin from the shaft. 4. removed 5 philips machine screws from the round base. 5. removed the round base from the mixer housing. 6. removed the o-ring from the shaft. 7. removed the shaft and large worm/pinion gear from the shaft. 8. pressed out the pinion drive gear from the mixer. The reverse operation repaired the mixer to new condition.
Parts Used:
-
Thomas from Dickson, TN
-
Difficulty Level:Really Easy
-
Total Repair Time:15 - 30 mins
-
Tools:Pliers, Screw drivers
Was this instruction helpful to you?
Thank you for voting!
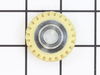
The worm gear driven by the motor stripped due to excessive load.
Remove the mixer head from the base by removing the 4 Phillips head screws. Pry off the ring around the rotating part with a flat head screwdriver. Punch out the pin holding the rotating part and remove. Remove the trim strip by removing the two Phillips screws at the rear of the unit. Remove the 4 screws at the bottom of the mixer head. Carefully separate the bottom of the head from the top using a flat screw driver. There will be the power wires connecting the top to the bottom of the unit. It is best to disconnect these wires to avoid breaking them during rest of the procedure. There will be a lot of grease in the gear box of the mixer. The assembly holding the damaged worm gear can now be removed by removing the three screws holding it to the bottom of the mixer head. At this point I removed the grease from the worm gear assembly to allow better inspection. Punch out the pin holding the worm gear to its shaft and remove the shaft. The worm gear is now free and can be replaced. Add some extra grease to the new gear and reassemble the mixer in the reverse order.
Parts Used:
-
James from Central City, IA
-
Difficulty Level:Easy
-
Total Repair Time:15 - 30 mins
-
Tools:Screw drivers
Was this instruction helpful to you?
Thank you for voting!
My wife was complaining of a loud grinding noise.
I replaced the brushes. I didn't realize that I've put one of them wrong. Reminder for next time the brushes have to touch the rotor of the motor. It took me a little bit to understand but the brushes can go in and not touch the rotor. It works very quietly now. Thank you PartSelect for your infos and knowledge.
Parts Used:

-
Nick from Naperville, IL
-
Difficulty Level:Really Easy
-
Total Repair Time:15 - 30 mins
-
Tools:Screw drivers
Was this instruction helpful to you?
Thank you for voting!
Worm gear was bad
Order part through parts select. it only took 3 days to receive part. The mixer was very easy to take apart and to replace the gear. it was back together in about 20 min. The video from kitchen aid to repair the unit is awsome. Thanks
Parts Used:

-
Alvaro from Brighton, CO
-
Difficulty Level:Really Easy
-
Total Repair Time:15 - 30 mins
-
Tools:Screw drivers
Was this instruction helpful to you?
Thank you for voting!
worm gear replacement
watched instruction video (from Part Select), the demonstration was close enough to enable me to repair the mixer. Newer mixers are disassembled differently.
Parts Used:
-
Bart from Stuarts Draft, VA
-
Difficulty Level:Easy
-
Total Repair Time:15 - 30 mins
-
Tools:Screw drivers
Was this instruction helpful to you?
Thank you for voting!
kitchen aid mixer wouldn't hold the bowl for kneading or mixing cookie dough
Unscrewed 3 Philips screws. Pried out the old screw cap. It had been there for 25 years and had flour, egg, etc. build up over the years. Did use a needle nose plier to lift it out. Put in the new one. Needed a rubber mallet to snug it down. Design has changed slightly over the years. Put the 3 screws back in and as they say in England, "you have an uncle named Bob."
Parts Used:

-
Roland from Newport, OH
-
Difficulty Level:Easy
-
Total Repair Time:15 - 30 mins
-
Tools:Screw drivers
Was this instruction helpful to you?
Thank you for voting!
Plastic worm gear stripped
The plastic worm gear was stripped,I took it apart first then cleaned out all the old grease so when the new part came it together like a charm.
Parts Used:
-
Pete from Tracy, MN
-
Difficulty Level:Really Easy
-
Total Repair Time:Less than 15 mins
-
Tools:Screw drivers
Was this instruction helpful to you?
Thank you for voting!
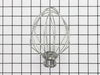
wire whip brokrn
-
Lawrence from Craryville, NY
-
Difficulty Level:Really Easy
-
Total Repair Time:Less than 15 mins
Was this instruction helpful to you?
Thank you for voting!
Base lost grip
Put on a new base plate using fresh screws, all ordered on Parts Select in under a minute. Now my grandmas old Kitchen Aid Stand-up mixer is as good as new! This was way easier than I thought it would be and really a great experience!
Parts Used:
-
Miya from Seattle, WA
-
Difficulty Level:Really Easy
-
Total Repair Time:Less than 15 mins
-
Tools:Screw drivers
Was this instruction helpful to you?
Thank you for voting!
Lost dough hook so no repair

-
jennie from cupertino, CA
-
Difficulty Level:Really Easy
-
Total Repair Time:Less than 15 mins
Was this instruction helpful to you?
Thank you for voting!
Coating on original flat beater was cracking.
I just replaced my old flat beater with the new one. It fit and worked perfectly.
Parts Used:

-
Deanna from Saint Joseph, IL
-
Difficulty Level:Really Easy
-
Total Repair Time:Less than 15 mins
Was this instruction helpful to you?
Thank you for voting!
Lost a rubber foot on my Kitchen Aid mixer. The remaining feet we're hard and mushroomed. I decided to replace all 5. That was the correct decision.
I griped each foot with a pliers and twisted it out of its setting. I then set a new foot in place and hammered it into place with a small hammer. The feet fit snugly and did not need to be glued. Job was easy and mixer sits like new. I was glad I spent the money to replace all of the feet at once.
Parts Used:

-
Dale from Manheim, PA
-
Difficulty Level:Really Easy
-
Total Repair Time:Less than 15 mins
-
Tools:Pliers
Was this instruction helpful to you?
Thank you for voting!
Brush's Wore
-
Gary from Scottsburg, IN
-
Difficulty Level:Really Easy
-
Total Repair Time:Less than 15 mins
-
Tools:Screw drivers
Was this instruction helpful to you?
Thank you for voting!
would not run
-
andrew from bridgeville, PA
-
Difficulty Level:Really Easy
-
Total Repair Time:Less than 15 mins
-
Tools:Screw drivers
Was this instruction helpful to you?
Thank you for voting!