




















5KSM175PSBMF4 Whirlpool Mixer - Instructions
Keep searches simple. Use keywords, e.g. "leaking", "pump", "broken" or "fit".
The thumb screw plastic came off
Open the package with the new screw and it looked like the screw was wider. I tried it to see if it goes in and as long as you screw it straight in, there was no problem.
Parts Used:

-
Karen from Salem, IL
-
Difficulty Level:Really Easy
-
Total Repair Time:Less than 15 mins
Was this instruction helpful to you?
Thank you for voting!
Lost a rubber foot on my Kitchen Aid mixer. The remaining feet we're hard and mushroomed. I decided to replace all 5. That was the correct decision.
I griped each foot with a pliers and twisted it out of its setting. I then set a new foot in place and hammered it into place with a small hammer. The feet fit snugly and did not need to be glued. Job was easy and mixer sits like new. I was glad I spent the money to replace all of the feet at once.
Parts Used:

-
Dale from Manheim, PA
-
Difficulty Level:Really Easy
-
Total Repair Time:Less than 15 mins
-
Tools:Pliers
Was this instruction helpful to you?
Thank you for voting!
I had lost the thumb screw
I sent for a new thumb screw and screwed it in where it belongs and now I can use my other attachments.
Parts Used:
-
Jane from Crivitz, WI
-
Difficulty Level:Really Easy
-
Total Repair Time:Less than 15 mins
Was this instruction helpful to you?
Thank you for voting!
Coating on beater wore off
Simply replaced the beater.Ordering part was simple and delivery was quick. I was back at baking in no time! Great service
Parts Used:

-
Sandra from Jackson, WI
-
Difficulty Level:Really Easy
-
Total Repair Time:Less than 15 mins
Was this instruction helpful to you?
Thank you for voting!
Food mixer suddenly stopped without burnning smell
Just change the motor brush. That's it! It work well now. Thank you, Partselect!
Parts Used:

-
Takahiro from Arlington, MA
-
Difficulty Level:Really Easy
-
Total Repair Time:Less than 15 mins
-
Tools:Screw drivers
Was this instruction helpful to you?
Thank you for voting!
No repair I purchased a part.
The part fit great! PS. I may need to buy a gasket to go around my refrigerator door. I have an Amana Model #THI1853W, Serial No. 9502301998. Do you have instructions on how to install this gasket?
Parts Used:
-
Ernet from Birmingham, AL
-
Difficulty Level:Really Easy
-
Total Repair Time:Less than 15 mins
Was this instruction helpful to you?
Thank you for voting!
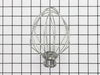
Bent wires in a wire whip
I ordered a new wire whip and attached it just like it was the original. WALLA!!! Done.
Parts Used:
-
Robert from Blairsville, GA
-
Difficulty Level:Really Easy
-
Total Repair Time:Less than 15 mins
Was this instruction helpful to you?
Thank you for voting!
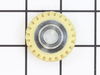
The worm gear was damaged
I how the video for replacing the worm gear on your website. It help me a lot. I followed step by step instruction display on video. It was great help.
Parts Used:
-
Ashok from Sterling, VA
-
Difficulty Level:Really Easy
-
Total Repair Time:30 - 60 mins
-
Tools:Screw drivers
Was this instruction helpful to you?
Thank you for voting!
The speed control lever was bent and broken from a fall
Per a video on this site, I removed the stand part, then removed the rear electrical cover and aluminum band which wraps around the mixer. Next, remove the drip ring and planetary gear (use a punch). Then remove the 4 screws securing the bottom housing and the 5 screws around the planetary gear housing. You should be able to pull the upper and bottom housings apart now. This exposes the control lever. Just unscrew it and replace it. Re-install all parts in reverse order.
Parts Used:


-
Jim from Longmont, CO
-
Difficulty Level:Easy
-
Total Repair Time:30 - 60 mins
-
Tools:Screw drivers
Was this instruction helpful to you?
Thank you for voting!
My kitchenaid stopped moving
My husband looked at youtube to figure out what the issue was. He saw a video that identified that the likely problem was the worm gear. My husband took the kitchenaid applicance apart, as he saw in the video. We ordered the part, it took less than a week to arrive. He rewatched the video that demonstrated how to put the kitchenaid mixer back together. It's a bit messy due to all the packing grease, but a pair of nitrile gloves, paper towels, and an old rag help. We put a garbage bag over the appliance after it was taken apart to protect it from any dust and my curious cat. We let the kitchenaid cycle for about a minute to make sure the gear was greased. I haven't used it to make bread yet, but I'll do that soon. Thanks for supplying the part that saved us at least one hundred dollars and TRY to get a person who will repair small appliances.
Parts Used:
-
Georgianne from Castro Valley, CA
-
Difficulty Level:Easy
-
Total Repair Time:30 - 60 mins
-
Tools:Pliers, Screw drivers
Was this instruction helpful to you?
Thank you for voting!
Mixer quit running
I discovered the brushes were worn, and one side had broken off and lodged against the armature.I got lucky as I removed the brush caps and the sleeves the brushes fit into (simple job) and was able to hand turn the armature so the pieces fell down into the bottom of the mixer housing.After removing them, I replaced the brushes and the mixer runs like new. Thanks for the fast delivery AND more importantly, the right part. Steve
Parts Used:
-
stephen from indianapolis, IN
-
Difficulty Level:Easy
-
Total Repair Time:30 - 60 mins
-
Tools:Screw drivers
Was this instruction helpful to you?
Thank you for voting!
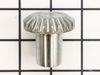
ground off the gears
-
Tom from Bay City, MI
-
Difficulty Level:Easy
-
Total Repair Time:30 - 60 mins
-
Tools:Screw drivers
Was this instruction helpful to you?
Thank you for voting!
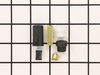
Nothing would happen when we turned it on...
The brushes on the inside of the motor were destroyed. We thought that it would be easier to just replace the brush holder and the brushes, however, the brushes were easy! and QUICK! The brush holders...not so much. We had lots of problems getting the brush holders into place because of a metal piece that had to fit perfectly on top of the brush holder. It made it easier when I held the mixer upside down (we dissembled it) and my husband did his magic on fixing the brush holders. Pray that you won't need to replace the brush holders because it was NO FUN...but the brushes were QUICK AND EASY :)
Parts Used:
-
Ashley from Dayton, OH
-
Difficulty Level:Easy
-
Total Repair Time:1- 2 hours
-
Tools:Pliers, Screw drivers
Was this instruction helpful to you?
Thank you for voting!
Lower Agitator broke as well as speed only worked on fast
Replaced electrical board and speed control plate. cleaned and added new grease. Removed agitator cover and replaced agitator with new. Problem agitator did not match existing. Old agitator was drilled and tapped for a plate to hold gear in place. Tried one without does not work.
Parts Used:



-
Rob from Tomball, TX
-
Difficulty Level:Easy
-
Total Repair Time:1- 2 hours
-
Tools:Screw drivers, Socket set
Was this instruction helpful to you?
Thank you for voting!
Mixer jammed, then would not mix, motor ran
Wish that I had known about the video before disassembling. I did not know if it needed a part or was just jammed. It was clear that i needed a worm gear. So I ordered that. It turned out that I needed the Pinion Shaft w/ gear too. So another order. The shipping far exceeded the cost of the parts. NOTE: Clear off as much grease as necessary to be certain that there are no stripped gears anywhere, the order the parts. I took the mixer head off of the stand. I would suggest that you take a bath towel, roll each end towards the center, and place the mixed head so that it is supported on both sides by the towel rolls. NOTE2: Shipping was great 2 days or less. One part arrived on a Saturday. P>S> I do not know the age of this mixer. The age drop down menu should have an UNKNOW option.
Parts Used:
-
Gordon from Seneca, SC
-
Difficulty Level:A Bit Difficult
-
Total Repair Time:1- 2 hours
-
Tools:Pliers, Screw drivers
Was this instruction helpful to you?
Thank you for voting!