




















5KSM175PSBMF4 Whirlpool Mixer - Instructions
Keep searches simple. Use keywords, e.g. "leaking", "pump", "broken" or "fit".
old stand mixer mixing bowl base will not firmly hold newer mixing bowls
With a screw driver remove the screws holding the old base in place. With a flat head screw driver carefully pry and remove old mixer base. With 600 grit sandpaper clean and make smooth any burrs or rough spots in the mixer base recessed area. You can use some light grease and coat the outer edges of new mixer base and place in the now cleaned mixer base recessed area. The new base maybe a tight fit and not be fully seated in the recess. If a tight fit, place the piece of 2x4 piece of wood over the new part that is in the recess and carefully tap the base home using the sledge hammer. Check to see, if the base is fully seated. If not fully seated, tap again When fully seated replace the screws. You may have to adjust the height of the stand mixer head with mixer paddle attached for proper clearance between bowl and paddle. See your mixer manual for adjustment procedure
Parts Used:

-
Susan from BATTLE GROUND, WA
-
Difficulty Level:Easy
-
Total Repair Time:30 - 60 mins
-
Tools:Screw drivers
1 person
found this instruction helpful.
Was this instruction helpful to you?
Thank you for voting!
Mixing bowl was no longer locking in place
Unscrewed the existing screw cap, put the new one in place, replaced the screws. So easy!
Parts Used:
-
Amelia from AURORA, CO
-
Difficulty Level:Really Easy
-
Total Repair Time:30 - 60 mins
-
Tools:Screw drivers
1 person
found this instruction helpful.
Was this instruction helpful to you?
Thank you for voting!
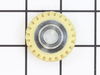
Plastic worm gear gave way (as designed) when the grain mill over-worked it.
I did exactly what the PartSelect video demonstrated after watching other DIY videos on the Internet, thus I did not remove the stand which seemed like a little too much for a simple straight forward repair. This is the second time I have replaced this gear. The first time was about 10 years ago when the bakelite gear broke on a 30 year old KitchenAid K
-45. That mixer made hundreds of loaves of bread after grinding many pounds of wheat berries. The only reason we had to replace it was that it walked off the flour dusted counter and landed on its head when my wife had her back turned. Otherwise we would still be using it. :-)
Thanks for the excellent service and instructions.
-45. That mixer made hundreds of loaves of bread after grinding many pounds of wheat berries. The only reason we had to replace it was that it walked off the flour dusted counter and landed on its head when my wife had her back turned. Otherwise we would still be using it. :-)
Thanks for the excellent service and instructions.
Parts Used:
-
Robert from CEDAR CITY, UT
-
Difficulty Level:Really Easy
-
Total Repair Time:30 - 60 mins
-
Tools:Screw drivers
1 person
found this instruction helpful.
Was this instruction helpful to you?
Thank you for voting!
cap screw was worn out and would not hold the bowl
-
Frank from Locust Grove, VA
-
Difficulty Level:Really Easy
-
Total Repair Time:Less than 15 mins
-
Tools:Screw drivers
2 of 4 people
found this instruction helpful.
Was this instruction helpful to you?
Thank you for voting!
The white enamel coating was breaking off the mixer beater. There was a scrapimg noise when the beater was in motion.
I simply inserted the new beater into the mixer to see if it scraped the sides of the bowl. It fit perfectly and didn't scrape the bowl like the old one did.
Parts Used:

-
Carolyn from LEXINGTON, SC
-
Difficulty Level:Very Easy
-
Total Repair Time:Less than 15 mins
1 person
found this instruction helpful.
Was this instruction helpful to you?
Thank you for voting!
Burnt brushes
The brushes are located on each side of the tilt head of the mixer. I used a screwdriver to remove the screws, removed the brushes & replaced with the new ones. Runs great again!!
Parts Used:

-
Sabrina from BUNKIE, LA
-
Difficulty Level:Very Easy
-
Total Repair Time:Less than 15 mins
-
Tools:Screw drivers
1 person
found this instruction helpful.
Was this instruction helpful to you?
Thank you for voting!
The threads on the plate that holds the bowl had stripped and the bowl flew off when mixing
Removed old plate, screwed in new plate and works like new! Was so happy I wouldn’t have to replace my 30 year old mixer.
Parts Used:
-
Christine from CHARLESTON, SC
-
Difficulty Level:Really Easy
-
Total Repair Time:Less than 15 mins
-
Tools:Screw drivers
1 person
found this instruction helpful.
Was this instruction helpful to you?
Thank you for voting!
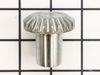
Decorative plug at top of mixer fell into the bowl and jammed the mixer stripping gears
Watch U Tube video. Take care to keep track of disassembly. Hard part was to have 4 types of screw drivers to fit the different screw heads. Be sure to clean broken gear clogs out of the grease. Parts select lady was a great help. Download Parts select diagram for extra help. Time and patience!
Parts Used:

-
BRIAN from PALISADE, CO
-
Difficulty Level:A Bit Difficult
-
Total Repair Time:1- 2 hours
-
Tools:Screw drivers
1 person
found this instruction helpful.
Was this instruction helpful to you?
Thank you for voting!
Worm gear was stripped and needed to be replaced
I am not handy, but was able to follow this YouTube video and do this repair easily and successfully: https://www.youtube.com/watch?v=1QsgPIL9FpA
I did take the mixer apart first to verify that the worm gear was the issue, then ordered the part from you site. I received it quickly and was able to do the repair and get back to mixing in a few days!
I did take the mixer apart first to verify that the worm gear was the issue, then ordered the part from you site. I received it quickly and was able to do the repair and get back to mixing in a few days!
Parts Used:
-
Rachael from SEATTLE, WA
-
Difficulty Level:A Bit Difficult
-
Total Repair Time:1- 2 hours
1 person
found this instruction helpful.
Was this instruction helpful to you?
Thank you for voting!
Motor surges at some speeds
Tried new brushes but alas it looks like it was a controller. Wife needed it asap so Ii bought her a new one. Service and delivery were quick but couldn't wait for a second part to try and repair it again.
Parts Used:
-
David from UNICOI, TN
-
Difficulty Level:Very Easy
-
Total Repair Time:Less than 15 mins
-
Tools:Screw drivers
1 of 2 people
found this instruction helpful.
Was this instruction helpful to you?
Thank you for voting!
I noticed that the Initials on the package indicated that the part was made in CI. That was the problem.
I decided to update the motor brushes in our KitchenA id mixer even though it operated perfectly for years. After installing the motor brushes, you sent,I plugged the cord attached to the mixer into the outlet. I selected 1 on the speed selector and nothing occurred. The mixer would not operate. I then checked the outlet to insure there was voltage present; there was voltage present. I again plugged the cord of the mixer into the outlet, selected 1, then 5, and finally 10, with no results. The mixer would not operate. Finally, I removed the motor brushes I had received from you and installed the old brushes that were originally in the mixer, plugged it in the outlet, selected 1 and the mixer operated perfectly as it did BEFORE installing the brushes you sent.
Parts Used:
-
Gary from COLUMBUS, OH
-
Difficulty Level:Very Easy
-
Total Repair Time:Less than 15 mins
-
Tools:Screw drivers
1 of 2 people
found this instruction helpful.
Was this instruction helpful to you?
Thank you for voting!
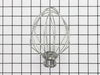
wire whip came apart
Really no help from Kitchen Aid sources; but phone call to PartSelect solved the problem. Kitchen Aid repair line didn't even know the part #! Thanks to Part/Select, Christmas cookies are being made.
Parts Used:
-
Beverly from St. James, MN
-
Difficulty Level:Really Easy
-
Total Repair Time:Less than 15 mins
1 of 2 people
found this instruction helpful.
Was this instruction helpful to you?
Thank you for voting!
wire whip got bent and had to be replaced
-
Robert from Lynchburg, VA
-
Difficulty Level:Really Easy
-
Total Repair Time:Less than 15 mins
1 of 2 people
found this instruction helpful.
Was this instruction helpful to you?
Thank you for voting!
over heating
followed the emailed instructions from your company
worked perfectly
thanks
worked perfectly
thanks
Parts Used:
-
KATHERINE from INVERNESS, FL
-
Difficulty Level:Easy
-
Total Repair Time:Less than 15 mins
1 of 2 people
found this instruction helpful.
Was this instruction helpful to you?
Thank you for voting!
The mixer started getting weak like a gear was stripped and then quite working all together.
I removed the decorative band that covers the seam by removing 1 screw. I then removed the top portion of mixer by removing 4 square head screws. You will then see the gear housing in the front of the mixer. Remove the 4 screws holding that on. There are no spring that are going to pop out and you never know where they went, but be careful because there is a lot of grease and a gear that it just laying in there on the right side. You will see the stainless shaft with a couple on gear cogs on it. Remove the retaing spring from the shaft and pull the top gear off, it may be a little snug. You will then see the dowel pin, mine was sheared off but I could see where it was. Be sure to remove the broken pieces. Use the punch to knock out the remaining pin. Replace with new pin making sure it is evenly exposed on both side of the shaft. Replace the top gear, then the retaining spring, the the gear housing cover, then the mixer top cover and finally the decorative band. Be sure to unplug before you start. These mixers are expensive and expensive to have someone fix them. I ordered 2 pins because shipping is a little high and the pin is cheap. I fixed this for $17.00 total and have a spare pin.
Parts Used:

-
Lane from Warrior, AL
-
Difficulty Level:Easy
-
Total Repair Time:30 - 60 mins
-
Tools:Nutdriver
3 of 8 people
found this instruction helpful.
Was this instruction helpful to you?
Thank you for voting!