




















5KSM156EBZ4 KitchenAid Mixer - Instructions
Keep searches simple. Use keywords, e.g. "leaking", "pump", "broken" or "fit".
stripped nylon drive gear
Followed the repair instructions from the manual. ...
I did notice that the replacement part had an extension on it that allowed for the gear grease to be "pulled up" onto the drive gear ( the one that broke), while the unit is running. This feature was not on the original part, but was obviously an upgrade design which was added after my particular mixer was made. I think that the extension on the bracket will help prevent the new nylon gear from binding and stripping as we use the mixer from now on.
I'm glad that PartSelect had the more modern part on hand, and not just an "overstock" from the original, inferior design.
I did notice that the replacement part had an extension on it that allowed for the gear grease to be "pulled up" onto the drive gear ( the one that broke), while the unit is running. This feature was not on the original part, but was obviously an upgrade design which was added after my particular mixer was made. I think that the extension on the bracket will help prevent the new nylon gear from binding and stripping as we use the mixer from now on.
I'm glad that PartSelect had the more modern part on hand, and not just an "overstock" from the original, inferior design.
Parts Used:

-
James from Naperville, IL
-
Difficulty Level:Really Easy
-
Total Repair Time:30 - 60 mins
-
Tools:Pliers, Screw drivers
2 of 3 people
found this instruction helpful.
Was this instruction helpful to you?
Thank you for voting!
The worm gears were broken.
We simply replaced the gear with the new one. It was very easy to install.
Parts Used:
-
Rejana from FAIRVIEW PARK, OH
-
Difficulty Level:Really Easy
-
Total Repair Time:30 - 60 mins
-
Tools:Screw drivers
2 of 3 people
found this instruction helpful.
Was this instruction helpful to you?
Thank you for voting!
Bad gears
-
Jeffrey from FLINT, MI
-
Difficulty Level:Really Easy
-
Total Repair Time:30 - 60 mins
-
Tools:Screw drivers
2 of 3 people
found this instruction helpful.
Was this instruction helpful to you?
Thank you for voting!
oil leak
just as the you tube instructions said.
Parts Used:



-
Jim from CIRCLE, MT
-
Difficulty Level:Really Easy
-
Total Repair Time:30 - 60 mins
-
Tools:Screw drivers
2 of 3 people
found this instruction helpful.
Was this instruction helpful to you?
Thank you for voting!
Very Happy
-
Joel from Mount Clemens, MI
-
Difficulty Level:Really Easy
-
Total Repair Time:Less than 15 mins
2 of 3 people
found this instruction helpful.
Was this instruction helpful to you?
Thank you for voting!
cap screw was worn out and would not hold the bowl

-
Frank from Locust Grove, VA
-
Difficulty Level:Really Easy
-
Total Repair Time:Less than 15 mins
-
Tools:Screw drivers
2 of 4 people
found this instruction helpful.
Was this instruction helpful to you?
Thank you for voting!
The threads on the plate that holds the bowl had stripped and the bowl flew off when mixing
Removed old plate, screwed in new plate and works like new! Was so happy I wouldn’t have to replace my 30 year old mixer.
Parts Used:
-
Christine from CHARLESTON, SC
-
Difficulty Level:Really Easy
-
Total Repair Time:Less than 15 mins
-
Tools:Screw drivers
1 person
found this instruction helpful.
Was this instruction helpful to you?
Thank you for voting!
Burnt brushes
The brushes are located on each side of the tilt head of the mixer. I used a screwdriver to remove the screws, removed the brushes & replaced with the new ones. Runs great again!!
Parts Used:

-
Sabrina from BUNKIE, LA
-
Difficulty Level:Very Easy
-
Total Repair Time:Less than 15 mins
-
Tools:Screw drivers
1 person
found this instruction helpful.
Was this instruction helpful to you?
Thank you for voting!
Motor speed was erratic and no high speed
Removed the rear cover to inspect the speed board. Replaced motor brushes and noticed the motor body nuts were loose and 1 was completely off. Cleaned up speed board and replaced the motor body nuts, tightened with nutdriver, adjusted speedboard governor screws and with new motor brushes worked like a charm. The very rough sounding motor noise was gone and the mixer has not operated so quietly ever.
Parts Used:

-
Hilton from GREENVILLE, SC
-
Difficulty Level:Easy
-
Total Repair Time:30 - 60 mins
-
Tools:Nutdriver, Pliers, Screw drivers
1 person
found this instruction helpful.
Was this instruction helpful to you?
Thank you for voting!
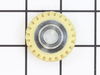
No rotation on mixer
You tube has great instructions! I would suggest when you buy a part to let customer know that they need a food grade gear grease ordered to complete the reinstall of all gears and body parts!
Parts Used:
-
Linda from ELY, MN
-
Difficulty Level:Really Easy
-
Total Repair Time:30 - 60 mins
-
Tools:Screw drivers
1 person
found this instruction helpful.
Was this instruction helpful to you?
Thank you for voting!
Hard to knock out pins, and connecting the top to the bottom after repair
-
Sheldon from RICHMOND, TX
-
Difficulty Level:Easy
-
Total Repair Time:30 - 60 mins
-
Tools:Socket set, Wrench (Adjustable)
1 person
found this instruction helpful.
Was this instruction helpful to you?
Thank you for voting!
Worm gear was worn out .
I watched the university of YouTube videos, and followed their instructions.
Parts Used:

-
Peter from SALADO, TX
-
Difficulty Level:A Bit Difficult
-
Total Repair Time:30 - 60 mins
-
Tools:Pliers, Screw drivers, Wrench (Adjustable)
1 person
found this instruction helpful.
Was this instruction helpful to you?
Thank you for voting!
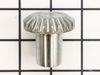
EXTRUDER GEARS GROUND DOWN AND STOPPED WORKING
-
Matthew from MILWAUKEE, WI
-
Difficulty Level:A Bit Difficult
-
Total Repair Time:30 - 60 mins
-
Tools:Pliers, Screw drivers
1 person
found this instruction helpful.
Was this instruction helpful to you?
Thank you for voting!
Attachment hub stopped spinning
Used youtube movies to disassemble the mixer and found that the gear was stripped. I kept the screws in labeled ziploc baggies so I wouldn't forget which screws went where. Once the part arrived, it was very simple to replace the gear. I regreased the mixer and then reassembled. The trickiest part was how greasy everything was! It was also hard to get the pin through the beater hub - I found a video that suggested using a very slim screwdriver to thread the hole before inserting the pin. This was the most involved part replacement I've done on my own, and it was very satisfying to get my mixer back in working order!
Parts Used:
-
Sarah from GRAPEVINE, TX
-
Difficulty Level:Easy
-
Total Repair Time:30 - 60 mins
-
Tools:Screw drivers
1 person
found this instruction helpful.
Was this instruction helpful to you?
Thank you for voting!
Mixer making a grinding noise

-
Jamie from FLORENCE, CO
-
Difficulty Level:Really Easy
-
Total Repair Time:30 - 60 mins
-
Tools:Screw drivers
1 person
found this instruction helpful.
Was this instruction helpful to you?
Thank you for voting!