




















59679519012 Kenmore Refrigerator - Instructions
Keep searches simple. Use keywords, e.g. "leaking", "pump", "broken" or "fit".
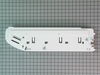
Broken plastic hinge holding bottom drawer lid.
Took the food out. A couple of screw removals. Put drawer lid on and then put the screws in. Nothing to it.
Parts Used:
-
Bob from Blair, NE
-
Difficulty Level:Really Easy
-
Total Repair Time:Less than 15 mins
-
Tools:Nutdriver
2 of 2 people
found this instruction helpful.
Was this instruction helpful to you?
Thank you for voting!
Hinge on 'goumet lid' in front broke off
Wasn't a big deal. Removed the the shelves and glass immediately above the endcap as well as the large 'goumet' draw. Used a nutdriver to remove two screws. Popped off the old endcap and did everything in reverse. Replaced the long clear goumet draw cover that was still intact. Thanks for making it easy!!!!
Parts Used:
-
Erik from Cumming, GA
-
Difficulty Level:Easy
-
Total Repair Time:Less than 15 mins
-
Tools:Nutdriver
2 of 2 people
found this instruction helpful.
Was this instruction helpful to you?
Thank you for voting!
I scratched the door handle while moving the refrigerator into my house.
With a small allen wrench, I was able to loosen the two screws to remove the door handle and replace the new on without any problems. A very simple operation.
Parts Used:
-
Ron from Hardin, MT
-
Difficulty Level:Really Easy
-
Total Repair Time:Less than 15 mins
2 of 2 people
found this instruction helpful.
Was this instruction helpful to you?
Thank you for voting!
Refrigerator was missing grille
This grille just snapped into place without the use of tools. Couldn't have been easier. And the delivery was super fast; I ordered online one day and the item arrived the very next day.
Parts Used:

-
Angela from Topeka, KS
-
Difficulty Level:Really Easy
-
Total Repair Time:Less than 15 mins
4 of 8 people
found this instruction helpful.
Was this instruction helpful to you?
Thank you for voting!
The small peg that holds the panry door in place broke, as a result the door would not operate
It took longer to empty the items off the shelf than it did to do the repair. Slid the veg, drawers out, set them aside.Took glass shelf out set it aside. removed three screws with 1/4in socket. Removed end cap. replaced with new end cap, replaced screws, cleaned and replaced shelf and drawers. Was a very easy task. these pegs break very easy, this is the second time I have had to replace the end cap, both times it was the left size. problem is you have to buy both the left and the right side together,
Parts Used:
-
Gerald from DRYDEN, MI
-
Difficulty Level:Really Easy
-
Total Repair Time:Less than 15 mins
-
Tools:Socket set
2 of 2 people
found this instruction helpful.
Was this instruction helpful to you?
Thank you for voting!
The right end cap hinge broke for the pantry door.
I replaced both side. The left side I very easy to replace. It has 2 screws holding the end cap in place and the tracking has 2 screws holding it in. Undo the 4 screws and put the track on the new end cap and then you are good to go to install the new end cap on the left side. Now for the right side is easy, but you now have to also undo 2 screws and other 2 for the track just like left side but also you are going to have to undo the humidity control stuff and put it on the new end cap.
Parts Used:
-
Justin from KANSAS CITY, KS
-
Difficulty Level:Really Easy
-
Total Repair Time:Less than 15 mins
-
Tools:Nutdriver, Socket set
2 of 2 people
found this instruction helpful.
Was this instruction helpful to you?
Thank you for voting!
Plastic bar between drawers cracked on the end
Removed glass shelf and inserted plastic running bar for drawers
Parts Used:

-
Geraldine from LANOKA HARBOR, NJ
-
Difficulty Level:Very Easy
-
Total Repair Time:Less than 15 mins
2 of 2 people
found this instruction helpful.
Was this instruction helpful to you?
Thank you for voting!
insert new drawer divider
Just removed drawers and glass plate. Put in divider and replaced drawers and glass plate. I was done in 5 minutes. no tools required.
Parts Used:
-
Richard from PHOENIX, AZ
-
Difficulty Level:Very Easy
-
Total Repair Time:Less than 15 mins
2 of 2 people
found this instruction helpful.
Was this instruction helpful to you?
Thank you for voting!
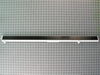
The vertical mullion rail went bad
I left this broken rail hang off my refrigerator for almost a year I finally decided to investigate the possibility of ordering the part on line. I found the part on line in minutes and when I received the part it literally took me 3 minutes to install.
Parts Used:
-
Ed from OCEAN CITY, NJ
-
Difficulty Level:Very Easy
-
Total Repair Time:Less than 15 mins
-
Tools:Nutdriver
2 of 2 people
found this instruction helpful.
Was this instruction helpful to you?
Thank you for voting!
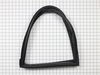
Right Door Magnet weak, door would not stay firmly closed
Replaced seal on door. Same problem. Went to Lowe's and got several magnetic cabinet door catches. Attached them to the top of the door. (they can be seen sticking up), with the magnet part screwed to the door and the metal plate attached to a small wooden block glued to the top of the body with contact cement. Cost abound $16.
"To infinity and beyond."
"To infinity and beyond."
Parts Used:
-
Larry from CHIRENO, TX
-
Difficulty Level:Really Easy
-
Total Repair Time:Less than 15 mins
2 of 2 people
found this instruction helpful.
Was this instruction helpful to you?
Thank you for voting!
The Tab on which the lid swings broke on the left side.
An ideal opportunity to clean the tracks for the glass top and sides. I just removed the two (2) screws with nut driver and gently eased the end cap off by slightly pulling it forward and up, inserting the lid onto the new endcap and slipping the cap back into place securing with the two screws. as easy as pie. I did not change the right end cap as there was no need for it, But if U have to change it U must also first disconnect the back plate.
Parts Used:
-
kenneth from CLEARWATER, FL
-
Difficulty Level:Very Easy
-
Total Repair Time:Less than 15 mins
-
Tools:Nutdriver
2 of 2 people
found this instruction helpful.
Was this instruction helpful to you?
Thank you for voting!
The right door gasket was cracked in two or more places and probably leaked.
I watched the Part Select demonstration for removing and replacing the door gasket. It looked easy and was easier and faster than the demo. The toughest part was getting the wrinkles out of the new door seal.
Parts Used:
-
JAMES from BREVARD, NC
-
Difficulty Level:Very Easy
-
Total Repair Time:Less than 15 mins
2 of 2 people
found this instruction helpful.
Was this instruction helpful to you?
Thank you for voting!
Refrigerator would stop cooling intermittently, control panel would not display temp settings until power was reset.
The video on the part select website with the Canadian gentleman was absolutely the best! My wife and I watched it and was able to accomplish the replacement with no surprises or issues. One tip that we could add is that the orientation of the temperature sensor was not specified in the video, but the slot seemed to work better for one orientation versus another. It has been a couple weeks since the repair and the refrigerator is working like it did when we first purchased it.
Parts Used:

-
Jim from HALTOM CITY, TX
-
Difficulty Level:Easy
-
Total Repair Time:15 - 30 mins
-
Tools:Screw drivers
2 of 2 people
found this instruction helpful.
Was this instruction helpful to you?
Thank you for voting!
FREEZEING UP
in stalled new circuit board an thermostat an was fixed
Parts Used:
-
Sherril from ROBBINSVILLE, NC
-
Difficulty Level:Easy
-
Total Repair Time:15 - 30 mins
-
Tools:Nutdriver
2 of 2 people
found this instruction helpful.
Was this instruction helpful to you?
Thank you for voting!
Refrig. was not holding proper temp in refrig compartment
Remove light lens by pushing straight back (needs some oomph, but not too much). Remove control housing by prying spring clips in back of housing with thin screwdriver or knife. Remove old control board by releasing plastic clips on both sections and removing 2 wiring plugs. Be careful snapping new control board in ; the alignment of the 4 switches and the 2 readouts is critical - easy to hang up a switch. Snap the control housing back into place, making sure that it is all the way in. Position the light lens so that it is lined up and about 1/2" back and then slide it forward (toward you) into place. The instruction sheet calls the refrigerator section the "fresh food" section. There are 2 light switches, one for each door. Both have to held down to get light to go out and enter programming mode. Easiest to close the right door, then push left door switch and quickly push the freezer DOWN button 3 times. Follow the instructions to set the program on the display and then push AND HOLD the freezer DOWN button until the display starts flashing. Release the freezer DOWN button, close the doors, open the doors to check. Display will indicate two 4s. (that was what mine indicated). Done.
Parts Used:
-
Dan from Goldens Bridge, NY
-
Difficulty Level:A Bit Difficult
-
Total Repair Time:15 - 30 mins
2 of 2 people
found this instruction helpful.
Was this instruction helpful to you?
Thank you for voting!