




















59679513013 Kenmore Refrigerator - Instructions
Keep searches simple. Use keywords, e.g. "leaking", "pump", "broken" or "fit".
Freezer box frosting up. Refrigerator not cold.
My son (who does HVAC, but not appliance repair) did some investigating by taking front and back panels off and determined that the evaporator coil was freezing over because the defrost wire was not heating up. He and his girlfriend did some real-time internet searching for diagnostic info because NO control diagram was included with the refrigerator. He determined the problem was most likely the electronic control board. Ordered and installed a new board and the refrigerator is back to working fine. Took about 2 hours to diagnose the problem and 1/4 hour to actually install the control board. Kind of disappointing that this control board failed when the refrigerator was less that 4 years old.
Parts Used:

-
Timothy from BELTSVILLE, MD
-
Difficulty Level:A Bit Difficult
-
Total Repair Time:30 - 60 mins
-
Tools:Nutdriver, Screw drivers
4 of 5 people
found this instruction helpful.
Was this instruction helpful to you?
Thank you for voting!
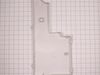
Pan is easy part, fan motor assembly is appliance orgami
Remove back cover
Remove drip thing from top to tray in the back
Remove fan motor assembly. This is squirrely. Top bends towards you, bottom pushes in to the unit. Not fun.
CAREFULLY remove copper tube that rests on drip tray
Remove tray - there are clips in the front that get released by screwdriver
Clean up
Replace new tray
Replace copper tube
Play with fan motor assembly till it fits. It doesn't look like it's gonna work until it does. See youtube videos on this.
Replace drip thing from top to tray - I forgot this one the first time.
Replace cover.
This is a simple, but squirrely, repair. Right on the border of easy (because so few tools and steps) and A Bit Difficult because of the patience required.
Remove drip thing from top to tray in the back
Remove fan motor assembly. This is squirrely. Top bends towards you, bottom pushes in to the unit. Not fun.
CAREFULLY remove copper tube that rests on drip tray
Remove tray - there are clips in the front that get released by screwdriver
Clean up
Replace new tray
Replace copper tube
Play with fan motor assembly till it fits. It doesn't look like it's gonna work until it does. See youtube videos on this.
Replace drip thing from top to tray - I forgot this one the first time.
Replace cover.
This is a simple, but squirrely, repair. Right on the border of easy (because so few tools and steps) and A Bit Difficult because of the patience required.
Parts Used:
-
Thomas from MELBOURNE, FL
-
Difficulty Level:Easy
-
Total Repair Time:15 - 30 mins
-
Tools:Nutdriver, Screw drivers
4 of 5 people
found this instruction helpful.
Was this instruction helpful to you?
Thank you for voting!
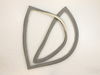
door no longer stayed shut
repair was extremely easy.
Whether it was magnets weakened or seal getting stiff with age not allowing it to seal well, these gaskets improved it. Still not as strong a magnetic pull as it could be though. I will also say that the seals didn't pull tight at first. It seems the seals needed to flatten a bit before the magnets did their job.
Whether it was magnets weakened or seal getting stiff with age not allowing it to seal well, these gaskets improved it. Still not as strong a magnetic pull as it could be though. I will also say that the seals didn't pull tight at first. It seems the seals needed to flatten a bit before the magnets did their job.
Parts Used:
-
John from BOONSBORO, MD
-
Difficulty Level:Very Easy
-
Total Repair Time:15 - 30 mins
4 of 5 people
found this instruction helpful.
Was this instruction helpful to you?
Thank you for voting!
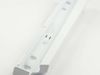
Parts ordered on Sun Arrived Tues (local stores closed)
Talking with the service tech and youtube video it was a snap... Saved a service repair and a 25% parts mark up..
Parts Used:

-
David from Blairsville, GA
-
Difficulty Level:Really Easy
-
Total Repair Time:15 - 30 mins
-
Tools:Screw drivers
3 of 3 people
found this instruction helpful.
Was this instruction helpful to you?
Thank you for voting!
There’s moisture inside the refrigerator and there’s a section in the gasket that was broken.
Easily pulled out the gaskets off the refrigerator doors and replaced them with the new ones. The installation video was also a big help in the process.
Parts Used:
-
Rodolfo from SAN LEANDRO, CA
-
Difficulty Level:Really Easy
-
Total Repair Time:Less than 15 mins
3 of 3 people
found this instruction helpful.
Was this instruction helpful to you?
Thank you for voting!
rubber seal for right hand doors separated and allowed magnetic strip to fall out
Received gasket. Checked color and size. Because this unit is 33 inches wide one door is 3 inches narrower than the other. Removed shelves from door to provide more room to work. Took 15 seconds to pull out old seal and 1 minute to install the new one. Checked to make sure center sealing flap were on the center side of door. Started in upper corners, worked my way around the perimeter pressing in in with my fingers.
Took longer to R&R and wash shelves than to replace door seal.
VERY EASY
Took longer to R&R and wash shelves than to replace door seal.
VERY EASY
Parts Used:
-
Gary from YUMA, AZ
-
Difficulty Level:Very Easy
-
Total Repair Time:Less than 15 mins
3 of 3 people
found this instruction helpful.
Was this instruction helpful to you?
Thank you for voting!
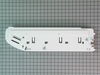
clips to pantry drawer lid had been broken off
First I removed the pantry drawer; then the two crisper drawers and glass shelf. Then I removed the hex screws that held end cap in place. Removal of cap from refrigerator was complicated by the adjustable temperature control - it is loosely attached at the back of end cap and also has to be removed to get cap out. Gentle persuasion accomplishes this. Getting the slider off end cap also a bit difficult. Then I removed the drawer glides. Reversing all steps was fairly easy and the rest of the "fix" went well. I wished that there had been some written directions - or at the very least, a diagram of how all went together. All in all was still cheaper than repair person.
Parts Used:
-
Linda from West Harwich, MA
-
Difficulty Level:A Bit Difficult
-
Total Repair Time:15 - 30 mins
-
Tools:Nutdriver
3 of 3 people
found this instruction helpful.
Was this instruction helpful to you?
Thank you for voting!
Fresh Food Compartment occasionally going down to 28-30 degrees F
Failure detected as Damper Control at upper rear of compartment would continuously open/close, would never stay open or closed. Sometimes the main board would turn it off (maybe a low thermistor limit?), but it would stick open a bit, and keeping letting freezer air into fridge. Could have potentially been control board, but as it turns out after disassembly of the defective damper, the internal microswitch was stuck in the closed position so it wouldn't shut off the motor. Easy fix by gently pulling the cover off the damper control, pull out Styrofoam encasement, then a phillips to remove the damper assembly. Gently push tabs to release wire connectors. Reverse the process and you're done! If I really wanted to go on the cheap, I could have just changed the microswitch, but that looked like a shaky maneuver at best. This site saved me on this one, so happy to share my experience with this Maytag and its nasty habit of freezing my milk and eggs!! :)
Parts Used:

-
Galen from WASECA, MN
-
Difficulty Level:Really Easy
-
Total Repair Time:15 - 30 mins
-
Tools:Screw drivers
3 of 3 people
found this instruction helpful.
Was this instruction helpful to you?
Thank you for voting!
Broken Plastic Pin
It was easier than I had anticipated. Just had to make sure that I was very careful in removing the old part so I did not break any of the good plastic that I needed in order to install the plastic temperature control to the new part.
Parts Used:
-
Mary C from CYPRESS, TX
-
Difficulty Level:Really Easy
-
Total Repair Time:15 - 30 mins
-
Tools:Socket set
3 of 3 people
found this instruction helpful.
Was this instruction helpful to you?
Thank you for voting!
Tab off of veggie drawer broke off
ordered part -- great delivery-- 3 days--- removed damaged bracket and replaced with new --- very easy to order correct part per web pg thanks
Parts Used:
-
ALBERT from BERLIN, VT
-
Difficulty Level:Very Easy
-
Total Repair Time:Less than 15 mins
-
Tools:Nutdriver
3 of 3 people
found this instruction helpful.
Was this instruction helpful to you?
Thank you for voting!
Center rail broke.
Removed the top glass above the vegetable drawers and slipped the center rail in place. And I would like to add that I would do business with this site again!
Parts Used:

-
Frank I. from FREMONT, CA
-
Difficulty Level:Very Easy
-
Total Repair Time:Less than 15 mins
3 of 3 people
found this instruction helpful.
Was this instruction helpful to you?
Thank you for voting!
Freezer iced up
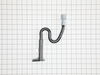
Let the ice in the freezer melt while installing P trap drain tube
Parts Used:
-
Dale from MECHANICSBURG, PA
-
Difficulty Level:Really Easy
-
Total Repair Time:30 - 60 mins
-
Tools:Nutdriver, Screw drivers
3 of 3 people
found this instruction helpful.
Was this instruction helpful to you?
Thank you for voting!
Pin for drawer lid broke off
Empty drawer and take out . remove glass shelf and front and rear shelf braces. remove 2 screws holding pantry end cap to fridge. remove rear bracket by unsnapping clips. remove temp control arm. and reattach to new end cap. reinstall rear bracket to fridge and align end cap, align screws and tighten. reinstall drawers and shelf brackets. replace glass shelf. and reattach lid to brackets. Open beer and enjoy success.
Parts Used:
-
John from WATERBURY, CT
-
Difficulty Level:Easy
-
Total Repair Time:30 - 60 mins
-
Tools:Nutdriver
3 of 3 people
found this instruction helpful.
Was this instruction helpful to you?
Thank you for voting!
Plastic food door hinge broke
Removed the food bins and lower shelf. Unscrewed the end cap. Removed the drawer hinge. Re-installed hing on new end cap. Installed the new end cap. Re-installed drawers and shelf. DONE!
Great graphics on the website helped to correctly idenitfy the required part. Part arrived quickly and well packed. One of the easiest transactions ever!
Great graphics on the website helped to correctly idenitfy the required part. Part arrived quickly and well packed. One of the easiest transactions ever!
Parts Used:
-
Michael from Nesconset, NY
-
Difficulty Level:Really Easy
-
Total Repair Time:Less than 15 mins
-
Tools:Nutdriver, Screw drivers
3 of 4 people
found this instruction helpful.
Was this instruction helpful to you?
Thank you for voting!
Water not draining to pan. It caused an ice build up under the freezer draw
Remove the grate at the back of the refrigerator. Remove the existing drawn tube. Replace the exiting drain tube with the updated drain tube. Check to see if water was draining properly. Replace the grate. Sit back and have a beer.
Parts Used:
-
Rich from WINSTED, CT
-
Difficulty Level:Very Easy
-
Total Repair Time:Less than 15 mins
-
Tools:Nutdriver, Pliers, Screw drivers
3 of 4 people
found this instruction helpful.
Was this instruction helpful to you?
Thank you for voting!