




















59679513013 Kenmore Refrigerator - Instructions
Keep searches simple. Use keywords, e.g. "leaking", "pump", "broken" or "fit".
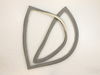
Needed to replace gaskets in refrigerator door as they were cracking
Beware - the website does not indicate that doors are different sizes on this model refrigerator. Not paying attention I ordered 2 of the same size gasket which only fit the right side door - had to send one back and reorder left side from Whirpool directly.
The actual installation is very easy. It may take a day or so the gasket to feel like its actually making a good seal.
The actual installation is very easy. It may take a day or so the gasket to feel like its actually making a good seal.
Parts Used:
-
John from LONG VALLEY, NJ
-
Difficulty Level:Very Easy
-
Total Repair Time:Less than 15 mins
12 of 12 people
found this instruction helpful.
Was this instruction helpful to you?
Thank you for voting!
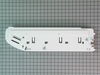
Pin for lid broke 2 Liter of pop fill on it
Removed drawers and glass top and support bars Two screws on slid bar two screws on end cap, Make sure you take time to remove air control it has two pivot points with small taps.
Then just replace parts as you had taken off very easy.
Then just replace parts as you had taken off very easy.
Parts Used:
-
Tommy N from Tipton, IN
-
Difficulty Level:Really Easy
-
Total Repair Time:Less than 15 mins
-
Tools:Nutdriver
15 of 21 people
found this instruction helpful.
Was this instruction helpful to you?
Thank you for voting!
Tab on end broke off allow crispers to fall off rail.

-
Ed from South Lebanon, OH
-
Difficulty Level:Really Easy
-
Total Repair Time:Less than 15 mins
12 of 13 people
found this instruction helpful.
Was this instruction helpful to you?
Thank you for voting!
The LH End Cap hinge stud had broken...
Removed the crisper drawers (pull out, then up & out), remove the glass shelf above the "pantry", remove the pantry door (easy because hinge stud was broken), then remove the pantry drawer. Use 1/4" nut driver to remove the broken LH End Cap...it pulls up and out. With the phillips screwdriver, remove/replace the steel rail for the drawer action to the new part. Replace in reverse order (after your neat freak SO cleans everything!).
Parts Used:
-
Myrna from El Paso, TX
-
Difficulty Level:Easy
-
Total Repair Time:Less than 15 mins
-
Tools:Nutdriver, Screw drivers
11 of 11 people
found this instruction helpful.
Was this instruction helpful to you?
Thank you for voting!
Scratches in Surface
This product comes in a bottle with a brush like Liquid Paper. It goes on incredibly easy. A second coat might be needed. I wanted to prevent rust from setting in so I covered the scratches and dings. The paint is a little brighter since my washer is 10 years old but it still looks great.
Parts Used:
-
Michelle from Richardson, TX
-
Difficulty Level:Really Easy
-
Total Repair Time:Less than 15 mins
83 of 227 people
found this instruction helpful.
Was this instruction helpful to you?
Thank you for voting!
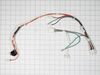
freezer icing up no cold air circulation to refrigerator
unplugged the unit pulled it away from the wall removed the lower panel removed the drain installed the new replacement . removed the wiring harness and replaced it with the new one replaced the panel and plugged back in
Parts Used:
-
THOMAS M from DENVER, CO
-
Difficulty Level:Easy
-
Total Repair Time:30 - 60 mins
-
Tools:Screw drivers, Socket set
13 of 18 people
found this instruction helpful.
Was this instruction helpful to you?
Thank you for voting!
Old gasket frayed & torn
Laid gasket in direct sunlight for an hour, heat made it very pliable. Removed existing gasket from door groove, which came out with little effort. Pressed new gasket in door groove with minimal effort as it was pliable from sunlight heat. Gasket seated correctly and resulted in tight seal.
Parts Used:
-
Carl from HARPSWELL, ME
-
Difficulty Level:Really Easy
-
Total Repair Time:30 - 60 mins
10 of 10 people
found this instruction helpful.
Was this instruction helpful to you?
Thank you for voting!
Refrigerator not defrosting properly. Evaporator froze on three different occasions.
I watched the video provided on-line in your website, which was excellent. The information provided gave me everything I needed to change the board. I already had experience handling control boards and was aware of the static precautions; however, your paperwork was very good detailing how to program the new board. The only small problem I had was reinstalling the temp sensor in its bracket. The lead was very short. Other than that, all went well! The project took between 20 and 30 minutes.
Parts Used:

-
John from GREENSBURG, PA
-
Difficulty Level:Really Easy
-
Total Repair Time:30 - 60 mins
-
Tools:Screw drivers
10 of 11 people
found this instruction helpful.
Was this instruction helpful to you?
Thank you for voting!
Right side door gasket split open
First, selecting the right part is more difficult than the repair. My Kenmore is an outdated model actually manufactured by Whirlpool.
Once I got the part I relaxed the gasket with a hair dryer - an important step suggested by PS. I then took old of the old gasket and removed it. The new one fits in the channel. Just press and make it is completely installed and flush.
Once I got the part I relaxed the gasket with a hair dryer - an important step suggested by PS. I then took old of the old gasket and removed it. The new one fits in the channel. Just press and make it is completely installed and flush.
Parts Used:
-
Thomas from SPRINGFIELD, MO
-
Difficulty Level:Very Easy
-
Total Repair Time:Less than 15 mins
9 of 9 people
found this instruction helpful.
Was this instruction helpful to you?
Thank you for voting!
frig would not get cold
I watched video for repair and it went just like it showed. piece of cake
Parts Used:
-
dennis j from TOMAHAWK, WI
-
Difficulty Level:Very Easy
-
Total Repair Time:15 - 30 mins
-
Tools:Screw drivers
10 of 12 people
found this instruction helpful.
Was this instruction helpful to you?
Thank you for voting!
freezer no staying cold
Replaced the electronics board. Fairly easy job. Video helped enormously. Programing is awkward.
Parts Used:
-
William from EXTON, PA
-
Difficulty Level:Easy
-
Total Repair Time:15 - 30 mins
-
Tools:Screw drivers
9 of 10 people
found this instruction helpful.
Was this instruction helpful to you?
Thank you for voting!
The frost free drain behind the freezer compartment clogged and water collected in the bottom of the freezer and eventually came out the door on the right front of the refrigerator.
The other instructions and the video provided by Parts Direct are pretty good with instructions, but they omit two steps. First, if you have an ice maker, you will need to unplug the connector on the back side of the panel you remove at the back of the refrigerator to access the drain tube. Just unplug it and you can move the removed panel to the side without disconnecting any of the water lines. Second, the instructions say to just reconnect the "bottom end" of the new p-trap drain to the drain pan at the bottom of the refrigerator. They don't tell you there are two places to connect the new p-trap to the drain pan. The original tube/trough connected to the one at the back of the drain pan on the left (viewed from the rear of the refrigerator). At first, it looks like the new p-trap won't reach to it for the connection, but if you look closer, there is another connector to the right of the original one that the p-trap connects to properly. Replacing the drain trough with the new p-trap was actually pretty easy and would only take about a half hour. Add another half hour to give the refrigerator coils a good cleaning as they will need it now that you can reach them. The real time consumer, 3 to 4 hours, is needed to use a hair dryer to melt and clear the ice from the condenser at the back of the freezer so the water can drain. Just take your time and all the ice will eventually melt and drain out so the new p-trap will work properly.
Parts Used:
-
David from ROSEBURG, OR
-
Difficulty Level:Easy
-
Total Repair Time:30 - 60 mins
-
Tools:Nutdriver, Screw drivers
8 of 9 people
found this instruction helpful.
Was this instruction helpful to you?
Thank you for voting!
Refrigerator wouldn't cool
First I removed the six screws from the cover. I then disconnected the two wires and pulled the small motor out with its base and removed two screws that hold it in place. I then changed the old one for the new one and set it back in its place. I then set the cover back and turned it on. I was happy again.
Parts Used:

-
Fidel from Forest, MS
-
Difficulty Level:Easy
-
Total Repair Time:30 - 60 mins
-
Tools:Screw drivers
10 of 15 people
found this instruction helpful.
Was this instruction helpful to you?
Thank you for voting!
Gasket on right hand refrigerator door tore at inside flap seal & outer tube seal split.
Pulled out on gasket seal at top right corner of door and when loose pealed the seal out around door. Installed gasket by inserting channel insert into door groove and pressed gasket in while lightly pulling down to stretch seal out to facilitate inserting gasket lip into door channel. Bada bing! Done. Good fit. Note: I laid out gasket in the sun to soften it up as there were some small wrinkles in material from being folded for shipping. Hair dryer would work too!
Parts Used:
-
James from Rainbow, TX
-
Difficulty Level:Very Easy
-
Total Repair Time:15 - 30 mins
7 of 7 people
found this instruction helpful.
Was this instruction helpful to you?
Thank you for voting!
The Freezer defrosted and everything on the top and the bottom spoiled
i had used your web site before and i read several problems that your readers had. i went to the back of the unit, removed the bottom cover and right there the i found the run capacitor and i chaged it. since i had only ordered this part to save money i went back and ordered the Start Device which when i took it off it was completely burned. the replacement part came labeled with 2 different compressor #, so i picked the one that i had and unpluged each wire. the part may differ from the one that it's in the unit but it worked when i pluged everything back on. it also helps to take a picture of everything before removing the wires in case you have to leave it and come back later. i hope to use this refrigerator another 10 years. thank you all for your help.
Parts Used:

-
Jorge from Miami, FL
-
Difficulty Level:Easy
-
Total Repair Time:15 - 30 mins
-
Tools:Nutdriver
10 of 16 people
found this instruction helpful.
Was this instruction helpful to you?
Thank you for voting!