




















59679512010 Kenmore Refrigerator - Instructions
Keep searches simple. Use keywords, e.g. "leaking", "pump", "broken" or "fit".
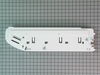
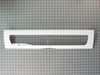
Broken drawer lid connector
I removed and replaced the right pantry end cap, as well as the drawer lid.
Parts Used:
-
Matt from BROOKFIELD, WI
-
Difficulty Level:Really Easy
-
Total Repair Time:15 - 30 mins
-
Tools:Screw drivers, Socket set
3 of 3 people
found this instruction helpful.
Was this instruction helpful to you?
Thank you for voting!
Broken Plastic Pin
It was easier than I had anticipated. Just had to make sure that I was very careful in removing the old part so I did not break any of the good plastic that I needed in order to install the plastic temperature control to the new part.
Parts Used:
-
Mary C from CYPRESS, TX
-
Difficulty Level:Really Easy
-
Total Repair Time:15 - 30 mins
-
Tools:Socket set
3 of 3 people
found this instruction helpful.
Was this instruction helpful to you?
Thank you for voting!
Broken Glass crisper top

-
Robert from Southwick, MA
-
Difficulty Level:Really Easy
-
Total Repair Time:Less than 15 mins
4 of 6 people
found this instruction helpful.
Was this instruction helpful to you?
Thank you for voting!
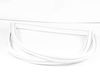
Needed a new gasket for the right side door
Watched the video on this site, followed the instructions to lay the gasket flat and warm it with a hair dryer, removed the old gasket, and popped the new one in. Easy!
Parts Used:
-
Mary Lou from RNCH DE TAOS, NM
-
Difficulty Level:Very Easy
-
Total Repair Time:15 - 30 mins
3 of 3 people
found this instruction helpful.
Was this instruction helpful to you?
Thank you for voting!
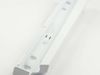
Parts ordered on Sun Arrived Tues (local stores closed)
Talking with the service tech and youtube video it was a snap... Saved a service repair and a 25% parts mark up..
Parts Used:

-
David from Blairsville, GA
-
Difficulty Level:Really Easy
-
Total Repair Time:15 - 30 mins
-
Tools:Screw drivers
3 of 3 people
found this instruction helpful.
Was this instruction helpful to you?
Thank you for voting!
Broken Pan
Don't try and remove the front/handle from the broken pan, you will break it and its double the price of the pan, just use the small hammer to break the pan into smaller pieces and remove handle from them then the handle will just snap onto the new pan. Piece of cake!
Parts Used:

-
Terry from HENDERSON, NV
-
Difficulty Level:Really Easy
-
Total Repair Time:15 - 30 mins
3 of 3 people
found this instruction helpful.
Was this instruction helpful to you?
Thank you for voting!
Fresh Food Compartment occasionally going down to 28-30 degrees F
Failure detected as Damper Control at upper rear of compartment would continuously open/close, would never stay open or closed. Sometimes the main board would turn it off (maybe a low thermistor limit?), but it would stick open a bit, and keeping letting freezer air into fridge. Could have potentially been control board, but as it turns out after disassembly of the defective damper, the internal microswitch was stuck in the closed position so it wouldn't shut off the motor. Easy fix by gently pulling the cover off the damper control, pull out Styrofoam encasement, then a phillips to remove the damper assembly. Gently push tabs to release wire connectors. Reverse the process and you're done! If I really wanted to go on the cheap, I could have just changed the microswitch, but that looked like a shaky maneuver at best. This site saved me on this one, so happy to share my experience with this Maytag and its nasty habit of freezing my milk and eggs!! :)
Parts Used:

-
Galen from WASECA, MN
-
Difficulty Level:Really Easy
-
Total Repair Time:15 - 30 mins
-
Tools:Screw drivers
3 of 3 people
found this instruction helpful.
Was this instruction helpful to you?
Thank you for voting!
Bad gasket
Pulled off old gasket
Put new gasket in the groove
Gasket fit perfectly
Thank you
Put new gasket in the groove
Gasket fit perfectly
Thank you
Parts Used:
-
Keith from GRANTS PASS, OR
-
Difficulty Level:Really Easy
-
Total Repair Time:15 - 30 mins
-
Tools:Screw drivers
3 of 3 people
found this instruction helpful.
Was this instruction helpful to you?
Thank you for voting!
The rubber liner around the refrigerator door was splitting and cracking
I watched the video and it took away my trepidation. I did what it said and it went right in!!
Parts Used:
-
Judy from BALD KNOB, AR
-
Difficulty Level:Very Easy
-
Total Repair Time:Less than 15 mins
3 of 3 people
found this instruction helpful.
Was this instruction helpful to you?
Thank you for voting!
rubber seal for right hand doors separated and allowed magnetic strip to fall out
Received gasket. Checked color and size. Because this unit is 33 inches wide one door is 3 inches narrower than the other. Removed shelves from door to provide more room to work. Took 15 seconds to pull out old seal and 1 minute to install the new one. Checked to make sure center sealing flap were on the center side of door. Started in upper corners, worked my way around the perimeter pressing in in with my fingers.
Took longer to R&R and wash shelves than to replace door seal.
VERY EASY
Took longer to R&R and wash shelves than to replace door seal.
VERY EASY
Parts Used:

-
Gary from YUMA, AZ
-
Difficulty Level:Very Easy
-
Total Repair Time:Less than 15 mins
3 of 3 people
found this instruction helpful.
Was this instruction helpful to you?
Thank you for voting!
Original door gasket was cracked and torn
Replacement gasket extremely easy to install. Used hair dryer to soften and straighten out “kinks” in replacement gasket. Pulled old gasket out of groove in refrigerator door. Lined up corners of new gasket and pressed into place with my fingers. Went in exactly as video showed.
Parts Used:
-
Sharon from RACINE, WI
-
Difficulty Level:Very Easy
-
Total Repair Time:Less than 15 mins
3 of 3 people
found this instruction helpful.
Was this instruction helpful to you?
Thank you for voting!
Right door seal was torn at top of door
I followed the remove and replace instructions in the Part Sect video when I ordered the seal. Pulled out the old seal by hand and installed the new seal. No tools needed, very easy. Took 10 minutes at most.
Parts Used:
-
Richard from MIDDLETOWN, MD
-
Difficulty Level:Really Easy
-
Total Repair Time:Less than 15 mins
3 of 3 people
found this instruction helpful.
Was this instruction helpful to you?
Thank you for voting!
There’s moisture inside the refrigerator and there’s a section in the gasket that was broken.
Easily pulled out the gaskets off the refrigerator doors and replaced them with the new ones. The installation video was also a big help in the process.
Parts Used:
-
Rodolfo from SAN LEANDRO, CA
-
Difficulty Level:Really Easy
-
Total Repair Time:Less than 15 mins
3 of 3 people
found this instruction helpful.
Was this instruction helpful to you?
Thank you for voting!
One of the plastic fasteners had broken so the entire part needed replacing.
Turned off power, Removed screw, disconnected wire harness and removed old rail from door, Connected new wire harness and attached new rail to door, replaced screw. Restored power. Done.
Parts Used:
-
lane from EVERETT, WA
-
Difficulty Level:Very Easy
-
Total Repair Time:Less than 15 mins
-
Tools:Socket set
3 of 3 people
found this instruction helpful.
Was this instruction helpful to you?
Thank you for voting!
Tab off of veggie drawer broke off
ordered part -- great delivery-- 3 days--- removed damaged bracket and replaced with new --- very easy to order correct part per web pg thanks
Parts Used:
-
ALBERT from BERLIN, VT
-
Difficulty Level:Very Easy
-
Total Repair Time:Less than 15 mins
-
Tools:Nutdriver
3 of 3 people
found this instruction helpful.
Was this instruction helpful to you?
Thank you for voting!