




















59679313511 Amana Refrigerator - Instructions
Keep searches simple. Use keywords, e.g. "leaking", "pump", "broken" or "fit".
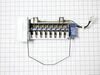
icemaker stopped working
Hardest part is access to the icemaker itself. Once I removed the freezer door (bottom drawer freezer), and got the sliding basket out, it was a 10 minute job. Make sure you start the upper screws first, the icemaker will hang there while you adjust, connect the harness, and tighten. Make sure you are ready before you close the door, it will start making ice as soon as the door is closed.
Parts Used:
-
Charles from CASTLE ROCK, CO
-
Difficulty Level:Easy
-
Total Repair Time:30 - 60 mins
-
Tools:Screw drivers
5 of 5 people
found this instruction helpful.
Was this instruction helpful to you?
Thank you for voting!
The Switch Broke...Absolutely Fell Apart.
I simply removed the old switch using 2 small screwdrivers and the old switch case popped out. I then upluged the wires from the old switch and reversed the process. Didn't take longer than 5 minutes begining to end! Thank you for the great service! Duncan quaid
Parts Used:

-
Duncan from Metairie, LA
-
Difficulty Level:Really Easy
-
Total Repair Time:Less than 15 mins
-
Tools:Screw drivers
5 of 5 people
found this instruction helpful.
Was this instruction helpful to you?
Thank you for voting!
Existing icemaker would freeze up, stop making ice.
I did not unplug the refrigerator. Your choice on this. Take a close look at the existing icemaker, how the wires are routed and what the water spout looks like as it relates to the icemaker. Small flat-blade screwdriver will help in unlocking tabs on the icemaker plug. Go ahead and unplug it. Of the three screws that secure the icemaker, two are impossible to see without holding a mirror in your third hand. Completely remove the bottom screw (by feel). Don't drop it, like I did. Have no idea where it went. Loosen the top two screws but do not remove. Icemaker will lift off of the top two screws when you push it up. With old icemaker out of the way, plug in the new icemaker. Be careful to properly align the water spout into the new icemaker as you hook it on the two top screws. When everything looks good, tighten the two top screws. Replace the bottom screw, if you didn't lose it. My icemaker is doing fine without a bottom screw. It should make some ice within an hour, or so. Mine did.
Parts Used:
-
Steve from WAKE FOREST, NC
-
Difficulty Level:A Bit Difficult
-
Total Repair Time:15 - 30 mins
-
Tools:Nutdriver, Screw drivers
5 of 5 people
found this instruction helpful.
Was this instruction helpful to you?
Thank you for voting!
Broken black plastic spring mechanism inside freezer rail
Remove rail and removed broken black plastic spring mechanism with new one and then replace rail.
Parts Used:
-
Ronald from WESTERVILLE, OH
-
Difficulty Level:Really Easy
-
Total Repair Time:30 - 60 mins
-
Tools:Nutdriver, Screw drivers
7 of 12 people
found this instruction helpful.
Was this instruction helpful to you?
Thank you for voting!
Ice maker not making ice.
This is a bottom freezer refrigerator. Had to remove the freezer door and bottom shelve to make access to the ice maker possible.. Removed the old ice maker using a 1/4" nutdriver to loosen, but not remove, the top 2 screws. Removed the bottom support screw completely.. Detached the wiring harness from the freezer connector and lifted the ice maker up and out of the freezer. Installed the replacement ice maker in reverse order, slipping it over the loosened top screws. Tightened them, making sure the usit was level, then inserted and tightened the bottom support screw . Plugged the wiring harness into the freezer connector.. Unit produced ice within 3 hrs. .
Parts Used:
-
Carol from SAINT MARYS, GA
-
Difficulty Level:A Bit Difficult
-
Total Repair Time:30 - 60 mins
-
Tools:Nutdriver
4 of 4 people
found this instruction helpful.
Was this instruction helpful to you?
Thank you for voting!
Thought motor was bad freezer cold fridge hot
Ordered new fan motor
Got part took fridge apart
Result was the motor was running
The fan blade had come off the motor
Replaced the motor anyway and reinstalled the fan, working well
Got part took fridge apart
Result was the motor was running
The fan blade had come off the motor
Replaced the motor anyway and reinstalled the fan, working well
Parts Used:

-
Wayne from PENNINGTON, NJ
-
Difficulty Level:Really Easy
-
Total Repair Time:30 - 60 mins
4 of 4 people
found this instruction helpful.
Was this instruction helpful to you?
Thank you for voting!
Had to replace the icemaker.
Took out the bottom drawer, removed one hexhead nut on the unit, unplugged the unit, plugged in the replacement unit, screwed in the hexhead screw, replaced the drawer, that's it! Very user friendly.
Parts Used:
-
Hal from ADDISON, NY
-
Difficulty Level:Very Easy
-
Total Repair Time:Less than 15 mins
-
Tools:Nutdriver
4 of 4 people
found this instruction helpful.
Was this instruction helpful to you?
Thank you for voting!
Refrigerator light would not stay on
Removed the 2 screws holding the light bulb shield, then the 4 uolding the metal panel. Unplugged the olw door switch and replaced.
reassembled the pieces.
reassembled the pieces.
Parts Used:
-
Dave from Manchester Center, VT
-
Difficulty Level:Easy
-
Total Repair Time:15 - 30 mins
-
Tools:Nutdriver, Socket set
4 of 4 people
found this instruction helpful.
Was this instruction helpful to you?
Thank you for voting!
Broken light switch
Watched video. Unplugged refrigerator and popped out switch. In plugged connector and pushed switch in place. Plugged in refrigerator and the light worked
Parts Used:

-
Terry from WARMINSTER, PA
-
Difficulty Level:Really Easy
-
Total Repair Time:15 - 30 mins
-
Tools:Screw drivers
4 of 5 people
found this instruction helpful.
Was this instruction helpful to you?
Thank you for voting!
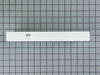
the rail to hold the crisper drawers broke
I first removed the bottom shelf. Then I popped the rail in. It was pretty easy although I did have to use some force to fit it in. Ordering the part and doing it myself was a lot cheaper than calling the repair man.
Parts Used:
-
Christina from Orange, CT
-
Difficulty Level:Really Easy
-
Total Repair Time:Less than 15 mins
4 of 5 people
found this instruction helpful.
Was this instruction helpful to you?
Thank you for voting!
Ice maker replacement
Loosen the top 2 screws, remove the bottom screw, unplug the wire harness, lift up the ice maker and remove. To install the new one simply reverse the removal procedure.
Note: You may want to wipe the inside of the new one to remove the protective grease or discard the first 2 cycles of ice.
Note: You may want to wipe the inside of the new one to remove the protective grease or discard the first 2 cycles of ice.
Parts Used:
-
John from CENTEREACH, NY
-
Difficulty Level:Very Easy
-
Total Repair Time:15 - 30 mins
-
Tools:Socket set
4 of 5 people
found this instruction helpful.
Was this instruction helpful to you?
Thank you for voting!
Freezer box frosting up. Refrigerator not cold.
My son (who does HVAC, but not appliance repair) did some investigating by taking front and back panels off and determined that the evaporator coil was freezing over because the defrost wire was not heating up. He and his girlfriend did some real-time internet searching for diagnostic info because NO control diagram was included with the refrigerator. He determined the problem was most likely the electronic control board. Ordered and installed a new board and the refrigerator is back to working fine. Took about 2 hours to diagnose the problem and 1/4 hour to actually install the control board. Kind of disappointing that this control board failed when the refrigerator was less that 4 years old.
Parts Used:

-
Timothy from BELTSVILLE, MD
-
Difficulty Level:A Bit Difficult
-
Total Repair Time:30 - 60 mins
-
Tools:Nutdriver, Screw drivers
4 of 5 people
found this instruction helpful.
Was this instruction helpful to you?
Thank you for voting!
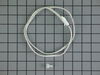
FREEZER WOULD NOT DEFROST.
I initially tested the heating element and defrost thermostat using an ohm meter. the defrost thermostat was incased in ice, so I replaced it first. The refridgerator worked for about a week and then froze up again. I then replaced the thermistor and the unit is working as designed.
Parts Used:
-
JEFF from SEATTLE, WA
-
Difficulty Level:Really Easy
-
Total Repair Time:30 - 60 mins
-
Tools:Nutdriver, Screw drivers
4 of 5 people
found this instruction helpful.
Was this instruction helpful to you?
Thank you for voting!
needed a Door Bin to replace the old one

-
Susan from BLOOMINGTON, IN
-
Difficulty Level:Easy
-
Total Repair Time:Less than 15 mins
6 of 11 people
found this instruction helpful.
Was this instruction helpful to you?
Thank you for voting!
Broken clips on old part
-
Rose from OCOEE, FL
-
Difficulty Level:Really Easy
-
Total Repair Time:Less than 15 mins
3 of 3 people
found this instruction helpful.
Was this instruction helpful to you?
Thank you for voting!