




















59679222011 Kenmore Refrigerator - Instructions
Keep searches simple. Use keywords, e.g. "leaking", "pump", "broken" or "fit".
Did not have a ice pan

-
DEBRA from STATE COLLEGE, PA
-
Difficulty Level:Really Easy
-
Total Repair Time:Less than 15 mins
2 of 2 people
found this instruction helpful.
Was this instruction helpful to you?
Thank you for voting!
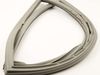
Ice in the freezer/ condensation in the refrigerator
The icing n the freezer and wetness/ humidity in the fridge would not stop. I reasoned the freezer seal was bad and letting the outside humidity in. This fridge had been moved to the garage after a new one was put in my house. The new door seals completely fixed the problem, works perfectly now.
Parts Used:
-
Ken from Santa Rosa Beach, FL
-
Difficulty Level:Really Easy
-
Total Repair Time:Less than 15 mins
2 of 2 people
found this instruction helpful.
Was this instruction helpful to you?
Thank you for voting!
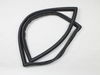
Gasket not sealing good
Opened the bottom freezer door and pulled the gasket out of the groove. Pulled it out around the door and put the new one back around the door and the pressed into the groove. There was one place that a flat spot didn't take shape so I used a blow dryer to heat it up some and now it seals perfectly.
Parts Used:
-
Vince from Miami, FL
-
Difficulty Level:Very Easy
-
Total Repair Time:Less than 15 mins
2 of 2 people
found this instruction helpful.
Was this instruction helpful to you?
Thank you for voting!
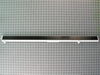
The vertical mullion rail went bad
I left this broken rail hang off my refrigerator for almost a year I finally decided to investigate the possibility of ordering the part on line. I found the part on line in minutes and when I received the part it literally took me 3 minutes to install.
Parts Used:
-
Ed from OCEAN CITY, NJ
-
Difficulty Level:Very Easy
-
Total Repair Time:Less than 15 mins
-
Tools:Nutdriver
2 of 2 people
found this instruction helpful.
Was this instruction helpful to you?
Thank you for voting!
The center rail was broken
The part just snapped in. super easy.
Parts Used:

-
Joella from THE DALLES, OR
-
Difficulty Level:Very Easy
-
Total Repair Time:Less than 15 mins
2 of 2 people
found this instruction helpful.
Was this instruction helpful to you?
Thank you for voting!
Clips on old toe kick plate were broken on one side. Would not stay on
Took the new kick plate out of the box. Snapped it into position. I have had a repairman for this refrigerator before. I would rather repair an appliance than buy a new one. I'm very proud that I thought to get a replacement part myself instead of calling my friendly repairman again. Saved a few dollars.
Parts Used:

-
Janet from SOUTH ST PAUL, MN
-
Difficulty Level:Very Easy
-
Total Repair Time:Less than 15 mins
2 of 2 people
found this instruction helpful.
Was this instruction helpful to you?
Thank you for voting!
I scratched the door handle while moving the refrigerator into my house.
With a small allen wrench, I was able to loosen the two screws to remove the door handle and replace the new on without any problems. A very simple operation.
Parts Used:

-
Ron from Hardin, MT
-
Difficulty Level:Really Easy
-
Total Repair Time:Less than 15 mins
2 of 2 people
found this instruction helpful.
Was this instruction helpful to you?
Thank you for voting!
Rear mount tab broken on Center Crisper Rail
It took longer to empty the glass shelf above the Crisper Bins than to replace the rail. Since the part simply snaps in place, no tools were required
Parts Used:
-
Joseph from Live Oak, FL
-
Difficulty Level:Really Easy
-
Total Repair Time:Less than 15 mins
2 of 2 people
found this instruction helpful.
Was this instruction helpful to you?
Thank you for voting!
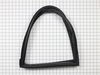
Right Door Magnet weak, door would not stay firmly closed
Replaced seal on door. Same problem. Went to Lowe's and got several magnetic cabinet door catches. Attached them to the top of the door. (they can be seen sticking up), with the magnet part screwed to the door and the metal plate attached to a small wooden block glued to the top of the body with contact cement. Cost abound $16.
"To infinity and beyond."
"To infinity and beyond."
Parts Used:
-
Larry from CHIRENO, TX
-
Difficulty Level:Really Easy
-
Total Repair Time:Less than 15 mins
2 of 2 people
found this instruction helpful.
Was this instruction helpful to you?
Thank you for voting!
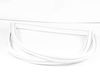
The right door gasket was cracked in two or more places and probably leaked.
I watched the Part Select demonstration for removing and replacing the door gasket. It looked easy and was easier and faster than the demo. The toughest part was getting the wrinkles out of the new door seal.
Parts Used:
-
JAMES from BREVARD, NC
-
Difficulty Level:Very Easy
-
Total Repair Time:Less than 15 mins
2 of 2 people
found this instruction helpful.
Was this instruction helpful to you?
Thank you for voting!
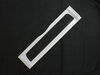
Drawer door broke
-
Linda from VINEYARD HVN, MA
-
Difficulty Level:Really Easy
-
Total Repair Time:15 - 30 mins
2 of 2 people
found this instruction helpful.
Was this instruction helpful to you?
Thank you for voting!
FREEZEING UP
in stalled new circuit board an thermostat an was fixed
Parts Used:

-
Sherril from ROBBINSVILLE, NC
-
Difficulty Level:Easy
-
Total Repair Time:15 - 30 mins
-
Tools:Nutdriver
2 of 2 people
found this instruction helpful.
Was this instruction helpful to you?
Thank you for voting!
Refrigerator would stop cooling intermittently, control panel would not display temp settings until power was reset.
The video on the part select website with the Canadian gentleman was absolutely the best! My wife and I watched it and was able to accomplish the replacement with no surprises or issues. One tip that we could add is that the orientation of the temperature sensor was not specified in the video, but the slot seemed to work better for one orientation versus another. It has been a couple weeks since the repair and the refrigerator is working like it did when we first purchased it.
Parts Used:
-
Jim from HALTOM CITY, TX
-
Difficulty Level:Easy
-
Total Repair Time:15 - 30 mins
-
Tools:Screw drivers
2 of 2 people
found this instruction helpful.
Was this instruction helpful to you?
Thank you for voting!
Refrigerator was warm,freezer was cold
Unplugged refrigerator,cleaned out freezer.Removed shelves in freezer compartment(that took some figuring to unlock sliding sheves)Our freezer is on the bottom.Removed four screws from back cover to expose fan,removed screws and attached wires.Carefully opened plastic clips after pulling fan off shaft.Replaced old motor after reattaching rubber seals.Closed clips to hold motor and placed fan back on shaft.Reattach wires and screws. Put cover back and replaced shelves.Plugged in refrigerator and wallah refrigerator part was cold again!
Parts Used:

-
Henning from RHINELANDER, WI
-
Difficulty Level:A Bit Difficult
-
Total Repair Time:30 - 60 mins
-
Tools:Screw drivers, Wrench (Adjustable)
2 of 2 people
found this instruction helpful.
Was this instruction helpful to you?
Thank you for voting!
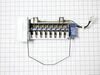
Ice maker quit working
Unplugged wire plug, removed mounting screws and removed ice maker. Installed new unit by reversing steps--
Parts Used:
-
Lloyd from Algona, IA
-
Difficulty Level:Really Easy
-
Total Repair Time:30 - 60 mins
-
Tools:Nutdriver
2 of 2 people
found this instruction helpful.
Was this instruction helpful to you?
Thank you for voting!