




















59673504200 Kenmore Refrigerator - Instructions
Keep searches simple. Use keywords, e.g. "leaking", "pump", "broken" or "fit".
Icemaker was dumping water into ice bin and the ice maker shut off arm broke its rear mount
First I removed the 14.3 tons of freezer contents, closed the water valve, shut off the juice, and removed the freezer bins, the freezer door and the three screws that held the element in place. After bringing in 397 hand tools from my garage inventory, I loosened the unit and, after extensive evaluation, I finally disconnected the wiring connector from its freezer rear wall connector counterpart. You ain't gonna believe the rest of my story--of total ineptitude by an experienced fix-it-yourself dummy.
I searched the internet for a replacement ice maker and found it at partselect.com. I called Sears to ask if I could add my refrigerator to my existing appliance repair account. Sears said sure--it would cost me only one arm, three toes and one grandchild. I abruptly declined their magnanimous offer—I don’t give up my arms and toes so easily.
I visited the local Maytag repair parts and service retailer, who advised they didn't do parts anymore. Expecting their repair price would be greater than Sears, I resorted to partselect.com. I called them to be assured what I was buying was not mistakenly a 747 Landing Gear. On the afternoon (West Coast) of 4/28/10, I ordered (via internet) one PS21215123 Ice Maker Assy. Much to my pleasant surprise, it arrived via FedEX on 4/30/10 (no freight charges to me).
My repair/replacement efforts were hampered by the effects of my right rotator cuff surgery a few months before and major left wrist surgery two months ago to remove fractured bones and torn ligaments.
Undaunted by my physical handicaps, I forged forward. After re-installing the unit, I turned the water supply and electricity back on. It was graveyard dead. I wisely then bought two bags of ice as an interim solution to the severe needs of my wife and me for our daily chilled evening cocktails. I removed the unit, checked it out and re-installed it. I bought two more bags of ice. All the while, I turned the water and electricity off and on as required by reasonable safety standards. High tediousness!
Several more home maintenance tasks then arose for Sergeant Super Fixer, but I returned to the ice maker problem on 4/8/10. Last chance--remove the device and insure there was no frozen ice in the inlet tube--or call the local partsless repairman. No ice found, but I did learn the wiring connector to the unit was awry--no contact! While explaining that to my wife, I realized the two upper mounting screws were intended to be partially installed into the freezer wall to accommodate the unit's slotted mounting holes! Then, tighten the screws. Oh my God! During my 143 installations and removals, I had installed those screws blindly--using the (handicapped) skills of my right and left hands without any benefit of direct eyesight.
I returned to my challenging project this morning (4/9/10), fully utilizing all the expertise I had gained yesterday. Fifteen minutes of amusing effort! Turn on the juice! Turn on the water!Two hours later, ice cubes were dropping into the bin like rhinoceros bisquits in the jungle.
Hallelujah! I now am free for the next challenge!
HINT: Put a bed pillow (an old one, or your wife's) in the freezer compartment to soften the harshness of its cold metal on your back, if you use the "crawl in on your back" approach.
I searched the internet for a replacement ice maker and found it at partselect.com. I called Sears to ask if I could add my refrigerator to my existing appliance repair account. Sears said sure--it would cost me only one arm, three toes and one grandchild. I abruptly declined their magnanimous offer—I don’t give up my arms and toes so easily.
I visited the local Maytag repair parts and service retailer, who advised they didn't do parts anymore. Expecting their repair price would be greater than Sears, I resorted to partselect.com. I called them to be assured what I was buying was not mistakenly a 747 Landing Gear. On the afternoon (West Coast) of 4/28/10, I ordered (via internet) one PS21215123 Ice Maker Assy. Much to my pleasant surprise, it arrived via FedEX on 4/30/10 (no freight charges to me).
My repair/replacement efforts were hampered by the effects of my right rotator cuff surgery a few months before and major left wrist surgery two months ago to remove fractured bones and torn ligaments.
Undaunted by my physical handicaps, I forged forward. After re-installing the unit, I turned the water supply and electricity back on. It was graveyard dead. I wisely then bought two bags of ice as an interim solution to the severe needs of my wife and me for our daily chilled evening cocktails. I removed the unit, checked it out and re-installed it. I bought two more bags of ice. All the while, I turned the water and electricity off and on as required by reasonable safety standards. High tediousness!
Several more home maintenance tasks then arose for Sergeant Super Fixer, but I returned to the ice maker problem on 4/8/10. Last chance--remove the device and insure there was no frozen ice in the inlet tube--or call the local partsless repairman. No ice found, but I did learn the wiring connector to the unit was awry--no contact! While explaining that to my wife, I realized the two upper mounting screws were intended to be partially installed into the freezer wall to accommodate the unit's slotted mounting holes! Then, tighten the screws. Oh my God! During my 143 installations and removals, I had installed those screws blindly--using the (handicapped) skills of my right and left hands without any benefit of direct eyesight.
I returned to my challenging project this morning (4/9/10), fully utilizing all the expertise I had gained yesterday. Fifteen minutes of amusing effort! Turn on the juice! Turn on the water!Two hours later, ice cubes were dropping into the bin like rhinoceros bisquits in the jungle.
Hallelujah! I now am free for the next challenge!
HINT: Put a bed pillow (an old one, or your wife's) in the freezer compartment to soften the harshness of its cold metal on your back, if you use the "crawl in on your back" approach.
Parts Used:

-
GORDON from CUPERTINO, CA
-
Difficulty Level:Very Difficult
-
Total Repair Time:More than 2 hours
-
Tools:Nutdriver, Pliers, Screw drivers
51 of 72 people
found this instruction helpful.
Was this instruction helpful to you?
Thank you for voting!
while closing the door, the light switch fouled, resulting in the switch breaking
I used a flat screwdriver and released the lock tab on the bottom of the light switch, and pried the switch out, being careful to not damage the plastic around the mounting place of the switch, unplugged wiring from old switch, plugged in the new one and pushed the new switch into place. Job finished light switch now working.
Parts Used:

-
Kevin from Beckley, WV
-
Difficulty Level:Really Easy
-
Total Repair Time:Less than 15 mins
-
Tools:Screw drivers
65 of 116 people
found this instruction helpful.
Was this instruction helpful to you?
Thank you for voting!
Light Switch broke
An easy job for smaller hands. Removed the two bolts holding the light cover. Removed two electrical connections from the old switch by pinching the retaining clip,removed the switch, snapped in the new one and re-attached the connectors. Your online illustrations helped me to know that the plastic housing for the light switch would only swing down so far and was not intended to be removed. Saved me from breaking that plastic cover's tabs. This home repair saved me more than 5 times the cost of hiring a professional to do it. Very happy homeowner.
Parts Used:

-
James Richard from St. Cloud, MN
-
Difficulty Level:Easy
-
Total Repair Time:Less than 15 mins
-
Tools:Socket set
48 of 76 people
found this instruction helpful.
Was this instruction helpful to you?
Thank you for voting!
Had to replace a hose connector at the base of my refrig/frreezer
Perhaps a helpful hint:
When aI received the hose adapter/connector, I inserted the 2 hose ends only to have water drip from the connection.
I used a utility knife to remove an inch from each side, then reinserted the hoses. That made the differnce. Dry as a bone.
LG
When aI received the hose adapter/connector, I inserted the 2 hose ends only to have water drip from the connection.
I used a utility knife to remove an inch from each side, then reinserted the hoses. That made the differnce. Dry as a bone.
LG
Parts Used:

-
Leo from Salem, SC
-
Difficulty Level:Really Easy
-
Total Repair Time:Less than 15 mins
47 of 81 people
found this instruction helpful.
Was this instruction helpful to you?
Thank you for voting!
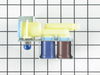
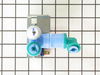
Original parts had cracked due to cold weather
Original parts froze when the fridge was stored in the garage, so when we brought it in and hooked up the water supply we discovered the cracks.
I used a wrench to remove the back lower cover of the fridge. attached to that cover were both the parts I needed to replace. I removed one nut each per part so they were free of the back cover. Once free I unhooked the two electrical plugs per part and reattached the new part so as not to confuse the positions of the wiring. Then I did the same thing with the two hoses attached to each part, swapping old part for new. Once connected, I reattached the new parts to the back cover and replaced the back cover to the fridge. Connected the water line and tried the ice maker and water source on the door. I didn't realize it, but the filter, located in the refrigerator side of the unit had also frozen and cracked, so I had water now pouring from the fridge! Replaced that filter, cleaned up the water and everything is working great!
800 number customer service person Kim originally helped me locate the correct parts via schematic diagram, as no part numbers were visible on my broken parts. She was incredibly helpful and got the correct parts on her first guess ( she told me it was a guess but she was right on the money).
I used a wrench to remove the back lower cover of the fridge. attached to that cover were both the parts I needed to replace. I removed one nut each per part so they were free of the back cover. Once free I unhooked the two electrical plugs per part and reattached the new part so as not to confuse the positions of the wiring. Then I did the same thing with the two hoses attached to each part, swapping old part for new. Once connected, I reattached the new parts to the back cover and replaced the back cover to the fridge. Connected the water line and tried the ice maker and water source on the door. I didn't realize it, but the filter, located in the refrigerator side of the unit had also frozen and cracked, so I had water now pouring from the fridge! Replaced that filter, cleaned up the water and everything is working great!
800 number customer service person Kim originally helped me locate the correct parts via schematic diagram, as no part numbers were visible on my broken parts. She was incredibly helpful and got the correct parts on her first guess ( she told me it was a guess but she was right on the money).
Parts Used:
-
Brian from University City, MO
-
Difficulty Level:Easy
-
Total Repair Time:15 - 30 mins
-
Tools:Wrench set
34 of 45 people
found this instruction helpful.
Was this instruction helpful to you?
Thank you for voting!
Icemaker arm was broken
The tiny piece of plastic that holds the wire that shuts off the icemaker, broke early on with our fridge (after just a few months.) We superglued it, but last week it bit the dust for good.
Once I got this part, I removed the freezer door and trays, and pulled the icemaker out by removing 3 flathead screws and unplugging the cables. Laying in the freezer on the floor was a bit unconfortable, but not too bad.
Then I inspected the icemaker. There was no obvious way to remove the part without disassembling the front of the unit (where the motor is) to release the spindle and free the part, so I did that - 3 or 4 nuts was all that held it together. Once that was out, I removed the spindle, swapped out the part, and put it all back together and back in the freezer. Plugged it in and waited.
It took a while to start making ice. Like 5 hours. Now it's going pretty slow (much slower than before.) Haven't had time to look into it, but my suspicion is the rubber hose that feeds water into the icemaker is blocked with ice or kinked. In any case, we have ice now (but not a lot), and the unit shuts itself off properly. However, we went from having too much ice (thing never shut off) to too little (thing makes ice too slow), so I need to shoot for somewhere in the middle ;)
Once I got this part, I removed the freezer door and trays, and pulled the icemaker out by removing 3 flathead screws and unplugging the cables. Laying in the freezer on the floor was a bit unconfortable, but not too bad.
Then I inspected the icemaker. There was no obvious way to remove the part without disassembling the front of the unit (where the motor is) to release the spindle and free the part, so I did that - 3 or 4 nuts was all that held it together. Once that was out, I removed the spindle, swapped out the part, and put it all back together and back in the freezer. Plugged it in and waited.
It took a while to start making ice. Like 5 hours. Now it's going pretty slow (much slower than before.) Haven't had time to look into it, but my suspicion is the rubber hose that feeds water into the icemaker is blocked with ice or kinked. In any case, we have ice now (but not a lot), and the unit shuts itself off properly. However, we went from having too much ice (thing never shut off) to too little (thing makes ice too slow), so I need to shoot for somewhere in the middle ;)
Parts Used:

-
Jason from Austin, TX
-
Difficulty Level:A Bit Difficult
-
Total Repair Time:30 - 60 mins
-
Tools:Nutdriver, Screw drivers
33 of 45 people
found this instruction helpful.
Was this instruction helpful to you?
Thank you for voting!
Latch was broken on the filter cover and would not hold the filter in place.
Ordered a new filter cover, received in 2 days and installed it in about 5 minutes. Worked perfectly.
Parts Used:

-
Ken from St. Geogre Island, FL
-
Difficulty Level:Really Easy
-
Total Repair Time:Less than 15 mins
34 of 49 people
found this instruction helpful.
Was this instruction helpful to you?
Thank you for voting!
The light switch on the refridgerator broke - no light.
Once I saw the replacement part I understood how to pry out the switch with a small screwdriver. Then just unplug the old one, plug in the new one and pop it into place.
The PartSelect site made it easy to correctly identify the correct part, it was inexpensive, and the shipping was fast.
I'm very pleased!
The PartSelect site made it easy to correctly identify the correct part, it was inexpensive, and the shipping was fast.
I'm very pleased!
Parts Used:
-
David from Albany, OR
-
Difficulty Level:Really Easy
-
Total Repair Time:Less than 15 mins
-
Tools:Screw drivers
36 of 56 people
found this instruction helpful.
Was this instruction helpful to you?
Thank you for voting!
refrigerator came with can/holder in door
i did not need the can holder in door, we do not buy can drinks. i would rather have the full shelf space, so i replaaced the can holder with a full shelf
Parts Used:

-
CAROLYN from SPARTANBURG, SC
-
Difficulty Level:Really Easy
-
Total Repair Time:Less than 15 mins
27 of 31 people
found this instruction helpful.
Was this instruction helpful to you?
Thank you for voting!
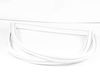
Right door seal lower tab was torn.
Unpacked, inspected, found two minor defects in the form of two tiny slivers along the seal edge which I cut with a small scissor, laid the seal down on the kitchen table, applied heat to the deformed areas and reshaped them with my fingers, heated the entire seal lightly, removed the old seal starting at the right hand upper corner using my fingers, installed the warm seal starting at the top corners by pushing it in its slot making sure the outer lip stayed out of the slot and worked my way around. I believe that the heat from the dryer made it pliable and easier to manage.
Parts Used:
-
Frederic from KILLEEN, TX
-
Difficulty Level:Very Easy
-
Total Repair Time:Less than 15 mins
24 of 24 people
found this instruction helpful.
Was this instruction helpful to you?
Thank you for voting!
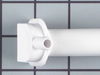
No ice in ice maker
Turn water and refrigerator off, use hair to thaw the ice maker filler tube, then remove the filler tube inside the freezer. Next remove the water supply line cover plate in back of the refrigerator. Now remove the speed clip at the white pvc elbow and pull out the supply line. Next, grasp the pvc elbow with pliers and pull hard to remove. The new filler tube is a 1 piece design (filler tube and elbow combined) and needs to be cut to the proper length. Mark it inside the freezer, remove it and cut to length. Now coat the outside flange with caulk or PU glue and snap into the opening. Put the speed clip on the elbow first and center it. Ensure that the spreader insert is in place in the plastic tube, then slide the supply line into the elbow untill completely engaged. Replace cover.
Parts Used:


-
Dave from dunwoody, GA
-
Difficulty Level:A Bit Difficult
-
Total Repair Time:15 - 30 mins
-
Tools:Pliers, Screw drivers
28 of 37 people
found this instruction helpful.
Was this instruction helpful to you?
Thank you for voting!
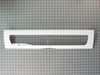
Wife dropped a gallon of milk on the lid and cracked the see through panel
Pushed the hinge pins aside and removed the old lid.. Reversed the process to install the new lid
Parts Used:
-
Stanley from Gurley, AL
-
Difficulty Level:Really Easy
-
Total Repair Time:Less than 15 mins
23 of 23 people
found this instruction helpful.
Was this instruction helpful to you?
Thank you for voting!
Ice Maker was leaking water and causing the ice to freeze into a block
First I removed the Ice bin, I then loosened the ice bin rail under the ice maker and removed the screw that attached the bottom of the ice maker to the side of the fridge. I unplugged the power to Ice Maker from the back of the fridge and unscreewed the two screws that secured the ice maker to the fridge. This allowed the Ice Maker to be removed from the fridge. To replace the new ice maker I simply repeated the steps in reverse.
Parts Used:
-
Shelley from Katy, TX
-
Difficulty Level:Really Easy
-
Total Repair Time:15 - 30 mins
-
Tools:Pliers, Screw drivers
30 of 47 people
found this instruction helpful.
Was this instruction helpful to you?
Thank you for voting!
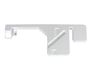
Drain pan failed and had many leaks
Took two times getting the correct part, however after getting the correct part it took about 10-minutes to replace. Had to take the fan out. When you put the new drip pan in make sure it is positioned so that the guides on the pan aligns with slots in the bottom refrig brace, otherwise back pannel will not align correctly. The fan is very easy getting aligned in the new tray. May take a little effort. I do not know why the pan on a refrighterator that is less than 5-years old could start breaking into many pieces.
Parts Used:
-
Malcolm from Parrish, FL
-
Difficulty Level:Easy
-
Total Repair Time:Less than 15 mins
-
Tools:Nutdriver
29 of 44 people
found this instruction helpful.
Was this instruction helpful to you?
Thank you for voting!
Icemaker leaked water into ice bin causing a glob of ice
Philips head screwdriver and ten minutes was all it took! I removed the two screws that hold the icemaker assembly in place, then pulled it out a little and disconnected the electrical plug freeing the icemaker assembly. Then I snapped the external parts off my old icemaker assembly and snapped them on the new icemaker assembly. Installing the new icemaker assembly was just as fast and easy. I snapped the electrical plug into the new icemaker assembly, then screwed in the two screws. It was making ice shortly thereafter. Glob free ice! I'm glad I didn't call a repairman. I probably saved a hundred bucks. A ten year old could accomplish this simple and easy task. No wonder the Maytag repairman has time on his hands.
Parts Used:
-
Kevin from Tyler, TX
-
Difficulty Level:Really Easy
-
Total Repair Time:Less than 15 mins
-
Tools:Screw drivers
22 of 25 people
found this instruction helpful.
Was this instruction helpful to you?
Thank you for voting!