




















59673504200 Kenmore Refrigerator - Instructions
Keep searches simple. Use keywords, e.g. "leaking", "pump", "broken" or "fit".
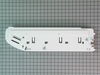
Switch light didn't work; broken drawer cover hinge
I removed the switch assemble from the panel with a Swiss Army knife. Disconnected the two wires and reversed the process with the new switch. Not being all that handy, I assumed the job would be very involved, but was very pleased that it was nearly effortless. A less than 15 minute operation.
Removing the right side panel of the lower drawer was a slightly more involved, requiring the removal of 3-4 screws and replacing the inner workings of the temperature adjustment workings on the new panel. But it proved pretty simple and only required about 20 minutes start to finish.
Removing the right side panel of the lower drawer was a slightly more involved, requiring the removal of 3-4 screws and replacing the inner workings of the temperature adjustment workings on the new panel. But it proved pretty simple and only required about 20 minutes start to finish.
Parts Used:

-
Richard from New Castle, PA
-
Difficulty Level:Really Easy
-
Total Repair Time:15 - 30 mins
-
Tools:Screw drivers, Socket set
9 of 9 people
found this instruction helpful.
Was this instruction helpful to you?
Thank you for voting!
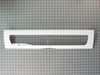
Cracked plastic on pantry drawer lid
Broken lid popped out, new lid popped in. No tools required. 30 seconds to replace. Great price, part shipped within an hour of placing my order and arrived the next day, although I only paid for standard shipping. Excellent service - will definitely order again if the opportunity arises!
Parts Used:
-
Angela from Bay Village, OH
-
Difficulty Level:Really Easy
-
Total Repair Time:Less than 15 mins
10 of 12 people
found this instruction helpful.
Was this instruction helpful to you?
Thank you for voting!
Leaking water tube connector/union
Received the union I ordered, then discovered that the tubes were different sizes, so I had the wrong part. I had read elsewhere that it was necessary to trim the two ends of the tubes with a box cutter to stop the leaks - I did this, and the leaking stopped. I was then able to go to a local hardware store and get a 5/16 to 1/4 union and replace it. The leaking is stopped, and the water supply in the door is now working like new. No problem with partselect, but I did buy a caliper so that I can check tube diameters if I ever have a similar problem! This is a great site to find instructions - well worth the time to search!
Parts Used:

-
Roderick from NEWTOWN, PA
-
Difficulty Level:Easy
-
Total Repair Time:15 - 30 mins
-
Tools:Pliers, Screw drivers
10 of 12 people
found this instruction helpful.
Was this instruction helpful to you?
Thank you for voting!
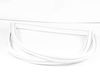
Old door gasket was torn
Old gasket was pulled off with ease. New gasket came folded in-half in cardboard box and was flattened in several places. It was reshaped with ease with the heat from ny wife's hair dryer. Insrallatint took about 5 minutes and seal was perfect. Took less than 15 minutes total.
Parts Used:
-
Charles from SALEM, MO
-
Difficulty Level:Very Easy
-
Total Repair Time:Less than 15 mins
9 of 10 people
found this instruction helpful.
Was this instruction helpful to you?
Thank you for voting!
There was no light on in refrig area
Just replaced the switch, but unfortunately that was not the problem; nor was it the bulb....so I am back to square one.
But Parts Select is a great place to order from. Thank you.
But Parts Select is a great place to order from. Thank you.
Parts Used:
-
Lori from Chuluota, FL
-
Difficulty Level:Easy
-
Total Repair Time:Less than 15 mins
-
Tools:Screw drivers
12 of 19 people
found this instruction helpful.
Was this instruction helpful to you?
Thank you for voting!
A friend dropped a jar of relish on the plastic window and cracked it.
Easy repair. Unwrapped the new cover; pulled the old one off by releasing tabs. Inserted new piece.
Took less than 15 minutes. Looks like new. The replacement part arrived quickly from Part Select.
Took less than 15 minutes. Looks like new. The replacement part arrived quickly from Part Select.
Parts Used:
-
Gene from Petaluma, CA
-
Difficulty Level:Really Easy
-
Total Repair Time:Less than 15 mins
9 of 10 people
found this instruction helpful.
Was this instruction helpful to you?
Thank you for voting!
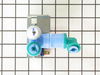
My ice maker was driping water on the ice cubes
It was really pretty simple. You get to the back of the frig, open a panel and the valve is right there. The instructions where clear on what to do, even though the new valve was different water line connections. It was spelled out what to do. Works great and all the parts supply places would have to ordered it anyway, so I saved $ and got the valve in 30 hours to boot. Thanks
Parts Used:
-
Garry from Anderson, IN
-
Difficulty Level:Easy
-
Total Repair Time:15 - 30 mins
-
Tools:Nutdriver, Pliers
9 of 11 people
found this instruction helpful.
Was this instruction helpful to you?
Thank you for voting!
Broken drawer lid
-
Rolf from Stanhope, NJ
-
Difficulty Level:Really Easy
-
Total Repair Time:Less than 15 mins
8 of 8 people
found this instruction helpful.
Was this instruction helpful to you?
Thank you for voting!
Light switch rocker broke, disabling freezer internal light, water dispenser, and ice dispenser
Very simple. Matched female plugs with respective male color coded prong; pushed together then inserted unit in slot of freezer sidewall and rotated into position...job done.
Parts Used:

-
Kenneth from Newton Grove, NC
-
Difficulty Level:Really Easy
-
Total Repair Time:Less than 15 mins
10 of 14 people
found this instruction helpful.
Was this instruction helpful to you?
Thank you for voting!
broken light switch
-
Richard from West Warwick, RI
-
Difficulty Level:Really Easy
-
Total Repair Time:Less than 15 mins
-
Tools:Screw drivers
12 of 20 people
found this instruction helpful.
Was this instruction helpful to you?
Thank you for voting!
Ice maker leaked water
Overall, replacing the ice maker wasn't too bad but it wasn't nearly as easy for me as it seems to have been for some. In my case, the fridge was an Amana and the ice maker was mounted in such a way that disconnecting the power connector was difficult. The ice maker had to be completely dismounted before any access to the power connector was even possible. The short power cables made it very difficult to get the ice maker into a position where I had a good view of the power connector enabling me to see how to release it. The only other challenge was the cup that the water line goes into. The replacement ice maker did not come with the right cup - the instructions said to replace the provided one with the old one. No instructions for this procedure were provided and it looked to me like it might involve significant disassembly, something I wanted to avoid for fear of breaking a plastic part on the new ice maker (something I had already done when disassembling the old ice maker). So instead of replacing the cup, I modified the new one to match the old one. This involved removing a cutout on one side and covering a hole on the other. Installation of the new ice maker went fine and the water leak problem was fixed.
Parts Used:

-
Robert from Pennsylvania Furnace, PA
-
Difficulty Level:A Bit Difficult
-
Total Repair Time:30 - 60 mins
-
Tools:Screw drivers, Socket set
10 of 15 people
found this instruction helpful.
Was this instruction helpful to you?
Thank you for voting!
didn't eject icecubes
R & R Icemaker Assembly. Took out 3 screws and unpluged Icemaker & replaced with new part. very easy and the service from PartSelect was fantastic.
Very Satisfied,
Ron Martin
Very Satisfied,
Ron Martin
Parts Used:
-
Ronald from Marion, IL
-
Difficulty Level:Really Easy
-
Total Repair Time:15 - 30 mins
-
Tools:Nutdriver
9 of 12 people
found this instruction helpful.
Was this instruction helpful to you?
Thank you for voting!
35 year old water tube became brittle and cracked; leaking water
Unscrewed clamp holding water tube to refrigerator ice maker. Pulled water tube from ice maker and water valve inlet. Cut the new tubing to the exact same length and inserted one end to the water valve inlet and the other end to the ice maker then screwed clamp holding water tube back to the refrigerator ice maker.
Parts Used:

-
Melvin from OPELIKA, AL
-
Difficulty Level:Very Easy
-
Total Repair Time:Less than 15 mins
-
Tools:Screw drivers
8 of 10 people
found this instruction helpful.
Was this instruction helpful to you?
Thank you for voting!
Door Gaskets had started to peel and break open. They needed to be replaced
Watched installation Video on the website parts. I put the new gaskets in bath tube in warm water for a few minuets until the gaskets were warm and pliable. I removed old gaskets cleaned door facing and installed new gaskets as instructed on video. Thanks for the information on how to install because I was dreading trying to do this task. "Just follow and listen to the instruction on Video".
Parts Used:
-
Gary from Carthage, TX
-
Difficulty Level:Really Easy
-
Total Repair Time:15 - 30 mins
7 of 7 people
found this instruction helpful.
Was this instruction helpful to you?
Thank you for voting!
no water when under sink water filter installed
I called the installer of my filter unit and he told me that often, thhe fridge filter is the problem. Like magic it worked
Parts Used:
-
Emi from Arlington, VA
-
Difficulty Level:Easy
-
Total Repair Time:Less than 15 mins
11 of 19 people
found this instruction helpful.
Was this instruction helpful to you?
Thank you for voting!