




















59666022700 Kenmore Refrigerator - Instructions
Keep searches simple. Use keywords, e.g. "leaking", "pump", "broken" or "fit".
Broken center crisper rail
Total time 10 minutes. 9 minutes to clear out the food and 1 minute to install the part. Installation was self evident and could have been done blindfolded. Part just snapped in.
Parts Used:

-
Allan from Tucson, AZ
-
Difficulty Level:Very Easy
-
Total Repair Time:Less than 15 mins
3 of 3 people
found this instruction helpful.
Was this instruction helpful to you?
Thank you for voting!
Broke the Rocker Switch in Fridge side
Popped out with butter knife and unplugged 3 prong connector and reversed with anew switch.
But, unfortunately it got broken again exactly same way as before.
So, I ordered same switch again for 2nd time.
Maytag should recall that Rocker Switch and build with better materials.
But, unfortunately it got broken again exactly same way as before.
So, I ordered same switch again for 2nd time.
Maytag should recall that Rocker Switch and build with better materials.
Parts Used:

-
Sung-Su from BISMARCK, ND
-
Difficulty Level:Very Easy
-
Total Repair Time:Less than 15 mins
4 of 6 people
found this instruction helpful.
Was this instruction helpful to you?
Thank you for voting!
Refrigerator compressor not run
-
ronald from San Diego, CA
-
Difficulty Level:Really Easy
-
Total Repair Time:30 - 60 mins
-
Tools:Screw drivers
3 of 3 people
found this instruction helpful.
Was this instruction helpful to you?
Thank you for voting!
Fridge and freezer were not getting cold. Clicking sound when compressor shutting off.
We noticed that items if the fridge portion of the refrigerator were starting to go bad before they should have and that the items in the freezer were not solidly frozen at times. I actually had two parts that needed to be replaced on my refrigerator, the relay assembly located near the compressor and the temperature control switch located in the freezer section. My fridge was making a clicking sound several months before it stopped working. I used the symptoms link on the website to help me locate what part might be the culprit and found the relay switch near the compressor bad and replaced it. A few days later we still had the same problem of both the fridge and freezer not being cold enough. Turns out the temperature controller in the freezer was just barely turning on when it would get warm enough in the freezer section. Once that part was replaced the refrigerator worked like new. It took me a while to find both problems since one was masked by the other but the website was a great help in finding both and getting the parts to fix everything.
Parts Used:
-
Daniel from POPLAR BLUFF, MO
-
Difficulty Level:Easy
-
Total Repair Time:30 - 60 mins
-
Tools:Nutdriver, Pliers, Screw drivers
3 of 3 people
found this instruction helpful.
Was this instruction helpful to you?
Thank you for voting!
One of the light bulbs went out on my Whirlpool refrigerator.
I changed the bulb but it still didn’t work. I ordered a bulb holder and replaced it and it works properly now. It was an easy repair, remove the bulb, gently pry the bulb holder out with a screwdriver and snap the new one in.
It was useful that under the description of the part in the catalog, it showed that this part was often used to repair this issue. The service was great and the delivery was fast.
It was useful that under the description of the part in the catalog, it showed that this part was often used to repair this issue. The service was great and the delivery was fast.
Parts Used:
-
Brian from LAKE CHARLES, LA
-
Difficulty Level:Very Easy
-
Total Repair Time:Less than 15 mins
-
Tools:Screw drivers
3 of 4 people
found this instruction helpful.
Was this instruction helpful to you?
Thank you for voting!
Ice cubes in bin frozen into big lumps due to water leaking into bin from icemaker. Lining of icemaker cube tray worn and damaged allowing leak.
Pull refrigerator out from wall to shut off water and power. Remove ice bin, pulling front down then out. Remove screw at bottom of icemaker, then pull down to release two clips, Pull out a couple inches to get hand behind icemaker to release wiring harness connector. (squeeze top and bottom to release clips). Remove unit. Remove wiring harness and wire bail from old unit and install on new unit. Reverse steps to install new unit. Make sure ice bin is fully inserted, or unit will not function.
Parts Used:

-
Ross from Sun Lakes, AZ
-
Difficulty Level:Really Easy
-
Total Repair Time:15 - 30 mins
-
Tools:Nutdriver
3 of 4 people
found this instruction helpful.
Was this instruction helpful to you?
Thank you for voting!
The shelf split in two
-
Lynne from ROCKVILLE CTR, NY
-
Difficulty Level:Really Easy
-
Total Repair Time:Less than 15 mins
3 of 4 people
found this instruction helpful.
Was this instruction helpful to you?
Thank you for voting!
Center Crisper rail
Take everything off the top self, lift the self install the new part ,put self back in place and then install the drawers again. Took minutes.
Parts Used:
-
Richard from PASADENA, CA
-
Difficulty Level:Really Easy
-
Total Repair Time:Less than 15 mins
3 of 4 people
found this instruction helpful.
Was this instruction helpful to you?
Thank you for voting!
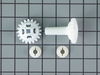
Boyfriends freezer door wouldn’t shut completely
I got really tired of taking food out covered in icicles and stabbing a huge block of ice out of the bottom. Turns out all he needed was a little wheel with cogs and I looked up the sticker model number on this site and clicked the part of the fridge. So simple, wish I would’ve done it sooner.
Parts Used:
-
Megan from NORFOLK, VA
-
Difficulty Level:Really Easy
-
Total Repair Time:Less than 15 mins
3 of 4 people
found this instruction helpful.
Was this instruction helpful to you?
Thank you for voting!
Light switch wasn't working.. As I would close the door I would notice our frig light wasn't going off...
I simply removed the old switch by gently pulling down on the old switch with a screwdriver. When it was about half way out I just gently pulled down on the old switch and it popped out... I removed the two connectors attached to the old switch by pulling on the connectors with a pliers...I tried using my fingers but wasn't able to pull the connectors off so I used pliers. It worked perfectly.. When pulling off the old connectors, make sure you attach the new switch to the same tabs on the new switch... It was very easy to do and took under 5 mins.....The light switch works perfect....P.S. You should unplug the frig while making the connection just in case....Safety first....!!!
Parts Used:

-
David from Hemet, CA
-
Difficulty Level:Really Easy
-
Total Repair Time:Less than 15 mins
-
Tools:Pliers, Screw drivers
3 of 4 people
found this instruction helpful.
Was this instruction helpful to you?
Thank you for voting!
Ice maker stopped working
After checking the water valves ordered new ice maker. received the part three days after ordering! Clearing out food, removing the old one and installing the new unit took under 15 minutes. Everything went fine.
Parts Used:
-
Raymond from Panama City Beach, FL
-
Difficulty Level:Really Easy
-
Total Repair Time:Less than 15 mins
-
Tools:Nutdriver, Screw drivers
3 of 4 people
found this instruction helpful.
Was this instruction helpful to you?
Thank you for voting!
defective light switch
inserted a knife between the switch and the plastic interior in order to pop the switch out.
then took off the 2 wires on the old switch put them on the new switch and reinserted the switch into the plastic interior.
then took off the 2 wires on the old switch put them on the new switch and reinserted the switch into the plastic interior.
Parts Used:
-
THOMAS from WILLARD, OH
-
Difficulty Level:Really Easy
-
Total Repair Time:Less than 15 mins
3 of 4 people
found this instruction helpful.
Was this instruction helpful to you?
Thank you for voting!
ice maker was over filling and causing water to flow into ice dispenser and freezing it al together
First turned off the water and unplugged the refrigerator and then removed the old ice maker by first removing the side cover plate and then next removed the ice level detector. Remove the screws that hold the ice maker in place and rotating it somewhat soas to gain access to the wires and then unplugged them. Next I had to modify the way the water comes into the new icemaker by adapting a CPVC street ell to fit into the hole on the side and then hook up the water supply. Installation is just the reverse of removal.
Parts Used:
-
Michael from Moore, OK
-
Difficulty Level:Easy
-
Total Repair Time:15 - 30 mins
-
Tools:Nutdriver
3 of 4 people
found this instruction helpful.
Was this instruction helpful to you?
Thank you for voting!
Old Ice Maker failed
I removed the old ice maker and during the short disassembly noticed a burned out connection to the heater element that allows the ice to be broken free of the tray and dumped into the bin. Part Select had a new unit to me next day! I had watched their short install video, and read some of the user comments, already. Re-installing the new unit was a snap, and just as the video had described except for the mount bracket. The only thing that concerned me was that the new unit did not immediately do anything. I began to investigate and found that the flexible water "chute" connection had ice in it! I unplugged the refer, unscrewed the water filter and drained it. I disconnected the water feed on the outside back of the unit as well to make sure water could flow easily to the ice maker port. I filled the water filter with boiling hot water and replaced it, I plugged in the refer, and reprogrammed the date and time. Several hours later I checked the ice maker and it was -- making ice!
Parts Used:
-
John from Gurnee, IL
-
Difficulty Level:Really Easy
-
Total Repair Time:15 - 30 mins
-
Tools:Nutdriver, Screw drivers
3 of 4 people
found this instruction helpful.
Was this instruction helpful to you?
Thank you for voting!
changed the light bulb still would not work so I figured it was the switch sure enough.
I took a chance and ordered a switch that is next to the top of the door. looked for how to remove it easily done in ten minutes works fine last long time.
Parts Used:
-
anthony from HAVELOCK, NC
-
Difficulty Level:Really Easy
-
Total Repair Time:15 - 30 mins
3 of 4 people
found this instruction helpful.
Was this instruction helpful to you?
Thank you for voting!