




















4RF302BXEQ1 Whirlpool Range - Instructions
Keep searches simple. Use keywords, e.g. "leaking", "pump", "broken" or "fit".
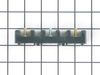
I snapped a bolt on the main power terminal block when connecting the pigtail.
Removed the small metal panel covering the main power terminal in back of the electric range. Removed the nuts holding the red, white and black electrical wires from the range using the appropriate socket (there will be two nuts on each bolt end). Removed the two screws holding the main power terminal block with appropriate screw driver. Connect the new main power terminal block to the range using the two screws. Reconnect the red, black and white electrical wires coming from the range using one nut for each wire. IMPORTANT: do no over tighten the nuts because the bolts could snap. Reconnect the pigtail and secure the small metal panel covering the main power panel.
Parts Used:
-
Frank from Palm Coast, FL
-
Difficulty Level:Easy
-
Total Repair Time:15 - 30 mins
-
Tools:Screw drivers, Socket set
3 of 8 people
found this instruction helpful.
Was this instruction helpful to you?
Thank you for voting!
thermostat knob tore off
my boyfriend took part of the back off unscrewed a few screws took the old one out and put the new one in. It seemed simple to me I was surprised. I knew the cost would have been more than double the part if I had called an appliance technician to do it. I received the part the next day which I was tatally suprised since it was a Saturday. I am very satisfied with Parts Select inventory and service Thank You
Parts Used:

-
SHARON from FRUITLAND PARK, FL
-
Difficulty Level:Easy
-
Total Repair Time:30 - 60 mins
-
Tools:Nutdriver, Screw drivers
2 of 5 people
found this instruction helpful.
Was this instruction helpful to you?
Thank you for voting!
Bad Receptacle
I had a receptacle melt in front of my eyes. I few questions later PartSelect.com showed me the part I needed and was checking out in less than 10minutes. Part arrived 3 days later and 20 minutes after that it was installed. I'm Amazing!!! No, PartSelect.com is AMAZING!
Parts Used:

-
TROY from YPSILANTI, MI
-
Difficulty Level:Really Easy
-
Total Repair Time:15 - 30 mins
-
Tools:Screw drivers
2 of 6 people
found this instruction helpful.
Was this instruction helpful to you?
Thank you for voting!
Oven selector switch hit by lightning-dead short
Removed rear access panel (after disconnecting plug). Removed 2 screws holding switch and attached all wires to the new switch and installed. The pictures on the website helped a lot. It's hard to order the wrong part with the information you supply. Part was delivered promptly. Overall this was a good experience. I will buy from you again.
Parts Used:

-
Eric from Cascade, VA
-
Difficulty Level:Easy
-
Total Repair Time:15 - 30 mins
-
Tools:Screw drivers
4 of 12 people
found this instruction helpful.
Was this instruction helpful to you?
Thank you for voting!
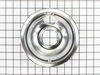
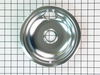
burnt out drip pans
I had been putting off this repair for months! I finally sat down to explore ordering the parts. It was so easy - I wish I did it a long time ago. When the parts arrived, they were exactly what I needed.
Parts Used:
-
Barbara from KAMUELA, AL
-
Difficulty Level:Really Easy
-
Total Repair Time:15 - 30 mins
1 of 3 people
found this instruction helpful.
Was this instruction helpful to you?
Thank you for voting!
broken glide
replaced glide with screwdriver. very easy
Parts Used:


-
Andrew J from MASSAPEQUA, NY
-
Difficulty Level:Really Easy
-
Total Repair Time:15 - 30 mins
-
Tools:Screw drivers
1 of 3 people
found this instruction helpful.
Was this instruction helpful to you?
Thank you for voting!
reflecter/drip pans wrong size
Ordered acording to range model & such. Had ben unsucksessful gettin the right size thru the years & finally got the correct ones.
Parts Used:
-
Dann from Glendale, AZ
-
Difficulty Level:Really Easy
-
Total Repair Time:Less than 15 mins
1 of 3 people
found this instruction helpful.
Was this instruction helpful to you?
Thank you for voting!
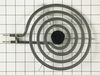
Lost element clips and bad burner element
Pushed elements to remove them. Put on new clips by snapping on clips to all burner elements. Tilted each burner 60 degrees allowing room for the clip to clear the range hood and pushed the contacts on the burner elements into the electrical slot. Turned on each burner to make sure they work. All burner element's work fine.
Parts Used:

-
James from CAMBY, IN
-
Difficulty Level:Really Easy
-
Total Repair Time:Less than 15 mins
1 of 3 people
found this instruction helpful.
Was this instruction helpful to you?
Thank you for voting!
Replace burner drip pan
Removed electric coil replaced pan and reinstalled coil. Part fit just right and no problem.
Parts Used:
-
Ray from Council Bluffrs, IA
-
Difficulty Level:Easy
-
Total Repair Time:Less than 15 mins
1 of 3 people
found this instruction helpful.
Was this instruction helpful to you?
Thank you for voting!
Eroding burner drip bowls
Removed old drip bowls and installed new, which, thanks to your efficiency, were a perfect replacement
Parts Used:
-
Edward from Hamilton, OH
-
Difficulty Level:Really Easy
-
Total Repair Time:Less than 15 mins
1 of 3 people
found this instruction helpful.
Was this instruction helpful to you?
Thank you for voting!
slides on lower drawer were broken
I used a phillips screwdriver and replaced the part with one screw.Very easy and replaced my lower drawer under my oven,it tool about three to five minutes at the most and my drawer works fine now.Thanks for the instruction video on line, it really helped.
Parts Used:
-
Leona R from Louisville, KY
-
Difficulty Level:Really Easy
-
Total Repair Time:Less than 15 mins
-
Tools:Screw drivers
1 of 3 people
found this instruction helpful.
Was this instruction helpful to you?
Thank you for voting!
door glide broken
-
David from Port Orange, FL
-
Difficulty Level:Really Easy
-
Total Repair Time:Less than 15 mins
-
Tools:Screw drivers
0 of 1 people
found this instruction helpful.
Was this instruction helpful to you?
Thank you for voting!
Ugly looking drip bowl.
Repair? What repair? I just removed the old drip bowl and replaced it with the new one. Piece of cake.
Parts Used:
-
Irina from Green Cove Springs, FL
-
Difficulty Level:Really Easy
-
Total Repair Time:Less than 15 mins
0 of 1 people
found this instruction helpful.
Was this instruction helpful to you?
Thank you for voting!
replacement of drip bowll
-
Gudrun from Santa Fe, NM
-
Difficulty Level:Really Easy
-
Total Repair Time:Less than 15 mins
0 of 1 people
found this instruction helpful.
Was this instruction helpful to you?
Thank you for voting!
the drip bowls had rusted through
a really simple fix! the parts came really quickly and all i had to do was pull the heating elements out along with the old drip pans and line up the new pans and push back in. the drip pans weren't 100% perfect as they were a universal fit, and were missing the clips that help the heating elements i nplace, but they look fine and do the job all the same.
Parts Used:
-
DANIEL from sanborn, NY
-
Difficulty Level:Really Easy
-
Total Repair Time:Less than 15 mins
0 of 1 people
found this instruction helpful.
Was this instruction helpful to you?
Thank you for voting!