




















4KWFC120MAW0 Whirlpool Range - Instructions
Keep searches simple. Use keywords, e.g. "leaking", "pump", "broken" or "fit".
Replaced screw
-
Judith from SALEM, OR
-
Difficulty Level:Very Easy
-
Total Repair Time:Less than 15 mins
-
Tools:Screw drivers
2 of 2 people
found this instruction helpful.
Was this instruction helpful to you?
Thank you for voting!
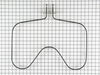
Oven bake would not heat up at all.
Very simple.
Remove 2 mount screws using a #2 phillips screwdriver.
Pull the element out to expose the 2 wires.
Using pliers, slip both wire terminals off the existing element.
Push wires onto the new element and install both mounting screws..
Done!
NOTE: The existing element showed no exterior signs of being bad.
The damage must have been internal.
Remove 2 mount screws using a #2 phillips screwdriver.
Pull the element out to expose the 2 wires.
Using pliers, slip both wire terminals off the existing element.
Push wires onto the new element and install both mounting screws..
Done!
NOTE: The existing element showed no exterior signs of being bad.
The damage must have been internal.
Parts Used:
-
Wilton from CANYON LAKE, TX
-
Difficulty Level:Very Easy
-
Total Repair Time:Less than 15 mins
-
Tools:Pliers, Screw drivers
2 of 2 people
found this instruction helpful.
Was this instruction helpful to you?
Thank you for voting!
Paint peeling from strip

-
Myron from Punta Gorda, FL
-
Difficulty Level:Easy
-
Total Repair Time:15 - 30 mins
-
Tools:Nutdriver
3 of 5 people
found this instruction helpful.
Was this instruction helpful to you?
Thank you for voting!
temp level uneven
-
Paul from HARMONY, MN
-
Difficulty Level:Very Easy
-
Total Repair Time:15 - 30 mins
2 of 3 people
found this instruction helpful.
Was this instruction helpful to you?
Thank you for voting!
the oven temperature was not working right. I installed a new oven sensor. Works get now
-
Rosalind from APOLLO, PA
-
Difficulty Level:Very Easy
-
Total Repair Time:15 - 30 mins
-
Tools:Screw drivers
3 of 6 people
found this instruction helpful.
Was this instruction helpful to you?
Thank you for voting!
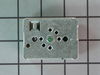
Burner did not always reduce heat when temp. Was lowered.
My husband unscrewed the bad switch and replaced with the new one.
Parts Used:
-
Annie S from RIDGEVILLE, SC
-
Difficulty Level:Really Easy
-
Total Repair Time:15 - 30 mins
-
Tools:Screw drivers
2 of 3 people
found this instruction helpful.
Was this instruction helpful to you?
Thank you for voting!
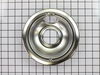
Used part
Lift burners out of plug discard old drip pans replace new drip pans into plugs and done .
Parts Used:
-
Sabrina from FREMONT, CA
-
Difficulty Level:Very Easy
-
Total Repair Time:Less than 15 mins
2 of 3 people
found this instruction helpful.
Was this instruction helpful to you?
Thank you for voting!
Oven Elementwas burnt into
-
Fred from APACHE JCT, AZ
-
Difficulty Level:Very Easy
-
Total Repair Time:Less than 15 mins
-
Tools:Screw drivers
1 person
found this instruction helpful.
Was this instruction helpful to you?
Thank you for voting!
Removing an heating element that burnt into .
Unplugged oven , removed screws ,pulled wires out, removed old element , just hooked wires up , screws .make sure it sits level plugged in. Works great
Parts Used:
-
Jenny from GREENFIELD, IN
-
Difficulty Level:Very Easy
-
Total Repair Time:Less than 15 mins
-
Tools:Pliers, Screw drivers
1 person
found this instruction helpful.
Was this instruction helpful to you?
Thank you for voting!
Drip pans were old and with burnt on food that I couldn't get off. Disgusting!!
-
Nicki from ELSIE, NE
-
Difficulty Level:Very Easy
-
Total Repair Time:Less than 15 mins
1 person
found this instruction helpful.
Was this instruction helpful to you?
Thank you for voting!
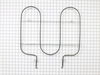
Oven Demon Possession
Our repair was extrodinarily easy. As my husband was taking out the old element and the oven was off, the element heated up and actually burned him. He readjusted it and it refused to heat again. We figured at that point that there must be a short, so we never even opened the box with the new element. A short time later we decided to use the top of the stove for soup and a small fire started in the oven. We turned off the braker at that point and ordered a new oven.
Parts Used:
-
Kevin from Greensboro, NC
-
Difficulty Level:Really Easy
-
Total Repair Time:Less than 15 mins
1 person
found this instruction helpful.
Was this instruction helpful to you?
Thank you for voting!
Couldn't find correct drip bowls that fit.
Removed old drip bowls, removed burners installed new drip bowls,installed burners. They fit perfect and I received them two days after ordering.
Parts Used:
-
Lowell from Hardin, KY
-
Difficulty Level:Really Easy
-
Total Repair Time:Less than 15 mins
2 of 4 people
found this instruction helpful.
Was this instruction helpful to you?
Thank you for voting!
The old drip bowls were rusting, no chrome left
Took the old ones out and put in the new ones! What I am so pleased about it that I just went online and at Parts Select website it was easy to find what I needed, a fair price and the 4 bowls arrived within 2 days!
Parts Used:
-
kathryn from piqua, OH
-
Difficulty Level:Really Easy
-
Total Repair Time:Less than 15 mins
3 of 7 people
found this instruction helpful.
Was this instruction helpful to you?
Thank you for voting!
baking element non operational
removed two screws to faceplate at rear of oven. Disconntected contact wires, installed bake element reconnected contact wires, attached faceplate turned on oven holy hell it works just saved some money on service call thanks!!!
Parts Used:
-
GARY from JACKSON, WY
-
Difficulty Level:Really Easy
-
Total Repair Time:Less than 15 mins
-
Tools:Screw drivers
1 person
found this instruction helpful.
Was this instruction helpful to you?
Thank you for voting!
Oven would not heat up.
Unplugged the range. Opened the oven door and took out the shelves. Took the right screw out, but had trouble getting the left one out do to the age of the range. Unhooked the two wires and took the element out. Put the new one in and hooked up the two wires. Attached the two screws and checked to see that the element laid flat and then tighten screws. Closed the door and plugged the range back in and turned the oven on and it worked perfect.
Parts Used:
-
Johnie from PARKERSBURG, WV
-
Difficulty Level:Really Easy
-
Total Repair Time:15 - 30 mins
-
Tools:Screw drivers
1 person
found this instruction helpful.
Was this instruction helpful to you?
Thank you for voting!