




















4KMER7600AW1 Whirlpool Range - Instructions
Keep searches simple. Use keywords, e.g. "leaking", "pump", "broken" or "fit".
I had a power serge and it burned the Plug at the termial block and melted a few wire.
After we got the part in the mail my husband put it on and shortened the wires and put new plugs on the ends of the wires and we had to get a new plug put it on and it was fixed.
Parts Used:

-
Robin from Vanderbilt, PA
-
Difficulty Level:Really Easy
-
Total Repair Time:15 - 30 mins
-
Tools:Socket set
Was this instruction helpful to you?
Thank you for voting!
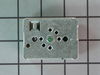
8 Inch electric burner not getting hot
I determined the problem by swapping the 8 inch burner with a 6 inch burner. the 8 inch got hot when connected to the 6 inch wire harness. This told me that the 8 inch burner was good. The 6 inch failed to get hot so I determined the next logical thing was the power to the 8 inch burner. I used a multi meter to determine that power was getting into the control unit but no voltage was getting out. The controller was bad. I ordered a new controller and after unplugging the stove, replaced the controller in about 10 minutes. (Critical part of repair is to unplug unit from wall -220 volts!)
Parts Used:
-
John from Dover, NJ
-
Difficulty Level:Easy
-
Total Repair Time:15 - 30 mins
-
Tools:Pliers, Screw drivers
Was this instruction helpful to you?
Thank you for voting!
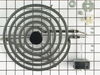
stove top got hot when using large pans
Removed the existing element and replaced it with the new one.
Parts Used:
-
Albert from Bryant, SD
-
Difficulty Level:Really Easy
-
Total Repair Time:15 - 30 mins
-
Tools:Screw drivers
Was this instruction helpful to you?
Thank you for voting!
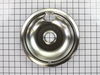
Drip bowls tarnished.
Remove heating element coils. & old drip pans. Install the new drip pans and reinsert the heating elements and insure all elements were level. For aesthetic reasons I replaced all the drip pans - 2 x 8" & 2 x 6".
Parts Used:
-
Jennifer from Albion, NE
-
Difficulty Level:Really Easy
-
Total Repair Time:15 - 30 mins
Was this instruction helpful to you?
Thank you for voting!
Side trim broke
take the 2 screws that hold the handle on out...watch the glass front and the side trims because the handle holds them on. Take the glass out then remove the side trims. Replace the side trims holding the glass in place with 2 pieces of masking tape om each side then install the handle with the 2 screws and remove the masking tape.
Parts Used:
-
Paul from Adamsville, TN
-
Difficulty Level:Easy
-
Total Repair Time:15 - 30 mins
-
Tools:Screw drivers
Was this instruction helpful to you?
Thank you for voting!
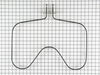
oven element burnt out
unscrew two screws..took old element out, put perfect fit new element in,screw two screws back in.
Parts Used:
-
JoAnne from Harrison, AR
-
Difficulty Level:Really Easy
-
Total Repair Time:15 - 30 mins
-
Tools:Screw drivers
Was this instruction helpful to you?
Thank you for voting!
Oven was not heating up to temp.
Pulled the oven away from the wall, unplugged the oven. Unscrewed the back panel(2 screws)that covers the pigtail connection. Pulled the two wires that attached to the heating element. Inside the oven i removed the two screws holding the element in place and removed old element. Put the new element in place and returned screws. The two wires clipped effortlessly on the back, returned cover and screws and plugged the oven back in. Tested the oven and returned it to its position, reset the clock and done.
Parts Used:
-
charlie from glenwood springs, CO
-
Difficulty Level:Really Easy
-
Total Repair Time:Less than 15 mins
-
Tools:Screw drivers
Was this instruction helpful to you?
Thank you for voting!
Oven Was Not Heating As It Should
Removed lower oven rack. Unplugged stove,removed 2 screws holding element in place,pulled element forward unplugged 2 wires. Reversed proc. To reinstall . Very simple. Parts were here in less than 24 hrs using standard shipping. Very good service
Parts Used:
-
larry from springville, AL
-
Difficulty Level:Really Easy
-
Total Repair Time:Less than 15 mins
-
Tools:Screw drivers
Was this instruction helpful to you?
Thank you for voting!
Baking element needed replacing.
It was as simple as using a screwdrivers and replacing in existing slot. Thank you. It works great!
Parts Used:
-
LINDA from BOLIVAR, TN
-
Difficulty Level:Really Easy
-
Total Repair Time:Less than 15 mins
-
Tools:Screw drivers
Was this instruction helpful to you?
Thank you for voting!
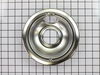
Drip bowls were all rusted.
Removed old rusted drip bowls and put in the new ones. Very easy to do and needed no tools. It made my 25 plus Jenn Air look new again!
Parts Used:
-
Robin from Seneca, SC
-
Difficulty Level:Really Easy
-
Total Repair Time:Less than 15 mins
Was this instruction helpful to you?
Thank you for voting!
The drip pans needed replacing.
Put in the new drip pan -- which are really nice shiny ones.
Parts Used:
-
Alison from Carnation, WA
-
Difficulty Level:Really Easy
-
Total Repair Time:Less than 15 mins
Was this instruction helpful to you?
Thank you for voting!
Dirty drip bowls
Just remove old bowls from range top and put new ones. That is all ... just super simple! :)
Parts Used:
-
Paul from Carnegie, PA
-
Difficulty Level:Really Easy
-
Total Repair Time:Less than 15 mins
Was this instruction helpful to you?
Thank you for voting!
Dirty drip bowl
-
Paul from Carnegie, PA
-
Difficulty Level:Really Easy
-
Total Repair Time:Less than 15 mins
Was this instruction helpful to you?
Thank you for voting!
old drip bowl was worn out
-
Richard from Germantown, MD
-
Difficulty Level:Really Easy
-
Total Repair Time:Less than 15 mins
Was this instruction helpful to you?
Thank you for voting!
replace the cook stove's drip bowls instead of cleaning them
I removed the burners and then the older drip bowls of the cook stove--and then I put on the new drip bowls and put back on the burners. My mechanical skills were sufficient for the replacement of the drip bowls.
Parts Used:
-
Dallas from Arlington, TX
-
Difficulty Level:Really Easy
-
Total Repair Time:Less than 15 mins
Was this instruction helpful to you?
Thank you for voting!