




















4KMER7600AW1 Whirlpool Range - Instructions
Keep searches simple. Use keywords, e.g. "leaking", "pump", "broken" or "fit".
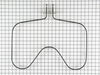
Oven would not heat up.
Unplugged the range. Opened the oven door and took out the shelves. Took the right screw out, but had trouble getting the left one out do to the age of the range. Unhooked the two wires and took the element out. Put the new one in and hooked up the two wires. Attached the two screws and checked to see that the element laid flat and then tighten screws. Closed the door and plugged the range back in and turned the oven on and it worked perfect.
Parts Used:
-
Johnie from PARKERSBURG, WV
-
Difficulty Level:Really Easy
-
Total Repair Time:15 - 30 mins
-
Tools:Screw drivers
1 person
found this instruction helpful.
Was this instruction helpful to you?
Thank you for voting!
Oven Demon Possession
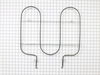
Our repair was extrodinarily easy. As my husband was taking out the old element and the oven was off, the element heated up and actually burned him. He readjusted it and it refused to heat again. We figured at that point that there must be a short, so we never even opened the box with the new element. A short time later we decided to use the top of the stove for soup and a small fire started in the oven. We turned off the braker at that point and ordered a new oven.
Parts Used:
-
Kevin from Greensboro, NC
-
Difficulty Level:Really Easy
-
Total Repair Time:Less than 15 mins
1 person
found this instruction helpful.
Was this instruction helpful to you?
Thank you for voting!
Removing an heating element that burnt into .
Unplugged oven , removed screws ,pulled wires out, removed old element , just hooked wires up , screws .make sure it sits level plugged in. Works great
Parts Used:
-
Jenny from GREENFIELD, IN
-
Difficulty Level:Very Easy
-
Total Repair Time:Less than 15 mins
-
Tools:Pliers, Screw drivers
1 person
found this instruction helpful.
Was this instruction helpful to you?
Thank you for voting!
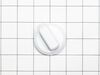
Broken Stove Knob
It took a view months, but well wort waiting for. My Stove is complete again, and I am very happy. Thank you for all your help.
Parts Used:
-
Silvia from BOTHELL, WA
-
Difficulty Level:Very Easy
-
Total Repair Time:Less than 15 mins
1 person
found this instruction helpful.
Was this instruction helpful to you?
Thank you for voting!
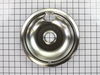
Drip Pans were stained and burned on.
Replaced drip pan. Notch did not want to match the burner notch. Was a close fit bit with a little pressure made it work.
Parts Used:
-
Sandra Collignon from SANTA CLAUS, IN
-
Difficulty Level:Really Easy
-
Total Repair Time:30 - 60 mins
1 person
found this instruction helpful.
Was this instruction helpful to you?
Thank you for voting!
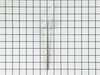
range would not heat right
-
bobby from HERSCHER, IL
-
Difficulty Level:Really Easy
-
Total Repair Time:30 - 60 mins
-
Tools:Screw drivers
1 person
found this instruction helpful.
Was this instruction helpful to you?
Thank you for voting!
Bake element died
Followed instructions on urine that you provided. Instructions were great.
Only problem had was the screw was hard to get loose on one due to oven usage from previous people but I got it after a bit and then fairly simple from there. Unplugged and plugged new element in. Works although seems to run a bit hotter than before.
Only problem had was the screw was hard to get loose on one due to oven usage from previous people but I got it after a bit and then fairly simple from there. Unplugged and plugged new element in. Works although seems to run a bit hotter than before.
Parts Used:
-
Jill from LYNNWOOD, WA
-
Difficulty Level:Easy
-
Total Repair Time:30 - 60 mins
-
Tools:Screw drivers
1 person
found this instruction helpful.
Was this instruction helpful to you?
Thank you for voting!
bake element out
use needle nose pliers to disconnect the element from the power supply. After disconnecting it was easy to repair.
Parts Used:
-
Joyce from BALLWIN, MO
-
Difficulty Level:Really Easy
-
Total Repair Time:30 - 60 mins
1 person
found this instruction helpful.
Was this instruction helpful to you?
Thank you for voting!
Oven temperature was 50 degrees off
Unplugged stove.
Pulled stove out.
Unscrewed screws and removed cover.
Removed & replaced sensor.
Reinstalled cover & screws.
Plugged in stove and pushed back in.
Only problem was when I pulled stove out, lid opened and disconnected the gas line to a burner.
Pulled stove out.
Unscrewed screws and removed cover.
Removed & replaced sensor.
Reinstalled cover & screws.
Plugged in stove and pushed back in.
Only problem was when I pulled stove out, lid opened and disconnected the gas line to a burner.
Parts Used:
-
Gregory from BRIDGEBORO, GA
-
Difficulty Level:A Bit Difficult
-
Total Repair Time:30 - 60 mins
-
Tools:Screw drivers
1 of 2 people
found this instruction helpful.
Was this instruction helpful to you?
Thank you for voting!
Glass Door Broken
Removed 3 screws holding the glass door bracket.
Placed glass into door holders, had another person hold glass while I replaced the removable bracket screws.
Placed glass into door holders, had another person hold glass while I replaced the removable bracket screws.
Parts Used:

-
Myron from Punta Gorda, FL
-
Difficulty Level:Easy
-
Total Repair Time:15 - 30 mins
-
Tools:Screw drivers
3 of 8 people
found this instruction helpful.
Was this instruction helpful to you?
Thank you for voting!
door of oven came apart when plastic screw holders broke
put back together with parts ordered. Parts arrived in 2 days!!!! and saved my large dinner party the following day from being ruined. Thank you so much for your parts inventory and for Jenn Air supplying only the part needed and not the entire door. It was a life saver!
Parts Used:
-
patricia from chipely, FL
-
Difficulty Level:Really Easy
-
Total Repair Time:15 - 30 mins
-
Tools:Screw drivers
1 of 2 people
found this instruction helpful.
Was this instruction helpful to you?
Thank you for voting!
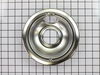
Just needed new drip pans for burners
Was glad to get the correct ones for a 30 year old stove. Had already wasted $12 shipping trying to order from someone else.
Parts Used:
-
Ann from Cadiz, KY
-
Difficulty Level:Really Easy
-
Total Repair Time:Less than 15 mins
1 of 2 people
found this instruction helpful.
Was this instruction helpful to you?
Thank you for voting!
Drip bowls very dirty and stained
Remove burner elements. Remove old drip pans. Thoroughly clean stove top under drip pan edges, and under top cover. Install new drip pans. Install burner elements.
I never seem to be able to find the correct replacement drip pans at retail outlets in the quantities I need. Your parts identification, selection and ordering processes were simple and delivery was faster than I hed expected.
Thank you
I never seem to be able to find the correct replacement drip pans at retail outlets in the quantities I need. Your parts identification, selection and ordering processes were simple and delivery was faster than I hed expected.
Thank you
Parts Used:
-
john from donna, TX
-
Difficulty Level:Really Easy
-
Total Repair Time:Less than 15 mins
1 of 2 people
found this instruction helpful.
Was this instruction helpful to you?
Thank you for voting!
Old burner pan warped.burner sat at 15 degree angle.
Removed burner and then burner pan.Then replaced pan and reinstalled burner.
Parts Used:
-
Michael from Portland, OR
-
Difficulty Level:Really Easy
-
Total Repair Time:Less than 15 mins
1 of 2 people
found this instruction helpful.
Was this instruction helpful to you?
Thank you for voting!
Simple - needed to replace the drip pans on the stove between tenants in a rental apartment
This wasn't much of a repair -- rather a replacement of a simple abused part. At the same time, PartSelect allowed me to order what I needed after two failed attempts to buy replacements that would fit the range. I'll remember PartSelect if we need parts for other older appliances in the rental units.
Parts Used:
-
Tama from Pacific Grove, CA
-
Difficulty Level:Really Easy
-
Total Repair Time:Less than 15 mins
1 of 2 people
found this instruction helpful.
Was this instruction helpful to you?
Thank you for voting!