




















486540A Frigidaire Range - Instructions
Keep searches simple. Use keywords, e.g. "leaking", "pump", "broken" or "fit".
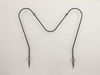
Bake Element burned in to stopped working
Turned off power to appliance removed the screws connecting the element. Disconnected the wires from the old element connected the new element replaced the screws and tightened turned power on turned power back on heated oven to be sure it worked. Very simple to do.
Parts Used:
-
Debbie from Mineral Wells, TX
-
Difficulty Level:Really Easy
-
Total Repair Time:15 - 30 mins
-
Tools:Nutdriver
2 of 3 people
found this instruction helpful.
Was this instruction helpful to you?
Thank you for voting!
Burner switch had gone bad.
I had to replace the switch on one of the large elements. It could and should have been a quicker repair if there would have been some installation/wiring instructions included with the part. Other than that the repair went well.
Parts Used:

-
Gregory from American Fort, UT
-
Difficulty Level:A Bit Difficult
-
Total Repair Time:15 - 30 mins
-
Tools:Nutdriver, Screw drivers
4 of 9 people
found this instruction helpful.
Was this instruction helpful to you?
Thank you for voting!
bake element burnt out
I looked for the proper part on this site. I was even able to find a video on how to install the part. It was great to see the step-by-step directions and tools needed. I ordered the part. It came quickly so that I was able to get my oven repaired before my kids came home for spring break. The only problem I had was the old screws were really stuck on. I used some WD-40 and they were still quite stuck. I learned that by gently going back and forth with the nut driver, rather than just trying to turn in the correct direction, that the screws came out quite easily. I felt so proud to be able to fix my own stove and save money in the process! Very satisfying for a single mom. Couldn't have done it without the video directions.
Parts Used:
-
Kim from Union Grove, WI
-
Difficulty Level:Really Easy
-
Total Repair Time:15 - 30 mins
-
Tools:Nutdriver
2 of 3 people
found this instruction helpful.
Was this instruction helpful to you?
Thank you for voting!
It burned out
The new part was shipped and recieved very fast.
I removed the old one and installed the new one going by how I took the old one out. It was simple to do even for a 75 year old lady.. Thanks.
I removed the old one and installed the new one going by how I took the old one out. It was simple to do even for a 75 year old lady.. Thanks.
Parts Used:
-
Lorene from Lewiston, ID
-
Difficulty Level:Easy
-
Total Repair Time:15 - 30 mins
-
Tools:Socket set
1 person
found this instruction helpful.
Was this instruction helpful to you?
Thank you for voting!
Oven element broke in three!
First I gave my roommate (an engineer) a screwdriver to remove the two screws that held the element in place. Then before I could hit the switch for the circuit breaker, he nearly fried himself by trying to take out the element! He gave up helping me after that.
Then I turned off the circuit, pulled the oven out and unplugged it, removed the racks from the oven, removed the two screws that hold in the element, and lifted up each side of the element and pulled each piece out. Unfortunately, they were a little stuck in back.
So I pulled out the oven, unscrewed the 6 or 8 screws that held up the back panel, and pulled the back panel off. I disconnected the two wires clipped to the element and pulled the old element out by lifting up and pulling them out. I then put in the new bake element, clipped the wires back on, put the oven's back panel on and screwed it in place, and then screwed the bake element back in with those two screws. Easy - a
Then I turned off the circuit, pulled the oven out and unplugged it, removed the racks from the oven, removed the two screws that hold in the element, and lifted up each side of the element and pulled each piece out. Unfortunately, they were a little stuck in back.
So I pulled out the oven, unscrewed the 6 or 8 screws that held up the back panel, and pulled the back panel off. I disconnected the two wires clipped to the element and pulled the old element out by lifting up and pulling them out. I then put in the new bake element, clipped the wires back on, put the oven's back panel on and screwed it in place, and then screwed the bake element back in with those two screws. Easy - a
Parts Used:
-
Keri from Raleigh, NC
-
Difficulty Level:Easy
-
Total Repair Time:15 - 30 mins
-
Tools:Nutdriver, Screw drivers
1 person
found this instruction helpful.
Was this instruction helpful to you?
Thank you for voting!
Replace the bake element
Had to remove the old element and had problems with the element shorted on the quick disconnect. After having my son unplug the appliance and cutting the quick connect off. My son then installed a new quick disconnect and the bake element.
Parts Used:
-
Michael from Fort Worth, TX
-
Difficulty Level:Easy
-
Total Repair Time:15 - 30 mins
-
Tools:Screw drivers
1 person
found this instruction helpful.
Was this instruction helpful to you?
Thank you for voting!
Heat element burned out.
The problem I ran into Was; Having the right socket size for doing the project. After taking care of that problem it was fairly easily to disconnect the element and reconnect the new one. It's pretty self explanitory.
Parts Used:
-
Laura from Hurricane, UT
-
Difficulty Level:A Bit Difficult
-
Total Repair Time:15 - 30 mins
-
Tools:Socket set
1 person
found this instruction helpful.
Was this instruction helpful to you?
Thank you for voting!
Didn't Bake
Took it off, ordered a new part and put it back on.
Ordered on Monday and got the part on Tuesday.
Ordered on Monday and got the part on Tuesday.
Parts Used:
-
Dale from Athens, TX
-
Difficulty Level:Easy
-
Total Repair Time:15 - 30 mins
-
Tools:Nutdriver, Screw drivers
1 person
found this instruction helpful.
Was this instruction helpful to you?
Thank you for voting!
Electric element would intermitantly go on high, even on low settings.
Slid stove out, disconnect power plug, removed top control panel with 4 screws. Unplugged two electrical connectors. removed knob and nut removing switch. Re-assembled in reverse order and test all functions.
Parts Used:
-
Sean from ASTORIA, OR
-
Difficulty Level:Really Easy
-
Total Repair Time:15 - 30 mins
-
Tools:Screw drivers
1 person
found this instruction helpful.
Was this instruction helpful to you?
Thank you for voting!
Element quit heating
Turn off power to the stove. Unscrewed the nutholding it in place, pulled the terminals out, replaced the element by sliding the new terminals in place, replaced the nuts holding it in place and done! Turn the power back on and tested. It works again!
Parts Used:
-
Lisa from OCEAN SPRINGS, MS
-
Difficulty Level:Easy
-
Total Repair Time:15 - 30 mins
-
Tools:Nutdriver
1 person
found this instruction helpful.
Was this instruction helpful to you?
Thank you for voting!
Oven would broil but wouldn't bake
First I removed the two screws that hold the element in place. I then pulled the element out about 3 inches and disconnected the two wires. connected the new element, reassembled and SHAZAM. It worked. I am not good with electrical circuit testing etc. even though I know it must be easy so after reading many stories here, I decided to start by replacing just the element and see if I got lucky. I did. No need to call expensive repairman.
Parts Used:
-
Chris from Blacksburg, VA
-
Difficulty Level:Really Easy
-
Total Repair Time:15 - 30 mins
-
Tools:Nutdriver, Screw drivers
1 person
found this instruction helpful.
Was this instruction helpful to you?
Thank you for voting!
Element cracked and sparked, no longer functioned
I UNPLUGGED the oven (very important), then I removed the two screws that hold the element in place, pulled the element out far enough to disconnect the two wires, plugged the wires on to the new element, pushed the new element back into place, and replaced and tightend the two screws. Finally, I plugged the oven back in.
Parts Used:
-
Steve Gilliland from Delavan, WI
-
Difficulty Level:Easy
-
Total Repair Time:15 - 30 mins
-
Tools:Nutdriver, Screw drivers
1 person
found this instruction helpful.
Was this instruction helpful to you?
Thank you for voting!
baking element out
removed the two screws pulled the wires out sliped the connections from the old element and connected the new one .
Parts Used:
-
PAUL from FRANKLIN, NC
-
Difficulty Level:Really Easy
-
Total Repair Time:15 - 30 mins
-
Tools:Screw drivers
1 person
found this instruction helpful.
Was this instruction helpful to you?
Thank you for voting!
burned out unit
Too dark to see, so left the power on so I cold use the oven light. Big mistake, shorted the fuse at the main box. No power in part of the house until finally figured out how to trip the fuse back on. Lesson learned. Never work on anything electrical without first turning off the power.
Parts Used:
-
Luis from Corpus Christi, TX
-
Difficulty Level:Really Easy
-
Total Repair Time:15 - 30 mins
-
Tools:Pliers
1 person
found this instruction helpful.
Was this instruction helpful to you?
Thank you for voting!
The bake element cracked in two
We called a local repair shop and they told us that it would take a month to get our part and it would cost over $50 for it. We went online and found PartSelect.com. The part was here in less than one week and it cost less than $40. My husband pulled the stove out from the wall took a screwdriver and unscrewed the screws, slipped in the new part and screwed the new screws in. It took him 15 minutes to fix it and now my stove works better than it has in many years!
Parts Used:
-
Cynthia from Roanoke, VA
-
Difficulty Level:Easy
-
Total Repair Time:15 - 30 mins
-
Tools:Screw drivers
1 person
found this instruction helpful.
Was this instruction helpful to you?
Thank you for voting!