




















48231010030 (DLGX2802R) LG Dryer - Instructions
Keep searches simple. Use keywords, e.g. "leaking", "pump", "broken" or "fit".
The dryer's lint filter was cracked.
I put the dryer information into my browser and found PartSelect had the exact replacement part I needed. I ordered the part and it came is just a few days. I removed the part from the excellent packaging, removed the cracked lint filter from the dryer, replaced it with the new lint filter and done!
Among things I've successfully repaired, this was the easiest and best job I've ever done. Quick, Easy and painless.
Thanks for asking!
Among things I've successfully repaired, this was the easiest and best job I've ever done. Quick, Easy and painless.
Thanks for asking!
Parts Used:

-
David E from SAN ANTONIO, TX
-
Difficulty Level:Really Easy
-
Total Repair Time:Less than 15 mins
3 of 3 people
found this instruction helpful.
Was this instruction helpful to you?
Thank you for voting!
None
When manufacturer confirmed the part would fit without an adapter, it was the easiest DIY task ever undertaken.
Parts Used:
-
Ernest J from Columbia, SC
-
Difficulty Level:Very Easy
-
Total Repair Time:Less than 15 mins
4 of 6 people
found this instruction helpful.
Was this instruction helpful to you?
Thank you for voting!
Dryer door latch broken
Part showed up in 2 days and repair took 2 min. Very easy. Thank you!!
Parts Used:

-
Paul from OVERLAND PARK, KS
-
Difficulty Level:Very Easy
-
Total Repair Time:Less than 15 mins
-
Tools:Screw drivers
3 of 4 people
found this instruction helpful.
Was this instruction helpful to you?
Thank you for voting!
Dryer work but wouldn’t shut off when finished cycle, had to shutoff from breaker
With a thin flat screwdriver I was able to pry out the old door switch, I replaced it with the new door switch, pushed back in dryer and so far is working since I installed a month ago.
Parts Used:

-
joaquin from MIAMI BEACH, FL
-
Difficulty Level:Very Easy
-
Total Repair Time:Less than 15 mins
-
Tools:Screw drivers
4 of 7 people
found this instruction helpful.
Was this instruction helpful to you?
Thank you for voting!
HST code given by dryer
Called LG on the phone and they gave the button presses for diagnostics, which then gave the HST code, saying the Humidity sensor was bad.
The part was described as the Humidity sensor module. Actually it's just the wire leads for the sensor which must be electronic and only accessible by disassembling the dryer. There were descriptions about cleaning the wires, perhaps because some people use dryer sheets which cause a buildup on the wires and prevent them from doing their job. I use wool balls and have no buildup on my wires and replacing them did not fix the sensor, because the module accessible inside the dryer is not the moisture sensor, but only the wire leads.
The part was described as the Humidity sensor module. Actually it's just the wire leads for the sensor which must be electronic and only accessible by disassembling the dryer. There were descriptions about cleaning the wires, perhaps because some people use dryer sheets which cause a buildup on the wires and prevent them from doing their job. I use wool balls and have no buildup on my wires and replacing them did not fix the sensor, because the module accessible inside the dryer is not the moisture sensor, but only the wire leads.
Parts Used:

-
marty from NEOSHO, MO
-
Difficulty Level:Easy
-
Total Repair Time:15 - 30 mins
-
Tools:Screw drivers
3 of 4 people
found this instruction helpful.
Was this instruction helpful to you?
Thank you for voting!
Not heat
Followed the instruction on video.was great after three parts now is OK .we have heat.still cheaper than having it service.
Parts Used:

-
Sal from MORENO VALLEY, CA
-
Difficulty Level:Really Easy
-
Total Repair Time:30 - 60 mins
-
Tools:Screw drivers, Wrench (Adjustable)
3 of 4 people
found this instruction helpful.
Was this instruction helpful to you?
Thank you for voting!
Locker assembly broke
Just unscrewed the original lock and screwed the new one on it was very easy
Parts Used:
-
temeaco from TULSA, OK
-
Difficulty Level:Very Easy
-
Total Repair Time:Less than 15 mins
-
Tools:Screw drivers
2 of 2 people
found this instruction helpful.
Was this instruction helpful to you?
Thank you for voting!
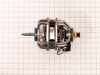
I would turn on the dryer it would run for about 10-20 seconds and then shutoff, and could smell something burning
-
Kevin from MASHPEE, MA
-
Difficulty Level:Really Easy
-
Total Repair Time:15 - 30 mins
-
Tools:Screw drivers, Socket set, Wrench (Adjustable)
3 of 5 people
found this instruction helpful.
Was this instruction helpful to you?
Thank you for voting!
Thumping noise when on

-
Bob from Holiday, FL
-
Difficulty Level:Very Easy
-
Total Repair Time:15 - 30 mins
-
Tools:Screw drivers
2 of 2 people
found this instruction helpful.
Was this instruction helpful to you?
Thank you for voting!
Lamp cover broke
Unscrew the screw, remove old part, place in new part, replace screw and you are done.
Parts Used:

-
Lorraine from SEQUIM, WA
-
Difficulty Level:Really Easy
-
Total Repair Time:Less than 15 mins
-
Tools:Screw drivers
2 of 2 people
found this instruction helpful.
Was this instruction helpful to you?
Thank you for voting!
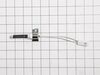
Igniter burned out
Completely had to dismantle the dryer to get to the igniter.
The screw holding the igniter is a SOB to get at for extraction, and even worse putting back.,
The screw holding the igniter is a SOB to get at for extraction, and even worse putting back.,
Parts Used:
-
EDWARD from KNG OF PRUSSA, PA
-
Difficulty Level:A Bit Difficult
-
Total Repair Time:1- 2 hours
-
Tools:Nutdriver, Screw drivers, Socket set
2 of 2 people
found this instruction helpful.
Was this instruction helpful to you?
Thank you for voting!
Cracked lint filter
-
Richard from MADISON, AL
-
Difficulty Level:Very Easy
-
Total Repair Time:Less than 15 mins
2 of 3 people
found this instruction helpful.
Was this instruction helpful to you?
Thank you for voting!
Dryer was making a terrible sound.
An appliance repairman determined the problem which was that it needed new pulleys and thankfully PartSelect carried them. He installed them in an hour and my dryer runs fine now.
Parts Used:

-
NANCY from ATASCADERO, CA
-
Difficulty Level:Really Easy
-
Total Repair Time:30 - 60 mins
2 of 3 people
found this instruction helpful.
Was this instruction helpful to you?
Thank you for voting!
The dryer door would not stay closed
Removed the two screws holding the dryer door strike/locker assembly in place, removed the old and put the new in its place and replaced the screws.
Parts Used:
-
William from BOZEMAN, MT
-
Difficulty Level:Very Easy
-
Total Repair Time:Less than 15 mins
-
Tools:Screw drivers
1 person
found this instruction helpful.
Was this instruction helpful to you?
Thank you for voting!
Persistent smell of propane despite multiple duct cleanings.
Despite the young age of this dryer, and failure of all the other trials to fix the problem, I figured maybe the igniter is the problem. Ordered one. Followed a U tube video to take the unit apart. Noticed immediately that there was lots of lint pretty much everywhere inside the cabinet. Come to find that the blower and the vent had never been connected, with about two inches gap. So, some of the exhaust was going out the vent hose, but lots was not. In fact, lint had coated the propane jet and the air mixer assembly. Replacing the igniter was not particularly difficult, once the dryer was in lots of pieces. I did not test the igniter before replacing it. I did connect the vent outlet to the blower and secured it. End result was a perfectly functioning unit and a happy wife. I don't recall reading about this as a possible cause of propane odor and failure of the unit to heat up.
Parts Used:
-
Steve from GOLDFIELD, NV
-
Difficulty Level:A Bit Difficult
-
Total Repair Time:1- 2 hours
-
Tools:Screw drivers, Socket set
2 of 4 people
found this instruction helpful.
Was this instruction helpful to you?
Thank you for voting!