




















4448B Frigidaire Range - Instructions
Keep searches simple. Use keywords, e.g. "leaking", "pump", "broken" or "fit".
replaced drip pans
i removed the stove eye and the old drip pan. then i placed the new drip pan in and replaced the eye. the new drip pans fit way better than the ones that i took off of it.
Parts Used:


-
Thomas from Fall Branch, TN
-
Difficulty Level:Really Easy
-
Total Repair Time:Less than 15 mins
1 of 4 people
found this instruction helpful.
Was this instruction helpful to you?
Thank you for voting!
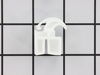
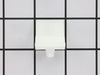
drawer glides broke
-
Charles from Greenfield, IN
-
Difficulty Level:Really Easy
-
Total Repair Time:Less than 15 mins
0 of 1 people
found this instruction helpful.
Was this instruction helpful to you?
Thank you for voting!
Drawer Glide Broke..
No problem..... I just had to slide the new one in..It took all of 5 minutes...
I searched so many different places for the part until a friend told me about Part Select!!!
Thank you so much...
I searched so many different places for the part until a friend told me about Part Select!!!
Thank you so much...
Parts Used:
-
Rita from East Boston, MA
-
Difficulty Level:Really Easy
-
Total Repair Time:Less than 15 mins
0 of 1 people
found this instruction helpful.
Was this instruction helpful to you?
Thank you for voting!
Broken drawer glide
First i removed the drawer. Then i removed the broken drawer glide and replaced it with the new one. Then i put the drawer back! The parts were a perfect match...
Parts Used:
-
Jeffrey from West Kingston, RI
-
Difficulty Level:Really Easy
-
Total Repair Time:Less than 15 mins
0 of 1 people
found this instruction helpful.
Was this instruction helpful to you?
Thank you for voting!
Broken drawer glide
I used a screw driver to pop the broken glide out and then snapped in the new one. The repair took all of about 30 seconds. It probably would have taken even less time if the former owner had not epoxied the broken piece in place.
Parts Used:
-
Myles from Twin Falls, ID
-
Difficulty Level:Really Easy
-
Total Repair Time:Less than 15 mins
-
Tools:Screw drivers
0 of 1 people
found this instruction helpful.
Was this instruction helpful to you?
Thank you for voting!
I accidently threw away the drawer glide, when it fell off one day b/c I didn't know what it was. Later on when I started pulling out the bottom stove drawer, I discovered that it wasn't gliding properly....duh...
I just placed the new glider in place and put the drawer back on its hinges and it was good to go... my wife was extremely happy
Parts Used:
-
Reginal from Tampa, FL
-
Difficulty Level:Really Easy
-
Total Repair Time:Less than 15 mins
0 of 1 people
found this instruction helpful.
Was this instruction helpful to you?
Thank you for voting!
drawer glides went in with just a push with a finger ,works great
pushed the glides in the proper holes and ,they work great now ,drawer opens and closes as easy as it should. will buy from again.
Parts Used:
-
carl from mashpee, MA
-
Difficulty Level:Really Easy
-
Total Repair Time:Less than 15 mins
0 of 1 people
found this instruction helpful.
Was this instruction helpful to you?
Thank you for voting!
I had a broken front drawer glide on my range.
Easy repair, I used a screw driver to pry out the broken part and no tools were required to put in the new part.
Parts Used:
-
Mike from Everett, WA
-
Difficulty Level:Really Easy
-
Total Repair Time:Less than 15 mins
-
Tools:Screw drivers
0 of 1 people
found this instruction helpful.
Was this instruction helpful to you?
Thank you for voting!
drawer wouldn't fit flush
removed drawer - removed broken drawer glides. new glides clip in very easy
Parts Used:
-
Gary from Milford, DE
-
Difficulty Level:Really Easy
-
Total Repair Time:Less than 15 mins
-
Tools:Pliers
0 of 1 people
found this instruction helpful.
Was this instruction helpful to you?
Thank you for voting!
Drawer was hard to close
I am a 74 year old single woman. I removed the drawer and replaced the guide which has been missing for some time. Wish I had none about your company a long time ago.
Thank you
Thank you
Parts Used:
-
Catherine from Washington, GA
-
Difficulty Level:Really Easy
-
Total Repair Time:Less than 15 mins
0 of 1 people
found this instruction helpful.
Was this instruction helpful to you?
Thank you for voting!
broken drawer glide
-
David from Lynbrook, NY
-
Difficulty Level:Really Easy
-
Total Repair Time:Less than 15 mins
0 of 1 people
found this instruction helpful.
Was this instruction helpful to you?
Thank you for voting!
Original rear glides had broken
Took the new parts out of the bags, slipped them into place and had the drawer working flawlessly in less than 5 minutes!
I surprised myself.
I surprised myself.
Parts Used:
-
Jeff from Irvine, CA
-
Difficulty Level:Really Easy
-
Total Repair Time:Less than 15 mins
0 of 1 people
found this instruction helpful.
Was this instruction helpful to you?
Thank you for voting!
missing drawer glide
Pulled out the bottom drawer of the stove. Attached the new drawer glide to the drawer. Replaced the drawer and it worked like new!
I received the part two days after I had ordered it. I was very pleased with the speed of the service and the ease with which I found the part I needed on the web site. I will use your site again if needed.
I received the part two days after I had ordered it. I was very pleased with the speed of the service and the ease with which I found the part I needed on the web site. I will use your site again if needed.
Parts Used:
-
Barbara from Cambridge City, IN
-
Difficulty Level:Really Easy
-
Total Repair Time:Less than 15 mins
0 of 1 people
found this instruction helpful.
Was this instruction helpful to you?
Thank you for voting!
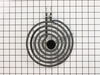
Burner units needed to be replaced from age/overuse.
Easy to open package and plug in unit! Too simple and quite happy with end results!
Parts Used:
-
Beth from Myrtle Point, OR
-
Difficulty Level:Really Easy
-
Total Repair Time:Less than 15 mins
0 of 1 people
found this instruction helpful.
Was this instruction helpful to you?
Thank you for voting!
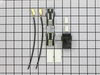
Range burner coil worked intermittenly
Unplugged range and cut wires on existing burner plug. Connected the replacement plug with the provided wire-nuts. Secured with provided shrink-wrap. Reattached burner plug to to range top, and plugged in the burner coil. Presto.
Parts Used:
-
MARK from LIBERTY LAKE, WA
-
Difficulty Level:Easy
-
Total Repair Time:Less than 15 mins
0 of 1 people
found this instruction helpful.
Was this instruction helpful to you?
Thank you for voting!