




















42198 LG Washer - Instructions
Keep searches simple. Use keywords, e.g. "leaking", "pump", "broken" or "fit".
Water will not Drain
-
Nate-Talisha from Miramar, FL
-
Difficulty Level:Really Easy
-
Total Repair Time:15 - 30 mins
-
Tools:Socket set
Was this instruction helpful to you?
Thank you for voting!
would not drain
During my troubleshooting, I removed the bottom to access the drain pump. I had to cut some wire ties so that I could make removing the wires easier. After checking the pump and putting everything back together, I determined that the pump itself was bad. Pump impeller should not rotate freely! After receiving new part, I installed it relatively easy. I didn't have to remove the bottom since there was enough room through the access hole. Just make sure to make where wires go before removing old part.
Parts Used:
-
Timothy from Williamsport, PA
-
Difficulty Level:Easy
-
Total Repair Time:15 - 30 mins
-
Tools:Pliers, Screw drivers
Was this instruction helpful to you?
Thank you for voting!
my lg washer wasnt draining
It was so easy. i searched my model it brought up this site and the most common problem popped up without my even asking and recommended the part. i got it one week later and it was so simple to fix. a repair man wanted three times the part price to come to my home twice and would have had to wait longer. you guys were very helpful
Parts Used:
-
chris from glenwood springs, CO
-
Difficulty Level:Really Easy
-
Total Repair Time:15 - 30 mins
-
Tools:Screw drivers
Was this instruction helpful to you?
Thank you for voting!
water would not drain, nothing jamming pump
new pump was a little different ,but mounted properly. Tipped washer on its side, changed pump by working trough bottom and back access. It went pretty smoothly, works fine.
Parts Used:
-
nicole from chicago, IL
-
Difficulty Level:Easy
-
Total Repair Time:15 - 30 mins
-
Tools:Pliers, Screw drivers
Was this instruction helpful to you?
Thank you for voting!
Bellows had developed a small hole
Removed the old bellows (2 squeeze hose clamps and one screw adjustable hose clamp) slid on the new one and it was done!
Parts Used:
-
Verle from Malcolm, NE
-
Difficulty Level:Easy
-
Total Repair Time:15 - 30 mins
-
Tools:Nutdriver, Screw drivers
Was this instruction helpful to you?
Thank you for voting!
It was torn and leaking.
Took off the old one and put the other one on. The only difficulty was that my husband has big hands and had a hard time getting to one end.
Parts Used:
-
Denise from Show Low, AZ
-
Difficulty Level:Easy
-
Total Repair Time:15 - 30 mins
-
Tools:Screw drivers, Wrench (Adjustable)
Was this instruction helpful to you?
Thank you for voting!
Drain pump making noise and water wasn't being pumped out
I watched a video of how to replace the pump and it showed taking the top and front off to get to it. I actually found this could be done by removing the back panel from the washer. There were two hose clamps you have to squeeze and slide up and two wires going to the pump. There are three screws holding the pump that need to be removed from the front of the washer. Once these are removed all you have to do is push a tab down and the motor slide right out. The pump assembly can also be reached from the bottom of the washer.
Parts Used:
-
richard from rustburg, VA
-
Difficulty Level:Easy
-
Total Repair Time:15 - 30 mins
-
Tools:Pliers, Screw drivers
Was this instruction helpful to you?
Thank you for voting!
Cold water valve stuck on
I watched a YouTube video on the repair and I was fully prepared.the repair went easy
Parts Used:
-
Craig from Sheridan, AR
-
Difficulty Level:Really Easy
-
Total Repair Time:Less than 15 mins
-
Tools:Pliers, Screw drivers
Was this instruction helpful to you?
Thank you for voting!
Inlet hot water valve was leaking.
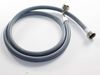
1. Unplug washer. 2. Shut off water supply (hot and cold). 3.Remove hot water hose at washer inlet. 4. Remove the 2 plastic pieces that hold the washer top to the washer body by removing the 2 retaining screws. 5. Pull the top back to remove and set the washer top off to the side. 6. Unclip the electric harness from the inlet water valve. 7. With your pliers, loosen the clamp on the water inlet valve discharge hose and remove the hose from the valve. 8. Loosen and remove the 2 screws holding the inlet valve to the washer body. Install new hot water inlet valve and follow steps in reverse. Check for leaks before plugging washer back in. Run washer and check for leaks. Note: Excellent video available on You Tube. Consider replacing both the hot and cold water connecting hoses during the repair if they are old.
Parts Used:
-
John from Houston, TX
-
Difficulty Level:Really Easy
-
Total Repair Time:Less than 15 mins
-
Tools:Pliers, Screw drivers
Was this instruction helpful to you?
Thank you for voting!
Water inlet valve coil was leaking water.
Unplug Washing machine first. Then remove 2 screws at the back of the top cover. Slide the top cover back then lift and remove. Unplug electrical connector @ inlet valve and remove water lines 1 going in and 1 out of valve. Remove 2 screws holding assembly in place then install new valve assembly and all other components in reverse order.
Parts Used:
-
Robert from Asheville, NC
-
Difficulty Level:Really Easy
-
Total Repair Time:Less than 15 mins
-
Tools:Pliers, Screw drivers
Was this instruction helpful to you?
Thank you for voting!
Very visible tear in hose. It was 1 1/2" long
Simply took hose off from inside machine and replaced it with new one. The tore one had a stopper on one end that wrapped to front machine; inside filter compartment. So I put stopper on the other end of new hose and wrapped it to it's holding spot in filter compartment.
Parts Used:
-
Tresa from McHenry, IL
-
Difficulty Level:Really Easy
-
Total Repair Time:Less than 15 mins
-
Tools:Screw drivers
Was this instruction helpful to you?
Thank you for voting!
leaky inlet valve
found the leak, went to the website, called customer service, ordered the part... $24 later, problem solved. Great customer service and on-line support
Parts Used:

-
Michael from Granite Bay, CA
-
Difficulty Level:Really Easy
-
Total Repair Time:Less than 15 mins
-
Tools:Pliers, Screw drivers
Was this instruction helpful to you?
Thank you for voting!
My Washer was leaking
The repair went well and your parts are easy to find. This is the second time I have used your services and both times have been great. Your parts are at great prices and your delivery is a lot faster that one would think.
Thank you
Thank you
Parts Used:
-
Bruce from West Hills, CA
-
Difficulty Level:Really Easy
-
Total Repair Time:Less than 15 mins
-
Tools:Nutdriver, Pliers
Was this instruction helpful to you?
Thank you for voting!
the water inlet was leaking
pulled off top of washer to get at the inlet valve disconnect two hoses take two screws out and then you put it back together the way you took apart and your done
Parts Used:
-
gerald from wis dells, WI
-
Difficulty Level:Really Easy
-
Total Repair Time:Less than 15 mins
-
Tools:Pliers, Screw drivers
Was this instruction helpful to you?
Thank you for voting!
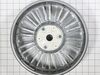
rotor assembly stripped. barrel not turning
1.open back of washer with screwdriver. 4 screws total. 2. Remove assembly with 17 mm socket. 3. Install new rotor assembly with socket. 4. Replace back of washer with sscrews. 15 minutes total time.
Parts Used:
-
Gregory from Meridian, MS
-
Difficulty Level:Really Easy
-
Total Repair Time:Less than 15 mins
-
Tools:Screw drivers, Wrench set
Was this instruction helpful to you?
Thank you for voting!