




















41797912702 Kenmore Washer Dryer Combo - Instructions
Keep searches simple. Use keywords, e.g. "leaking", "pump", "broken" or "fit".
DRYER MADE A LOT OF NOISE
Took the top dryer cabinet apart to replace all the above parts plus the dryer belt. Because of its age decide to replace all the parts from the above list.
Three major problems: none of the video reviews showed this type of dryer. Some parts were practically impossible to get back together. Difficult getting the top square. The top of the cabinet picture did not indicate how the top was to be installed.
After 23 hours finally got it back together. Then it would not start. Discovered a wire had come loose. The dryer works fine now.
Three major problems: none of the video reviews showed this type of dryer. Some parts were practically impossible to get back together. Difficult getting the top square. The top of the cabinet picture did not indicate how the top was to be installed.
After 23 hours finally got it back together. Then it would not start. Discovered a wire had come loose. The dryer works fine now.
Parts Used:

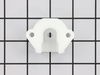
-
Jerry from ROCKWALL, TX
-
Difficulty Level:Very Difficult
-
Total Repair Time:More than 2 hours
-
Tools:Nutdriver, Pliers, Screw drivers, Socket set, Wrench (Adjustable)
3 of 3 people
found this instruction helpful.
Was this instruction helpful to you?
Thank you for voting!
Loud Squeek while the dryer is running.
1. After checking the Parts Select website for some useful information I unplugged the dryer.
2. I popped the two clips holding the top down and lifted the top up and out of the way.
3. I used the 8mm socket and screwdiver combo to remove the two screws holding the front of the dryer on. These screws are so close to the sides of the dryer that you need something very thin to seat the socket, it is so thin a small rachet would not fit.
4. Once the to screws are free to forget to unhook the two wires that lead to the automatic cutoff switch on the right. Label them and move them out of the way.
5. The front of the dryer should pivot forward and come right off. Don't forget about the two clips at the bottom, they are not really attached to anything and can be easy to lose.
6. Get your screwdriver and dive into the drum, on the back should be three screws, take those out.
7. Spin the dryer around and take off the vent cover in the lower left corner of the back of the dryer, watch out the socket is a smaller size.
8. Once inside there is an idler pulley like on the back of a ten speed bike, pull the tension out of it and take the drive belt off the pulleys.
9. The drum should be able to be pulled out the front of the dryer, set aside with the door. The screws on my dryer were so tight I had to use a hammer drill to remove them.
10. This is were I got stuck, no one mentioned how to get the bearing plate off, as if everyone would just know. You must lift up on the bearing plate and once it moves up then you can pull it out.
11. Use the 8mm socket to unscrew the old plastic bearing guide. The small metal clip on the back of the dryer will fall off with the grounding ball bearing.
12. With brum bearing kit in hand start off by putting as much high temp lubricant as you can into the bottom of the new bearing guide. I also use a little lubricant like glue to hold the new grounding ball bearing in the little hole on the back of the bearing guide.
13. Here is the tricky part you have to screw the bearing guide into the the dryer while simulaneously holding the little metal clip in place on the back of the dryer. I used duct tape to hold the metal clip and once the screws got started I just took the tape off.
14. Now you have to do the impossible, the bearing must be screwed to the drum. So unless you have 7 foot long arms you can't hold the bearing and drive the screws. Another problem is the bearing itself, the holes are not the same size as the original and they are not threaded. I stripped every screw that came with the kit trying to get them through the metal of the bearing.
15. With an unwilling victim holding the bearing steady I finally got a replacement screw to seat through the bearing. Once you get one the rest are easier.
16. You are ready to reassemble, after vacuuming everything ou, pick up the drum making sure the belt is around the drum about where it was when you took it off. Push the drum through the front of the dryer all the way to the back, aim a little high so the bearing can move down and seat in the bearing guide.
17. Tuck the clips on the front panel of the dryer into the bottom front edge of the dryer and the whole front should pivot up, when you get it almost closed you will have to lift the drum and set it on the front bearing in the door.
18. While holding the front of the dryer on you have to reach inside and get the 8mm screw started on the left or right, if you let go the front of the dryer will pop off and you have to start over with the pivot. Now is a good time to have a magnet on a stick so when you drop the screw or screw driver you don't have to take the front off to retrieve your tools.
19. Once the front is on reconnect the two wires to the switch in the front of the dryer. Remember the ones you were supposed to have labeled earlier.
20. Close the top of the dryer and spin the dryer around so you can reach inside the vent door and pull the tension pulley over and reseat the drive belt. Rem
2. I popped the two clips holding the top down and lifted the top up and out of the way.
3. I used the 8mm socket and screwdiver combo to remove the two screws holding the front of the dryer on. These screws are so close to the sides of the dryer that you need something very thin to seat the socket, it is so thin a small rachet would not fit.
4. Once the to screws are free to forget to unhook the two wires that lead to the automatic cutoff switch on the right. Label them and move them out of the way.
5. The front of the dryer should pivot forward and come right off. Don't forget about the two clips at the bottom, they are not really attached to anything and can be easy to lose.
6. Get your screwdriver and dive into the drum, on the back should be three screws, take those out.
7. Spin the dryer around and take off the vent cover in the lower left corner of the back of the dryer, watch out the socket is a smaller size.
8. Once inside there is an idler pulley like on the back of a ten speed bike, pull the tension out of it and take the drive belt off the pulleys.
9. The drum should be able to be pulled out the front of the dryer, set aside with the door. The screws on my dryer were so tight I had to use a hammer drill to remove them.
10. This is were I got stuck, no one mentioned how to get the bearing plate off, as if everyone would just know. You must lift up on the bearing plate and once it moves up then you can pull it out.
11. Use the 8mm socket to unscrew the old plastic bearing guide. The small metal clip on the back of the dryer will fall off with the grounding ball bearing.
12. With brum bearing kit in hand start off by putting as much high temp lubricant as you can into the bottom of the new bearing guide. I also use a little lubricant like glue to hold the new grounding ball bearing in the little hole on the back of the bearing guide.
13. Here is the tricky part you have to screw the bearing guide into the the dryer while simulaneously holding the little metal clip in place on the back of the dryer. I used duct tape to hold the metal clip and once the screws got started I just took the tape off.
14. Now you have to do the impossible, the bearing must be screwed to the drum. So unless you have 7 foot long arms you can't hold the bearing and drive the screws. Another problem is the bearing itself, the holes are not the same size as the original and they are not threaded. I stripped every screw that came with the kit trying to get them through the metal of the bearing.
15. With an unwilling victim holding the bearing steady I finally got a replacement screw to seat through the bearing. Once you get one the rest are easier.
16. You are ready to reassemble, after vacuuming everything ou, pick up the drum making sure the belt is around the drum about where it was when you took it off. Push the drum through the front of the dryer all the way to the back, aim a little high so the bearing can move down and seat in the bearing guide.
17. Tuck the clips on the front panel of the dryer into the bottom front edge of the dryer and the whole front should pivot up, when you get it almost closed you will have to lift the drum and set it on the front bearing in the door.
18. While holding the front of the dryer on you have to reach inside and get the 8mm screw started on the left or right, if you let go the front of the dryer will pop off and you have to start over with the pivot. Now is a good time to have a magnet on a stick so when you drop the screw or screw driver you don't have to take the front off to retrieve your tools.
19. Once the front is on reconnect the two wires to the switch in the front of the dryer. Remember the ones you were supposed to have labeled earlier.
20. Close the top of the dryer and spin the dryer around so you can reach inside the vent door and pull the tension pulley over and reseat the drive belt. Rem
Parts Used:

-
Miles from LaPorte, IN
-
Difficulty Level:Very Difficult
-
Total Repair Time:More than 2 hours
-
Tools:Nutdriver, Screw drivers, Socket set, Wrench set
3 of 3 people
found this instruction helpful.
Was this instruction helpful to you?
Thank you for voting!
Black lines and small tears
Previous comments on line were so helpful.
My husband and son took the dryer apart by removing the top in order to get to the drum. Part of silver rim that the Drum Glide is attached to was broken,it had been cut somehow. They had to soder it back in place so they could attach the Drum Glide and so far it's working.
Felt- I just ordered one with the adhesive and removed the damaged section used a wire brush, applied the adhesive ( which was more than enough) waited a few minutes for the adhesive to set, applied the felt, attached binder clips to hold it in place while working on the Drum Glide. Really easy.
My husband and son took the dryer apart by removing the top in order to get to the drum. Part of silver rim that the Drum Glide is attached to was broken,it had been cut somehow. They had to soder it back in place so they could attach the Drum Glide and so far it's working.
Felt- I just ordered one with the adhesive and removed the damaged section used a wire brush, applied the adhesive ( which was more than enough) waited a few minutes for the adhesive to set, applied the felt, attached binder clips to hold it in place while working on the Drum Glide. Really easy.
Parts Used:
-
Robin from Sewaren, NJ
-
Difficulty Level:A Bit Difficult
-
Total Repair Time:1- 2 hours
-
Tools:Screw drivers
3 of 3 people
found this instruction helpful.
Was this instruction helpful to you?
Thank you for voting!
Leaking through the main tub seal
-Remove front panel - 2 screws
-Remove the top panel - 2 screws
-Disconnect the lid switch from the top panel - 2 screws
-Remove the agitator cap - unscrew
-Remove the agitator - This was a bit difficult and required a lot of jiggling but it eventually came off
-Remove the inner drum - 5 bolts at the bottom
-Remove the drum mount - 2 bolts and then it got really difficult. A lot of penetrating blaster, wire brushing, jiggling, and some strategically placed hammer taps (don't damage the threads.
-Remove the seal
-Clean up the inner and outer seal seating surfaces
-Rinse and repeat in reverse (pun intended)
-Remove the top panel - 2 screws
-Disconnect the lid switch from the top panel - 2 screws
-Remove the agitator cap - unscrew
-Remove the agitator - This was a bit difficult and required a lot of jiggling but it eventually came off
-Remove the inner drum - 5 bolts at the bottom
-Remove the drum mount - 2 bolts and then it got really difficult. A lot of penetrating blaster, wire brushing, jiggling, and some strategically placed hammer taps (don't damage the threads.
-Remove the seal
-Clean up the inner and outer seal seating surfaces
-Rinse and repeat in reverse (pun intended)
Parts Used:
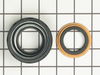
-
Rob from DACULA, GA
-
Difficulty Level:A Bit Difficult
-
Total Repair Time:More than 2 hours
-
Tools:Screw drivers, Socket set
3 of 3 people
found this instruction helpful.
Was this instruction helpful to you?
Thank you for voting!
Leveling Leg Broken
The leveling legs on my Frigidaire stackable washer & dryer were broken. They are made of plastic and while moving the unit one of the legs had broke off. I ordered two replacements from PartSelect and received them within a few days. The old legs were removed by screwing them out and then the new ones were installed. Pretty easy installation for DIY. The new legs work great.
Parts Used:
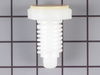
-
Brian from Rochester, NH
-
Difficulty Level:Really Easy
-
Total Repair Time:15 - 30 mins
-
Tools:Pliers, Wrench (Adjustable)
3 of 4 people
found this instruction helpful.
Was this instruction helpful to you?
Thank you for voting!
Front drum guidesnubber ring was worn out
removed the top of dryer, pulled front panel back from drum and installed snubber(Front Drum guide).
Parts Used:
-
Alan from Emporia, KS
-
Difficulty Level:Really Easy
-
Total Repair Time:15 - 30 mins
-
Tools:Screw drivers
3 of 4 people
found this instruction helpful.
Was this instruction helpful to you?
Thank you for voting!
clothes were getting stuck
after numerous holes put in my families clothes i looked on line and found "partselect.com". i ordered the front drum glide after seeing a similar story about the clothes being torn and getting caught and my family and i have our new dryer back!! yeah :<)
Parts Used:
-
robert from lake worth, FL
-
Difficulty Level:Easy
-
Total Repair Time:Less than 15 mins
4 of 7 people
found this instruction helpful.
Was this instruction helpful to you?
Thank you for voting!
no filter

-
Luis from La Jolla, CA
-
Difficulty Level:Really Easy
-
Total Repair Time:Less than 15 mins
4 of 7 people
found this instruction helpful.
Was this instruction helpful to you?
Thank you for voting!
The thermostat had deteriorated and no heat
Had to loosen drum and move it forward to get at switch. Didn’t have to remove belt.
Parts Used:
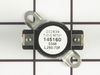
-
David from ROUND TOP, NY
-
Difficulty Level:Easy
-
Total Repair Time:30 - 60 mins
3 of 4 people
found this instruction helpful.
Was this instruction helpful to you?
Thank you for voting!
lack of heat
Remove top lid by pushing tab on either side with a putty knife. Disconnect the 2 wire carriages on right. Remove one
phillips head screw on each side that holds front panel to dryer body. Remove front panel by using flat head screwdriver to pry panel from body. Remove thermostat located on bottom right attached to front of motor on a plastic body by removing two phillips head screws. Disconnect wires and place on new part.
phillips head screw on each side that holds front panel to dryer body. Remove front panel by using flat head screwdriver to pry panel from body. Remove thermostat located on bottom right attached to front of motor on a plastic body by removing two phillips head screws. Disconnect wires and place on new part.
Parts Used:
-
Ann from WALLA WALLA, WA
-
Difficulty Level:Really Easy
-
Total Repair Time:30 - 60 mins
3 of 4 people
found this instruction helpful.
Was this instruction helpful to you?
Thank you for voting!
Very noisy
Replaced rear drum bearing, drum support bearing & drum belt. Still very noisy. Will order new motor & see if that does the trick.
Parts Used:
-
Cherry from WATERVLIET, NY
-
Difficulty Level:Easy
-
Total Repair Time:30 - 60 mins
-
Tools:Nutdriver, Pliers, Screw drivers
2 of 2 people
found this instruction helpful.
Was this instruction helpful to you?
Thank you for voting!
Drive Belt Was Noisy-Slipping
I just popped up the top front using a large straight (slotted) screw driver, then removed the 2 screws at the bottom front, then the whole front panel popped down about a half inch to be lifted out of the way. I found the old drive belt way down under the motor (still attached as normal), very near the floor and removed the worn out belt by hand, and replaced it with the new belt by hand also. The spring loaded belt tightener- idler wheel makes this a very simple process to accomplish. Then, I replaced the front panel-- all done. Works like new.
Parts Used:
-
Steve from Carrollton, TX
-
Difficulty Level:Easy
-
Total Repair Time:15 - 30 mins
-
Tools:Screw drivers
3 of 5 people
found this instruction helpful.
Was this instruction helpful to you?
Thank you for voting!
Loud Squealing
Remove top panel with large flat screwdriver and 2 screws in back.Remove bottom panel with 2 screws.Release belt tensioner and remove belt.Remove 3 screws in center of drum inside.Remove drum. Remove rear bearing by pulling up on assembly.Replace all parts in reverse order.
Parts Used:
-
William from Hudson Falls, NY
-
Difficulty Level:A Bit Difficult
-
Total Repair Time:30 - 60 mins
-
Tools:Nutdriver, Screw drivers
2 of 2 people
found this instruction helpful.
Was this instruction helpful to you?
Thank you for voting!
Drum would not spin
After unplugging the dryer, disconnecting it from the vent, and moving into an open work area, I popped the top open with the blade of a screwdriver, disconnected the two wires that connect to the door switch, then lifted the front panel (with the door) up and away from the drum. Next, I lifted the drum out of the worn rear bearing assembly and lowered it into the dryer in order to release tension on the belt. I then removed the entire drum by carrying it forward and out of the way. I then removed the old bearing assembly, which was loose and covered with metal dust. After cleaning the area with a dry cloth to remove the old grease and metal dust, and vacuuming all the lint off *everything*, I installed the new bearing assembly with a 5/16" nut driver, being careful to position the provided ball-bearing between the plastic bearing assembly and the outer clip. The little ball-bearing is very important, as it is the drum's only path to ground, and prevents the build up of static electricity as the drums spins. I then filled the new bearing assembly with the provided grease. Everything is easy up to this point, but the difficult part for me was removing the old hub from the drum and re-attaching the new one. It is held on by three screws and they become seated very tightly. After loosening them and removing the old hub from the drum, attaching the new one prvoed difficult as well, as the screw-holes in the new hub are not threaded to fit the screws. The screws muct be forced to cut a thread as you install them, which requires a great deal of force. After installing the new hub and putting the new belt (pruchased separately) around the drum, the next step is to reinstall the drum by lifting it in through the front of the dryer and positioning the new hub over the new bearing assembly and pressing it down into place. It will gently "snap" into place as it seats. Then, on the back side of the dryer, I removed the vent panel by removing the two screws that hold it in place and positioned the new drive belt (loosely dangling around the drum) over the motor's drive wheel and behind the sring-tensioned idle arm. Then it is a simply matter to reinstall the front panel by genly lifting the drum and sliding the door opening inside it, then reseating all the little clips that hold the front panel in place. I then pressed the top back into place, reconnected the vent hose, plugged it back in and checked for operation. My fifteen year-old dryer now works like new!
Parts Used:
-
garland from Morganton, NC
-
Difficulty Level:A Bit Difficult
-
Total Repair Time:30 - 60 mins
-
Tools:Nutdriver, Screw drivers
3 of 5 people
found this instruction helpful.
Was this instruction helpful to you?
Thank you for voting!
replaced broken belt
Romoved front from dryer . Then loosened tub , slid belt on , reached in back and put belt on pulley , turned tub till belt went into place and reassembled dryer all with the help of a 3 year old and an8 year old,so in my oppinion it was one of the easiest fixes i've ever done!
Parts Used:
-
Shelia from Elizabethtown, IL
-
Difficulty Level:Easy
-
Total Repair Time:30 - 60 mins
-
Tools:Wrench set
2 of 2 people
found this instruction helpful.
Was this instruction helpful to you?
Thank you for voting!