




















41797804792 Kenmore Washer Dryer Combo - Instructions
Keep searches simple. Use keywords, e.g. "leaking", "pump", "broken" or "fit".
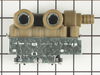
Inlet valve leaked water from supply line(s) back into washer.
Pulled washer electrical plug from receptacle.
Unscrewed hot and cold water inlet hose connectors.
Removed screws retaining backplate.
Removed back plate.
Removed two screws connecting valve assembly to frame.
Pulled two spade electrical wire connectors from valve assembly.
Opened hose clip securing hose on outlet side of valve assembly, using pliers.
Pulled hose from valve assembly.
Valve assembly now free.
Reversed above with replacement valve assembly.
Unscrewed hot and cold water inlet hose connectors.
Removed screws retaining backplate.
Removed back plate.
Removed two screws connecting valve assembly to frame.
Pulled two spade electrical wire connectors from valve assembly.
Opened hose clip securing hose on outlet side of valve assembly, using pliers.
Pulled hose from valve assembly.
Valve assembly now free.
Reversed above with replacement valve assembly.
Parts Used:
-
John from Powhatan, VA
-
Difficulty Level:Really Easy
-
Total Repair Time:Less than 15 mins
-
Tools:Pliers, Screw drivers
6 of 8 people
found this instruction helpful.
Was this instruction helpful to you?
Thank you for voting!
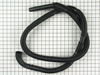
Discharge hose was leaking
This is a newer washer, but I don't know the age. I just bought the house...!
I made this repair more difficult than it needed to be. I took off the back panel of the machine completely, only to discover the coupling for the hose was near the front of the machine. I tilted the unit on its side and took off the bottom before I discovered the access panel on the front, which is held on by only two screws. I put the bottom panel back on, tilted it upright, took off the panel, and had easy access to the coupling. The new part fit perfectly, and a quick wash load proved the leak was fixed.
I made this repair more difficult than it needed to be. I took off the back panel of the machine completely, only to discover the coupling for the hose was near the front of the machine. I tilted the unit on its side and took off the bottom before I discovered the access panel on the front, which is held on by only two screws. I put the bottom panel back on, tilted it upright, took off the panel, and had easy access to the coupling. The new part fit perfectly, and a quick wash load proved the leak was fixed.
Parts Used:
-
John from Hyattsville, MD
-
Difficulty Level:A Bit Difficult
-
Total Repair Time:30 - 60 mins
-
Tools:Screw drivers
6 of 8 people
found this instruction helpful.
Was this instruction helpful to you?
Thank you for voting!
crack in drain hose
First I went on-line and found a download for the parts catalogue which contains a schematic for the washer. After looking this over I could determine how to get the washer apart! After getting the front panel off, I disconnected the drain hose from the pump with a pair of water-pump pliers. As I pulled this hose out, water spilled out all over the floor, so I then cleaned that up. Next I connected the new hose and put the machine back together. This job would have cost me over $150 if I had called in a repairman. PartSelect saved me so much money, and I thank them so much!
Parts Used:
-
mary from port jefferson station, NY
-
Difficulty Level:Easy
-
Total Repair Time:15 - 30 mins
-
Tools:Pliers, Screw drivers
7 of 11 people
found this instruction helpful.
Was this instruction helpful to you?
Thank you for voting!
The rear drum hitch was sheared off
I noticed for sometime that my dryer had been sqeeking...but I had thought nothing of it. It got alot louder as time went on and then one day the drum stopped spinning. Not to mention I had my son's 5th birthday party in 3 days. So I went online and found parts select. They sent me the whole assembly and I got it the day before the birthday, and it only took me 30 mins to replace it. Thank you, Parts Select for the prompt response and saving me for the embarrasment of having clothes all over the floor.
Parts Used:

-
Nathan from Clarence, IA
-
Difficulty Level:Really Easy
-
Total Repair Time:15 - 30 mins
-
Tools:Nutdriver, Screw drivers, Wrench set
5 of 5 people
found this instruction helpful.
Was this instruction helpful to you?
Thank you for voting!
water leaked into machine when turned off
Removed top,removed hose from inlet valve to washer,removed hot and cold inlet hoses and with phillips screwdriver removed water inlet valve assy and replaced. Reassembled and tested.
My order arrived 2 days after i ordered same. Excellent service from partselect, Thank You....
My order arrived 2 days after i ordered same. Excellent service from partselect, Thank You....
Parts Used:
-
Henry from Frenchtown, NJ
-
Difficulty Level:Really Easy
-
Total Repair Time:Less than 15 mins
-
Tools:Screw drivers
5 of 6 people
found this instruction helpful.
Was this instruction helpful to you?
Thank you for voting!
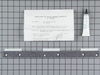
cloths being torn in dryer
first i removed the top -second I removed the two screws hold the front on - thrid I unpluged the wiring to remove the front - fourth I removed old part and cleaned off old glue -fifth I applied new glue and new part - sixth I reasembled - worked good as new
Parts Used:
-
rene from las cruces, NM
-
Difficulty Level:Easy
-
Total Repair Time:Less than 15 mins
-
Tools:Screw drivers
5 of 6 people
found this instruction helpful.
Was this instruction helpful to you?
Thank you for voting!
broken belt
I took off the front panel of the washer and placed the belt on the large tub wheel and then the smaller wheel. I placed the belt over the adjustable third wheel and turned the tub in order to get the belt all the way in the grooves. Thirty minutes max to replace. Thanks, my order was 100% satisfactory
Parts Used:

-
odell from Elizabethtown, KY
-
Difficulty Level:Really Easy
-
Total Repair Time:15 - 30 mins
-
Tools:Screw drivers
5 of 6 people
found this instruction helpful.
Was this instruction helpful to you?
Thank you for voting!
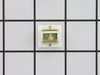
dryer door wouldnt close
the catch on the door was worn and cracked.... so I noticed it could be easily popped out with a screw driver and when the new part came in the mail 2 days later, it was just as easy to pop back in with no tools required. Now the door stays shut really good!!!
Parts Used:
-
karen from aurora, IL
-
Difficulty Level:Really Easy
-
Total Repair Time:Less than 15 mins
-
Tools:Screw drivers
5 of 6 people
found this instruction helpful.
Was this instruction helpful to you?
Thank you for voting!
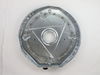
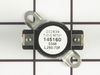
Replaced burned out heating element
Not having the repair manual made the repair more difficult. Prior experience made the job somewhat easy. Had to study every move to make sure no parts were not broken but overall the repair went without any problems. I found out that the bearing plate was removable to facilitate removal and replacement of the heating element. Advise if you are doing a repair of an appliance you don't know much about, take your time and everything should go well for you.
Parts Used:
-
George from ALLENTOWN, PA
-
Difficulty Level:Really Easy
-
Total Repair Time:30 - 60 mins
-
Tools:Screw drivers
5 of 6 people
found this instruction helpful.
Was this instruction helpful to you?
Thank you for voting!
Leaking hoses
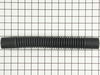
I made my job difficult by removing the back panel, then the side, and finally discovered the front panel opens giving access to the washer. Using heavy pliers I removed the spring clamps and replaced the pump to washer hose and the other hose end to the tub. Turned on the washer no leak only to discover the drain hose had developed a leak. So I ordered the second hose. I was not sure how to release the plastic retaining clamps. Finally just yanked them loose, which worked. Ran the hose through the machine out the back into the drain pipe. I was able to reattach the retaining clamps put the spring clamp on the pump end of the hose. The difficult part was getting the back, sides and front of the washing machine together that took hours.
Parts Used:
-
Dixie from STRANG, OK
-
Difficulty Level:Difficult
-
Total Repair Time:More than 2 hours
-
Tools:Pliers, Screw drivers
5 of 6 people
found this instruction helpful.
Was this instruction helpful to you?
Thank you for voting!
squeaking in dyer progressively got unbearable
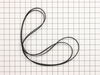
removed top and front panel on stackable dyer unit. 3 screws at back of the inside of the drum, and the drum was out. installed new bearing and belt and all was good.
Parts Used:
-
matt from south vienna, OH
-
Difficulty Level:Easy
-
Total Repair Time:More than 2 hours
-
Tools:Nutdriver, Screw drivers
6 of 9 people
found this instruction helpful.
Was this instruction helpful to you?
Thank you for voting!
Dryer bearing failure
From previous responses on this site. I just followed their lead. If I had not found these folks, and the responses, it would have been a nightmare. It looked like and I thought the dryer came apart from the back! But in reality it comes apart from the front!! Absolutely fantastic site and help. Fast shipping, I ordered on Wednesday before Labor Day, didn't expect the parts until the following Wednesday, but received the parts on Saturday morning, and had the dryer back running by Sunday AM. Never even ran out of clean clothes!!!!!
Parts Used:
-
Douglas Green from Kansas City, MO
-
Difficulty Level:Easy
-
Total Repair Time:More than 2 hours
-
Tools:Pliers, Screw drivers, Socket set
21 of 36 people
found this instruction helpful.
Was this instruction helpful to you?
Thank you for voting!
my mother dryer was leaving marks on the clothes and squeaking.
1 Unplug the dryer and Raise top up by releasing the clips and fold back to expose the drum. 2. Take Phillips head screw driver and remove two screws inside the front dryer panel and then take flathead screwdriver to pop out both sides and set aside. 3. Lay on your stomach and reach inside to the belt pulley and push right so the belt will release then stand to either side of dryer and grab the belt and lift the drum up out of its bracket. 4. Go to the front and pull the drum out and replace the Rear Drum Bearing Kit . 5. Grab the front panel and remove the Top dryer guide and replace to match evenly with the bottom dryer guide by cutting at least 1/8 -1/4" from felt and use High temp adhesive to glue down. 6. Replace everything in order that was taken apart and reconnect electrical plug and start dryer.
Parts Used:
-
Jonathan from GAINESVILLE, GA
-
Difficulty Level:Really Easy
-
Total Repair Time:30 - 60 mins
-
Tools:Screw drivers
4 of 4 people
found this instruction helpful.
Was this instruction helpful to you?
Thank you for voting!
dryer stopped in middle of cycle and would not restart
followed the repair video and replaced thermal fuse and thermostat(recommend replacing both due to the problem could of resulted in either part being the cause),Repair went relatively easy.I also recommend to clean and vacuum the dryer while you have it all apart due to a lot of lint buildup and don't forget to unplug before servicing!Stay Safe!!!
Parts Used:
-
MICHAEL from HUDSON, NY
-
Difficulty Level:Easy
-
Total Repair Time:30 - 60 mins
-
Tools:Pliers, Screw drivers
5 of 7 people
found this instruction helpful.
Was this instruction helpful to you?
Thank you for voting!
Agitation weak
Got the washer used. Agitation was okay, but the screw part of the agitator was very weak and kept slipping, so bought a replacement agitator. This DID NOT fix the problem, it remained the same. Watched a video on this site about the part under the agitator, whereupon we saw there was supposed to be a washer on top of the spike-thing where you screw the agitator down. THAT was the problem. That washer was missing, and when we replaced it, the agitation was fixed! Very much appreciate this site.
Parts Used:
-
Linda from WEST POINT, GA
-
Difficulty Level:Really Easy
-
Total Repair Time:30 - 60 mins
4 of 4 people
found this instruction helpful.
Was this instruction helpful to you?
Thank you for voting!