




















41797802790 Kenmore Washer Dryer Combo - Instructions
Keep searches simple. Use keywords, e.g. "leaking", "pump", "broken" or "fit".
female part of door clasp broke

-
Tammy from St. Peters, MO
-
Difficulty Level:Really Easy
-
Total Repair Time:Less than 15 mins
5 of 7 people
found this instruction helpful.
Was this instruction helpful to you?
Thank you for voting!
belt broke
i left my washer on its back till my belt came in and when it did all i had to do is slip the front off and go at it. it was really fast. then i put the front back on screwed in two screws and hooked up hoses and started washing everything went smooth till i was about to wash wash-n-wear and was like where is my other houseshoe and i remember my dog was bugging me while fixing my washer and dropped my house shoe and i already closed up front soi had to unhook everything and get that out, did not want it to catch on that belt i just bought and fixed lol thanks kristal cumpton
Parts Used:

-
kristal from caruthersville, MO
-
Difficulty Level:Really Easy
-
Total Repair Time:15 - 30 mins
-
Tools:Screw drivers
4 of 4 people
found this instruction helpful.
Was this instruction helpful to you?
Thank you for voting!
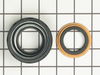
Leaking water from machine
-
Martinus from Fort Lauderdale, FL
-
Difficulty Level:Really Easy
-
Total Repair Time:15 - 30 mins
-
Tools:Screw drivers, Socket set, Wrench set
10 of 22 people
found this instruction helpful.
Was this instruction helpful to you?
Thank you for voting!
Belt not tight
Tensioner (pulley spring) replacement.
The whole tub and motor are suspended by springs so I just got a flat bar and using the edge of the bottom of the washer as a fulcrum, lifted the whole thing enough to be able to shove a 2x4 under there at the base of the dome. It was still tight getting the lock washer off the bottom of the spring axel, but it popped off by pushing the ends with two screwdrivers.
The whole tub and motor are suspended by springs so I just got a flat bar and using the edge of the bottom of the washer as a fulcrum, lifted the whole thing enough to be able to shove a 2x4 under there at the base of the dome. It was still tight getting the lock washer off the bottom of the spring axel, but it popped off by pushing the ends with two screwdrivers.
Parts Used:

-
Richard from Rahway, NJ
-
Difficulty Level:A Bit Difficult
-
Total Repair Time:30 - 60 mins
-
Tools:Screw drivers
5 of 8 people
found this instruction helpful.
Was this instruction helpful to you?
Thank you for voting!
door catch wasn't working and screws in door were loose.
-
NICOLE from WEST JORDAN, UT
-
Difficulty Level:Really Easy
-
Total Repair Time:Less than 15 mins
-
Tools:Screw drivers
12 of 29 people
found this instruction helpful.
Was this instruction helpful to you?
Thank you for voting!
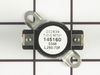
Cloths not drying
Removed the back panel and the exhaust hose.removed the heater element and changed the thermostat wire was melted cut damaged part of wire soldered and rapped with black electrical tap
Parts Used:
-
keith from ELLENVILLE, NY
-
Difficulty Level:Really Easy
-
Total Repair Time:Less than 15 mins
-
Tools:Pliers, Screw drivers, Socket set
5 of 8 people
found this instruction helpful.
Was this instruction helpful to you?
Thank you for voting!
Broken Belt
Very easy to install. Unscrew 2 screws and I was done in minutes. Thanks for the fast part delivery!
Parts Used:
-
Stephen from Honesdale, PA
-
Difficulty Level:Really Easy
-
Total Repair Time:Less than 15 mins
-
Tools:Screw drivers
4 of 5 people
found this instruction helpful.
Was this instruction helpful to you?
Thank you for voting!
Washer tub stopped spinning and was real noisy
I read the last three peoples experiences when I ordered the part on your on line page. I had already made all the wrong mistakes taking the machine apart, and couldn't beleive how simplified it was on your web site. I had called a local repair shop only to be advised the part would take 4 days shipping and the price of it plus shipping was twice what I paid you. Your part arrived the day after I ordered it on line, Thanks again for being there!!!!!
Parts Used:
-
Raymond from Brewster, MA
-
Difficulty Level:Really Easy
-
Total Repair Time:Less than 15 mins
-
Tools:Screw drivers
4 of 5 people
found this instruction helpful.
Was this instruction helpful to you?
Thank you for voting!
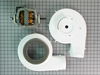
Motor locked up and started smoking
Unplugged unit. Proceeded to remove front and back covers. Took drum unit out after loosening belt, unplugged wire plug from motor. Removed belt tightening unit. Removed screws holding motor to plate. Took lint catcher unit out of front then removed motor and fan unit combination through front. Reversed procedure. Mounted fan combo motor unit. Put drum in place at front and suspended back part of drum with homemade wire hook. Put belt around drum, then put back cover back in place, removed wire hook and secured back panel. Installed belt tightened. Put lint catcher unit in. Replaced front covers. Procedure was challenging since dryer was part of stack unit. Probably could have left lint catcher unit in and just removed motor fan unit from back.
Parts Used:
-
Stephen from Baylis, IL
-
Difficulty Level:A Bit Difficult
-
Total Repair Time:More than 2 hours
-
Tools:Pliers, Screw drivers, Socket set
4 of 5 people
found this instruction helpful.
Was this instruction helpful to you?
Thank you for voting!
Brown stains on clothes.
Followed your website repair guides and the great belt replacement video.
Other parts used were; front lower basket seal, dryer seal, and dryer drum belt.
Had no problems except for keeping the drum belt idler pulley tension spring in place. Used the rear access panel to solve this issue.
John H.
Palm Desert, CA
Other parts used were; front lower basket seal, dryer seal, and dryer drum belt.
Had no problems except for keeping the drum belt idler pulley tension spring in place. Used the rear access panel to solve this issue.
John H.
Palm Desert, CA
Parts Used:
-
John from Palm Desert, CA
-
Difficulty Level:Really Easy
-
Total Repair Time:1- 2 hours
-
Tools:Screw drivers
3 of 3 people
found this instruction helpful.
Was this instruction helpful to you?
Thank you for voting!
The drum was squeaking and running slow
Removed drum replaced bearing with kit, replaced both front drum seals and drive belt. The only problem was when replacing the rear drum ball the three screw holes were poorly tapped and took several tries to get them in. The manufacturers could easily fix this problem. They could provide self tapping hex head screws instead of the Phillips head screws. Everything else went very smoothly.
Parts Used:


-
Terry from TENINO, WA
-
Difficulty Level:Really Easy
-
Total Repair Time:1- 2 hours
-
Tools:Nutdriver, Screw drivers
3 of 3 people
found this instruction helpful.
Was this instruction helpful to you?
Thank you for voting!
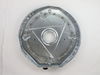
My heating element had gone out
Don’t do like I did and undo the drummer from the back of that thing pulled off the bearing
Parts Used:
-
Van from BLUFFDALE, UT
-
Difficulty Level:Easy
-
Total Repair Time:1- 2 hours
-
Tools:Nutdriver, Screw drivers
3 of 3 people
found this instruction helpful.
Was this instruction helpful to you?
Thank you for voting!
Squeaky drum until drum would not turn.
Watched on-line video, then applied those steps.
1. Pop the front of the deck loose using putty knife to depress clips;
2. Disconnect wires from light and door switch;
(Before I disconnected wires from door switch and light, I made wiring sketches to make sure I reconnected in original manner.)
3. Remove lint filter mount screws and mount from bottom of door opening;
4. Cut drum belt with wire-cutters and removed it;
5. Remove drum support clip from top center of front panel;
6. Remove (1) screw from each side of dryer body that hold front to sidewalls, removed front panel;
7. Remove drum by lifting the rear out of the bearing, then moving it forward through the machine front;
[While I had the dryer disassembled, I thoroughly cleaned it of lint, dirt & metal filings. The metal filings were from the worn ball hitch and drum support bearing cup. I spent as much time cleaning it out as I did working on it.]
8. Stand drum on gallon paint bucket while removing ball hitch (Use a #2 drywall phillips apex to obtain sufficient seating & torque to remove and reinstall ball hitch screws at rear of drum.);
9. Have a second person hold the new ball hitch in position while starting screws, if necessary;
10. Use nut driver w/5/16" socket to remove bearing retainer & ground ball clip;
11. Install new bearing into retainer clip, insert attachment screws through the holes in both, stick grounding ball in depression on back of bearing as screws are fed through back panel;
12. Hold ground ball clip in place to start one screw, then the other & tighten with nut driver;
13. Start drum belt on motor shaft and position against tensioner pulley;
14. Feed drum through front of machine and loop belt over rear of drum;
15. Slide belt forward on drum as drum moves to rear to keep it aligned with position of tension pulley;
16. Lift rear of drum to place ball hitch on top of bearing, then press down to seat it into bearing;
17. Turn drum to ensure belt alignment, then re-accomplish steps 6 thru 1.
1. Pop the front of the deck loose using putty knife to depress clips;
2. Disconnect wires from light and door switch;
(Before I disconnected wires from door switch and light, I made wiring sketches to make sure I reconnected in original manner.)
3. Remove lint filter mount screws and mount from bottom of door opening;
4. Cut drum belt with wire-cutters and removed it;
5. Remove drum support clip from top center of front panel;
6. Remove (1) screw from each side of dryer body that hold front to sidewalls, removed front panel;
7. Remove drum by lifting the rear out of the bearing, then moving it forward through the machine front;
[While I had the dryer disassembled, I thoroughly cleaned it of lint, dirt & metal filings. The metal filings were from the worn ball hitch and drum support bearing cup. I spent as much time cleaning it out as I did working on it.]
8. Stand drum on gallon paint bucket while removing ball hitch (Use a #2 drywall phillips apex to obtain sufficient seating & torque to remove and reinstall ball hitch screws at rear of drum.);
9. Have a second person hold the new ball hitch in position while starting screws, if necessary;
10. Use nut driver w/5/16" socket to remove bearing retainer & ground ball clip;
11. Install new bearing into retainer clip, insert attachment screws through the holes in both, stick grounding ball in depression on back of bearing as screws are fed through back panel;
12. Hold ground ball clip in place to start one screw, then the other & tighten with nut driver;
13. Start drum belt on motor shaft and position against tensioner pulley;
14. Feed drum through front of machine and loop belt over rear of drum;
15. Slide belt forward on drum as drum moves to rear to keep it aligned with position of tension pulley;
16. Lift rear of drum to place ball hitch on top of bearing, then press down to seat it into bearing;
17. Turn drum to ensure belt alignment, then re-accomplish steps 6 thru 1.
Parts Used:
-
Doug from ODESSA, TX
-
Difficulty Level:Easy
-
Total Repair Time:1- 2 hours
-
Tools:Nutdriver, Pliers, Screw drivers
3 of 3 people
found this instruction helpful.
Was this instruction helpful to you?
Thank you for voting!
The drier was "screeching"
First of all, the folks at Part Select have been terrific. I balled up my address and they were great in correcting my error and getting the parts promptly to me. They provide directions with the parts. And You Tube, is a wealth of information too. The process is to remove the drum and replace the nylon busihing that supports the drum at the back of the machine. Getting it out was no sweat. Getting the drum back in was a bit more challenging single handed. If I was going to make any suggestion it would be this is a good project for two sets of hands with the second set needed for about ten minutes. The You Tube video I watched said putting the front cover with the drum attached to the back of the unit would be the challenge and they were right. Otherwise, super easy and the results are it's back to "new" condition. Thanks again to Part Select!
Parts Used:
-
Michel from CHICAGO, IL
-
Difficulty Level:A Bit Difficult
-
Total Repair Time:1- 2 hours
-
Tools:Pliers, Screw drivers
9 of 9 people
found this instruction helpful.
Was this instruction helpful to you?
Thank you for voting!
Worn front drum slides
The disassembly was very easy and it appeared that this would be a very quick repair. But the removal of the old felt was difficult and once it was removed it took a lot of effort to remove the bits still stuck on. The tool of choice to remove the stuck on felt was a small torch. After that use a coarse sand paper to remove the remnants. Glue on the new felt and reinstall the front panel.
Parts Used:
-
David from Plymouth, ME
-
Difficulty Level:Easy
-
Total Repair Time:1- 2 hours
-
Tools:Screw drivers
3 of 3 people
found this instruction helpful.
Was this instruction helpful to you?
Thank you for voting!