




















41790412700 Kenmore Dryer - Instructions
Keep searches simple. Use keywords, e.g. "leaking", "pump", "broken" or "fit".
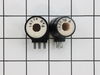
My dryer would light but when it called for more heat it would not light.
lifted the top panel, there were 2 screws to remove the front panel, then the coils were right there on the bottom left side. a screw or two hold the coils inplace. Then just unplug the old coils and plug in to the new coils.
Parts Used:
-
Tyler from Story City, IA
-
Difficulty Level:Easy
-
Total Repair Time:15 - 30 mins
-
Tools:Screw drivers
5 of 6 people
found this instruction helpful.
Was this instruction helpful to you?
Thank you for voting!
Dryer had Loud squeek, barely spun!
First, I shut off the gas & unplugged the dryer. Then I disconnected the vent pipe so I could pull it away from the wall to access the back. Disassembling the dryer was simple.
there are 8 screws: 2 for rear access panel, 2 for top, & 4 for front panel! Once front panel is off, lift back of drum up 2 inches, then forward to get rear bearing out of it's bracket. My rear bearing had worn down so much it was 1/2 the size of the new one! It wore through the bracket down to the metal! I replaced the rear bearing & bracket assembly, as well as the belt & the spring for the belt tensioner! make sure you generously lubricate the new bearing as well as the tensioner pulley! The most time consuming part of this job was cleaning all the lint out the dryer cabinet& cleaning the drum. It works great now! I hope to get a few more years out of it!
there are 8 screws: 2 for rear access panel, 2 for top, & 4 for front panel! Once front panel is off, lift back of drum up 2 inches, then forward to get rear bearing out of it's bracket. My rear bearing had worn down so much it was 1/2 the size of the new one! It wore through the bracket down to the metal! I replaced the rear bearing & bracket assembly, as well as the belt & the spring for the belt tensioner! make sure you generously lubricate the new bearing as well as the tensioner pulley! The most time consuming part of this job was cleaning all the lint out the dryer cabinet& cleaning the drum. It works great now! I hope to get a few more years out of it!
Parts Used:


-
John from Edgewater, MD
-
Difficulty Level:Easy
-
Total Repair Time:1- 2 hours
-
Tools:Screw drivers
6 of 9 people
found this instruction helpful.
Was this instruction helpful to you?
Thank you for voting!
I broke the turn start switch and had to replace it
This was a Sears Dryer, also know as Kenmore, This dryer can be stacked or side by side. In this case it was stacked. There are no directions on how to replace this part. For this model made in 2005 the lid of the dryer is held in front by two clips. You open the lid simply by prying the two front corners up with a flat head screw driver. The front of the top lid pops right up. You may have to remove the mounts in back if you cant lift the dryer lid enough to be able to get your hands in. UNPLUG THE DRYER I got a nasty shock. There are two wires on the switch, remember how they go and where they are, that's important. Turn the switch (from the front or back) so that it pops out. Remove and replace the wires put it back in (from behind/top) and twist a 1/4 turn into place. Plug, test and simply push the cover back down onto the clips. Done.
Parts Used:
-
Don from Port Jefferson, NY
-
Difficulty Level:A Bit Difficult
-
Total Repair Time:30 - 60 mins
-
Tools:Pliers, Screw drivers
4 of 4 people
found this instruction helpful.
Was this instruction helpful to you?
Thank you for voting!
female part of door clasp broke

-
Tammy from St. Peters, MO
-
Difficulty Level:Really Easy
-
Total Repair Time:Less than 15 mins
5 of 7 people
found this instruction helpful.
Was this instruction helpful to you?
Thank you for voting!
fan cage came undone from motor
The new motor from parts select was not correct. The new motor is a bolt on. The original motor was a press on. Had to return at a cost of 42.00 dollars. Had to buy a new dryer.
Parts Used:
-
Christopher from DENVER, PA
-
Difficulty Level:Really Easy
-
Total Repair Time:Less than 15 mins
4 of 4 people
found this instruction helpful.
Was this instruction helpful to you?
Thank you for voting!
clothes not drying in one cycle
remove top cover, remove front of dryer, unscrew two #2 screws from gas valve coil hol down bracket. replace coils. reassemble dryer.. works great.. had already replaced the thermostate and flame sensor.. didn't change anything.. the coil set did the trick..
Parts Used:
-
Aaron from Kerhonkson, NY
-
Difficulty Level:Easy
-
Total Repair Time:Less than 15 mins
-
Tools:Screw drivers
4 of 4 people
found this instruction helpful.
Was this instruction helpful to you?
Thank you for voting!
door handle broke off a the handle
used a putty knife to press the clips away from the door and lift the assembly away out of the door. Used the putty knife to push the clip over the lip and snap the new handle into place
Parts Used:

-
John from SARATOGA SPGS, NY
-
Difficulty Level:Really Easy
-
Total Repair Time:Less than 15 mins
4 of 4 people
found this instruction helpful.
Was this instruction helpful to you?
Thank you for voting!
Screeching noise under load
I basically followed the video instructions on your website. Pretty simple but ran into an issue pre-threading the 3 self taping screws into the spindle bearing. The screws provided were blunt on the end and did not tap easily at all. I used the existing screws that were much more "sharp" and worked much better. Also, the new screws were Philips drive and due to the amount of torque trying to self tap nearly stripped them out. The old sharper screws were square drive which had a better bite. So basically, I used the old screws to self tap and then used the new screws for the final installation.
It took a long time to clean all the lint out from the inside of the dryer. The motor was completely embedded with lint and animal hair. You may want to suggest that a good cleaning may be needed so bring a shop vac...and also something to carefully pick the lint balls out from around the motor armature and bearing area. Overall the video instructions were really a big help!
It took a long time to clean all the lint out from the inside of the dryer. The motor was completely embedded with lint and animal hair. You may want to suggest that a good cleaning may be needed so bring a shop vac...and also something to carefully pick the lint balls out from around the motor armature and bearing area. Overall the video instructions were really a big help!
Parts Used:
-
John from WESTLAKE, OH
-
Difficulty Level:Easy
-
Total Repair Time:1- 2 hours
-
Tools:Nutdriver, Screw drivers
4 of 4 people
found this instruction helpful.
Was this instruction helpful to you?
Thank you for voting!
My lent screen broke on my dryer

-
Mary from Garland, NC
-
Difficulty Level:Really Easy
-
Total Repair Time:Less than 15 mins
-
Tools:Pliers
4 of 5 people
found this instruction helpful.
Was this instruction helpful to you?
Thank you for voting!
door catch wasn't working and screws in door were loose.
-
NICOLE from WEST JORDAN, UT
-
Difficulty Level:Really Easy
-
Total Repair Time:Less than 15 mins
-
Tools:Screw drivers
12 of 29 people
found this instruction helpful.
Was this instruction helpful to you?
Thank you for voting!
Dryer wasn't heating
Determined that the coil on the gas valve wasn't pulling in to ignite. Using an ohmmeter, I determined the coil was open. The coil was removed by pulling off the wire connecter and removing the two phillips screws holding the bracket over the two coils. The coil then slides out. I slid the new coil into place, replaced the bracket and two screws and reconnected the wire connector. It worked immediately. The actual repair only took 15 minutes. The bulk of the time was spent tracking down which part had failed.
Parts Used:
-
Jack from Huntingdon, PA
-
Difficulty Level:Easy
-
Total Repair Time:1- 2 hours
-
Tools:Pliers, Screw drivers
4 of 5 people
found this instruction helpful.
Was this instruction helpful to you?
Thank you for voting!
Squeaking noises (very high pitch)
Replace rear bearing, found Exhust tube seal broken. Went ahead and replaced Drum belt & Idler arm assembly. Works like New !
Parts Used:
-
Bruce from Liberty, TX
-
Difficulty Level:Really Easy
-
Total Repair Time:30 - 60 mins
-
Tools:Screw drivers
5 of 8 people
found this instruction helpful.
Was this instruction helpful to you?
Thank you for voting!
dryer wouldn't tumble with normally large load - very noisy when it did tumble
I disassembled the dryer using instructions from the following website for White Westinghouse (pictures really helped)
After removing the drum, I first noticed that the grouding ball was sitting on the bottom of the dryer (along with much lint). I then saw that the bracket for bearing support cup and the bearing support cup were both worn well past use. The bracket had been worn down about 1/4" to the SE with matching wear on the bearing support cup. There was a hole in the bottom of the bearing support cup (hence the grouding ball on the floor of dryer).
I installed the new idler pulley assembly and completely vacuumed out the dryer (I didn't know lint could get so stiff!). I installed the new parts from the kit once received (and the new belt bought previously) and the dryer works great. I'm so used to the obnoxious squealing that it seems odd to be so quiet.
The internet is a magnificent thing!
After removing the drum, I first noticed that the grouding ball was sitting on the bottom of the dryer (along with much lint). I then saw that the bracket for bearing support cup and the bearing support cup were both worn well past use. The bracket had been worn down about 1/4" to the SE with matching wear on the bearing support cup. There was a hole in the bottom of the bearing support cup (hence the grouding ball on the floor of dryer).
I installed the new idler pulley assembly and completely vacuumed out the dryer (I didn't know lint could get so stiff!). I installed the new parts from the kit once received (and the new belt bought previously) and the dryer works great. I'm so used to the obnoxious squealing that it seems odd to be so quiet.
The internet is a magnificent thing!
Parts Used:
-
Rebecca from Kansas City, MO
-
Difficulty Level:A Bit Difficult
-
Total Repair Time:15 - 30 mins
-
Tools:Screw drivers, Socket set
5 of 9 people
found this instruction helpful.
Was this instruction helpful to you?
Thank you for voting!
Not enough heat
Checked PartSelect online for people with a. similar problem. Found most common problem was the coils.
I opened the top, removed the two screws holding the front panel, unclipped the wiring harness from the machine to the door and removed/cut the plastic wire tie and front came off easily. I put the front piece to the side after changing the light bulb. I cleaned out a large amount of lint and found the coils on the left hand side without trouble. Carefully disconnected the wiring clips, unscrewed the holding screw and removed the old coils. Installed the new colis, 1 has three prongs and the other has 2 so you ca'nt mix them up. Replaced the hold screw, re-connected the witing harness, installed a new wire tie, and re-stalled the two holding screws. Closed the cover and turned it on.
At first it did not heat up which was dissappointing; but then I left it alone and 15 minutes later it worked like new! And heated up just fine ever since.
Total cost about $35.00 with shipping. I took a chance that I would not need the sensor or the ignitor based on the comments of others and I just bought the coils. If I had to do it over I would have bought all three and saved on the shipping.
I opened the top, removed the two screws holding the front panel, unclipped the wiring harness from the machine to the door and removed/cut the plastic wire tie and front came off easily. I put the front piece to the side after changing the light bulb. I cleaned out a large amount of lint and found the coils on the left hand side without trouble. Carefully disconnected the wiring clips, unscrewed the holding screw and removed the old coils. Installed the new colis, 1 has three prongs and the other has 2 so you ca'nt mix them up. Replaced the hold screw, re-connected the witing harness, installed a new wire tie, and re-stalled the two holding screws. Closed the cover and turned it on.
At first it did not heat up which was dissappointing; but then I left it alone and 15 minutes later it worked like new! And heated up just fine ever since.
Total cost about $35.00 with shipping. I took a chance that I would not need the sensor or the ignitor based on the comments of others and I just bought the coils. If I had to do it over I would have bought all three and saved on the shipping.
Parts Used:
-
John from Bergenfield, NJ
-
Difficulty Level:A Bit Difficult
-
Total Repair Time:30 - 60 mins
-
Tools:Pliers, Screw drivers
4 of 6 people
found this instruction helpful.
Was this instruction helpful to you?
Thank you for voting!
Black lines and small tears
Previous comments on line were so helpful.
My husband and son took the dryer apart by removing the top in order to get to the drum. Part of silver rim that the Drum Glide is attached to was broken,it had been cut somehow. They had to soder it back in place so they could attach the Drum Glide and so far it's working.
Felt- I just ordered one with the adhesive and removed the damaged section used a wire brush, applied the adhesive ( which was more than enough) waited a few minutes for the adhesive to set, applied the felt, attached binder clips to hold it in place while working on the Drum Glide. Really easy.
My husband and son took the dryer apart by removing the top in order to get to the drum. Part of silver rim that the Drum Glide is attached to was broken,it had been cut somehow. They had to soder it back in place so they could attach the Drum Glide and so far it's working.
Felt- I just ordered one with the adhesive and removed the damaged section used a wire brush, applied the adhesive ( which was more than enough) waited a few minutes for the adhesive to set, applied the felt, attached binder clips to hold it in place while working on the Drum Glide. Really easy.
Parts Used:

-
Robin from Sewaren, NJ
-
Difficulty Level:A Bit Difficult
-
Total Repair Time:1- 2 hours
-
Tools:Screw drivers
3 of 3 people
found this instruction helpful.
Was this instruction helpful to you?
Thank you for voting!