




















41761712511 Kenmore Washer Dryer Combo - Instructions
Keep searches simple. Use keywords, e.g. "leaking", "pump", "broken" or "fit".
Felt around drum holder worn and torn.
1. Removed face of dryer (drum 'holder')
2. Disconnected door switch wires
3. Tore off existing felt
NOTE: The length of the felt that I recieved from PartSelect was incorrect (too short). Since the existing felt was worn and torn at the top, I replaced only a length that matched the length of the new felt.
4. Used a razor blade-type gasket remover/scraper to remove the exisitng glue
5. Applied new glue (which comes with the felt) onto the felt and let it set up
NOTE: In hindsite, I would apply the glue to the drum holder instead, as the glue otherwise soaks into the felt. If applied to the drum holder instead, the glue will spread out and provide more surface area for adherence.
6. Installed the new felt, starting at one end and working my way around to the other end, being careful not to stretch it
7. Trimmed the remainder of the existing felt (see first NOTE)
8. Scraped the drum holder below the pulled away ends of the exisitng felt
9. Applied glue to the existing felt, including the trrimmed ends so that the ends do not pull away from the ends of the new felt
10. Re-attached the existing felt
11. Let the glue set-up overnight
12. Reinstalled the face of the dryer, turning the drum so that the felt will not get pushed away
13. Reconnected the door switch wires
14. Turned dryer on, with lid still raised, to check for any drifting of the felt
15. Once assured that the felt would stay in place, put the dryer in service
NOTE: I replaced the felt becasue of the gap that opened due to compression of the felt. The gap, as well as a torn piece of the felt that entered the interior of the drum, was catching clothes and tearing them as they were rotated between the drum and the drum holder. The new felt eliminated this problem.
2. Disconnected door switch wires
3. Tore off existing felt
NOTE: The length of the felt that I recieved from PartSelect was incorrect (too short). Since the existing felt was worn and torn at the top, I replaced only a length that matched the length of the new felt.
4. Used a razor blade-type gasket remover/scraper to remove the exisitng glue
5. Applied new glue (which comes with the felt) onto the felt and let it set up
NOTE: In hindsite, I would apply the glue to the drum holder instead, as the glue otherwise soaks into the felt. If applied to the drum holder instead, the glue will spread out and provide more surface area for adherence.
6. Installed the new felt, starting at one end and working my way around to the other end, being careful not to stretch it
7. Trimmed the remainder of the existing felt (see first NOTE)
8. Scraped the drum holder below the pulled away ends of the exisitng felt
9. Applied glue to the existing felt, including the trrimmed ends so that the ends do not pull away from the ends of the new felt
10. Re-attached the existing felt
11. Let the glue set-up overnight
12. Reinstalled the face of the dryer, turning the drum so that the felt will not get pushed away
13. Reconnected the door switch wires
14. Turned dryer on, with lid still raised, to check for any drifting of the felt
15. Once assured that the felt would stay in place, put the dryer in service
NOTE: I replaced the felt becasue of the gap that opened due to compression of the felt. The gap, as well as a torn piece of the felt that entered the interior of the drum, was catching clothes and tearing them as they were rotated between the drum and the drum holder. The new felt eliminated this problem.
Parts Used:
-
Robert from York, PA
-
Difficulty Level:Really Easy
-
Total Repair Time:15 - 30 mins
-
Tools:Screw drivers
10 of 12 people
found this instruction helpful.
Was this instruction helpful to you?
Thank you for voting!
The Dryer Drum Would Not Move. Motor Worked But Drum Didnt.
First I read the manual on how to replaced the dryer drum belt. Second I took off the front panel. This would involving taken all screws from the top of the dryer face and the front panel. Thirdly I removed the exhaust attachment. Then I saw that the belt broke. Really it looked torned apart. I believe too heavy of a load in dryer. I then installed the new belt and reversed everyhing I did to start. The dryer runs great. This is not that bad of a job. If you can do it yourself, why pay hunreds on a service man to do the job.
Parts Used:
-
steven from parrish, FL
-
Difficulty Level:Easy
-
Total Repair Time:30 - 60 mins
-
Tools:Pliers, Screw drivers
10 of 14 people
found this instruction helpful.
Was this instruction helpful to you?
Thank you for voting!
drum glides worn out making thumping noise.
watched video on replacing rear bearing.although rear bearing was not the part(s) i needed to replace, video instructed disassembly procedures to get to the drum glides. this was a very simple and easy to follow video. repair was a breezeand took roughly 25 minutes. the most time consuming segement of repair was vaccuuming out lint,that was 15 minutes. In future, as a preventative, i plan to remove front of machine to clean annually.
Thank you.
Thank you.
Parts Used:

-
david from edinboro, PA
-
Difficulty Level:Really Easy
-
Total Repair Time:15 - 30 mins
-
Tools:Screw drivers
7 of 8 people
found this instruction helpful.
Was this instruction helpful to you?
Thank you for voting!
Terminal block, and wires were dammaged/melted
Used nut driver to remove screw and cover from dryer cord terminal block, used screw driver to remove two screws securing old terminal block, cut dammaged wire and stripped wire back and crimped on new terminal connecter, replaced old terminal block with new one, replaced two screws, installed new cord, and replaced cover plate and screw.
Parts Used:
-
Edwin from Eagar, AZ
-
Difficulty Level:Really Easy
-
Total Repair Time:30 - 60 mins
-
Tools:Nutdriver, Pliers, Screw drivers
7 of 9 people
found this instruction helpful.
Was this instruction helpful to you?
Thank you for voting!
Thumping Noise, Clothes Getting Stuck
Unplug, lift top, unplug 5 wires, remove 2 screws, pull dryer front away while supporting drum. Remove old glides, snap in new. Reverse disassembly procedure
Parts Used:
-
LT Frank from Wacissa, FL
-
Difficulty Level:Easy
-
Total Repair Time:30 - 60 mins
-
Tools:Screw drivers
6 of 6 people
found this instruction helpful.
Was this instruction helpful to you?
Thank you for voting!
Filter Needed Replacing

-
Joe from Reston, VA
-
Difficulty Level:Really Easy
-
Total Repair Time:Less than 15 mins
7 of 10 people
found this instruction helpful.
Was this instruction helpful to you?
Thank you for voting!
Broken Door Strike
After the part arrived, I located a pair of needle nose pliers. Then removed the broken one and inserted the new one. It was very easy.
I also noted that the new part was of a better design than the original. It should not need further attention.
I also noted that the new part was of a better design than the original. It should not need further attention.
Parts Used:
-
William from Martinsville, IN
-
Difficulty Level:Really Easy
-
Total Repair Time:Less than 15 mins
-
Tools:Pliers
9 of 17 people
found this instruction helpful.
Was this instruction helpful to you?
Thank you for voting!
The rear drum hitch was sheared off
I noticed for sometime that my dryer had been sqeeking...but I had thought nothing of it. It got alot louder as time went on and then one day the drum stopped spinning. Not to mention I had my son's 5th birthday party in 3 days. So I went online and found parts select. They sent me the whole assembly and I got it the day before the birthday, and it only took me 30 mins to replace it. Thank you, Parts Select for the prompt response and saving me for the embarrasment of having clothes all over the floor.
Parts Used:

-
Nathan from Clarence, IA
-
Difficulty Level:Really Easy
-
Total Repair Time:15 - 30 mins
-
Tools:Nutdriver, Screw drivers, Wrench set
5 of 5 people
found this instruction helpful.
Was this instruction helpful to you?
Thank you for voting!
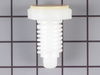
The front level screw legs are made of plastic and each time I move they break
-
Bobby from Asheboro, NC
-
Difficulty Level:Really Easy
-
Total Repair Time:15 - 30 mins
-
Tools:Wrench (Adjustable)
5 of 5 people
found this instruction helpful.
Was this instruction helpful to you?
Thank you for voting!
Zipper was cought between brum and cabnet
Disconect power, Removed top and front of dryer.
The broken zipper was easly removed at this point. The plastic glides easly snap out and in. The felt took some more time to scrape off and clean the old glue. Glue the new felt into place and replace front and top. The parts were shiped promptly and the dryer was out of service for only three days.
The broken zipper was easly removed at this point. The plastic glides easly snap out and in. The felt took some more time to scrape off and clean the old glue. Glue the new felt into place and replace front and top. The parts were shiped promptly and the dryer was out of service for only three days.
Parts Used:
-
John from Swansboro, NC
-
Difficulty Level:Really Easy
-
Total Repair Time:15 - 30 mins
-
Tools:Pliers, Screw drivers
5 of 6 people
found this instruction helpful.
Was this instruction helpful to you?
Thank you for voting!
Drum guides came out into dryer
Removed old guides ( some of the snap in fastners were broken off). REplaced guides by rolling drum, easy to snap in @ drum bottom each time.
Parts Used:
-
lloyd from celina, OH
-
Difficulty Level:Easy
-
Total Repair Time:Less than 15 mins
-
Tools:Screw drivers
5 of 6 people
found this instruction helpful.
Was this instruction helpful to you?
Thank you for voting!
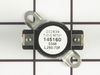
dryer stopped in middle of cycle and would not restart
followed the repair video and replaced thermal fuse and thermostat(recommend replacing both due to the problem could of resulted in either part being the cause),Repair went relatively easy.I also recommend to clean and vacuum the dryer while you have it all apart due to a lot of lint buildup and don't forget to unplug before servicing!Stay Safe!!!
Parts Used:
-
MICHAEL from HUDSON, NY
-
Difficulty Level:Easy
-
Total Repair Time:30 - 60 mins
-
Tools:Pliers, Screw drivers
5 of 7 people
found this instruction helpful.
Was this instruction helpful to you?
Thank you for voting!
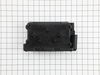
The washing machine half was completely dead.
Very easy to do. The part was easily accessible through a panel in the back. It has 8 electrical connections. I suggest that when replacing this part remove one connection at a time so you put them back in the right spots. Its fairly idiot proof.
Parts Used:
-
MARK from NASHVILLE, TN
-
Difficulty Level:Really Easy
-
Total Repair Time:30 - 60 mins
-
Tools:Pliers, Screw drivers, Socket set
4 of 4 people
found this instruction helpful.
Was this instruction helpful to you?
Thank you for voting!
Cloths not drying
Removed the back panel and the exhaust hose.removed the heater element and changed the thermostat wire was melted cut damaged part of wire soldered and rapped with black electrical tap
Parts Used:
-
keith from ELLENVILLE, NY
-
Difficulty Level:Really Easy
-
Total Repair Time:Less than 15 mins
-
Tools:Pliers, Screw drivers, Socket set
5 of 8 people
found this instruction helpful.
Was this instruction helpful to you?
Thank you for voting!
Black lines and small tears
Previous comments on line were so helpful.
My husband and son took the dryer apart by removing the top in order to get to the drum. Part of silver rim that the Drum Glide is attached to was broken,it had been cut somehow. They had to soder it back in place so they could attach the Drum Glide and so far it's working.
Felt- I just ordered one with the adhesive and removed the damaged section used a wire brush, applied the adhesive ( which was more than enough) waited a few minutes for the adhesive to set, applied the felt, attached binder clips to hold it in place while working on the Drum Glide. Really easy.
My husband and son took the dryer apart by removing the top in order to get to the drum. Part of silver rim that the Drum Glide is attached to was broken,it had been cut somehow. They had to soder it back in place so they could attach the Drum Glide and so far it's working.
Felt- I just ordered one with the adhesive and removed the damaged section used a wire brush, applied the adhesive ( which was more than enough) waited a few minutes for the adhesive to set, applied the felt, attached binder clips to hold it in place while working on the Drum Glide. Really easy.
Parts Used:
-
Robin from Sewaren, NJ
-
Difficulty Level:A Bit Difficult
-
Total Repair Time:1- 2 hours
-
Tools:Screw drivers
3 of 3 people
found this instruction helpful.
Was this instruction helpful to you?
Thank you for voting!