




















4100 - Instructions
Keep searches simple. Use keywords, e.g. "leaking", "pump", "broken" or "fit".
no temp control
-
Cathreen from Lusby, MD
-
Difficulty Level:Really Easy
-
Total Repair Time:Less than 15 mins
-
Tools:Screw drivers
21 of 53 people
found this instruction helpful.
Was this instruction helpful to you?
Thank you for voting!
w/d repeatedly fills with water during warm or hot loads
E. Z. hardest part (which isn't hard) was moving the appliance to reach the back, then putting the appliance back into place. the actual repair (swapping out valve) took less time than that to do.
Parts Used:
-
kevin from WASHINGTON, DC
-
Difficulty Level:Very Easy
-
Total Repair Time:Less than 15 mins
-
Tools:Screw drivers
5 of 5 people
found this instruction helpful.
Was this instruction helpful to you?
Thank you for voting!
Magnetic Door Plunger would stay on washer and not stay in door.
-
SHIRLEY from HARTFORD CITY, IN
-
Difficulty Level:Very Easy
-
Total Repair Time:Less than 15 mins
6 of 8 people
found this instruction helpful.
Was this instruction helpful to you?
Thank you for voting!
The pump filter leaked after cleaning it out. Would work with teflon tape, but wanted to see if a new part would eliminate the need to wrap it every time.
Unscrewed the old part; screwed in the new part and said a quick prayer - LOL!
The part worked great, but I wanted to mention how quickly I received the part!
I would definitely order from this company again!
The part worked great, but I wanted to mention how quickly I received the part!
I would definitely order from this company again!
Parts Used:
-
Sandra from Livonia, MI
-
Difficulty Level:Very Easy
-
Total Repair Time:Less than 15 mins
5 of 5 people
found this instruction helpful.
Was this instruction helpful to you?
Thank you for voting!
Dishwasher would not drain
I simply removed the front toe kick panels.
The solonoid is staring you in the face.
I removed the small nuts on back side of the solonoid bracket and removed the retaining clip and springs.
I installed the new solonoid and was very surprised how easy it was.
I DID turn the power OFF at the breaker panel prior to starting the repair.
The solonoid is staring you in the face.
I removed the small nuts on back side of the solonoid bracket and removed the retaining clip and springs.
I installed the new solonoid and was very surprised how easy it was.
I DID turn the power OFF at the breaker panel prior to starting the repair.
Parts Used:
-
SCOTT from ROMEOVILLE, IL
-
Difficulty Level:Really Easy
-
Total Repair Time:15 - 30 mins
-
Tools:Screw drivers, Wrench set
6 of 8 people
found this instruction helpful.
Was this instruction helpful to you?
Thank you for voting!
Freezer door not closing properly, cam broke at bottom of door
Unplug the refrigerator and turn off the water supply
Remove the screws from the freezer top hinge cover and remove it
Disconnect all the plugs and the grounding screw that were present under the cover
Remove the front bottom grill (under the doors) 3 screws
Place the drip pan under the waterline connectors
On the freezer side of the connector push the lock into the connector and pull the hoses straight out of the connector
Remove the bolts from the top freezer hinge and lift it off
Lift the whole freezer door straight up off of the bottom hinge and lay it on a flat surface.
Remove the screws from the hinge piece on the bottom of the door and slide it out.
Line the new hinge piece up and slide it into place and reinsert the screws.
Remove the cam screw from the hinge bottom (still attached to the refrigerator) and remove the can pieces
Place the new cam on the hinge bottom and reinstall the screw. The flat side of the cam goes down.
Lift the freezer door back into place by lining up the bottom hinge pieces
Slide the top hinge back into the freezer top and reinstall the bolts
Reinstall the hoses into the connectors on the refrigerator bottom by pushing them in
Plug all the connectors together on the freezer top and reinstall the grounding screw
Space out the connectors so they will fit under the cover and put the top cover back on.
Plug the refrigerator back in and turn on the water supply.
Test the water and ice maker then check the bottom connectors for leaks
Reinstall the bottom grill and congratulate yourself on a job well done
Remove the screws from the freezer top hinge cover and remove it
Disconnect all the plugs and the grounding screw that were present under the cover
Remove the front bottom grill (under the doors) 3 screws
Place the drip pan under the waterline connectors
On the freezer side of the connector push the lock into the connector and pull the hoses straight out of the connector
Remove the bolts from the top freezer hinge and lift it off
Lift the whole freezer door straight up off of the bottom hinge and lay it on a flat surface.
Remove the screws from the hinge piece on the bottom of the door and slide it out.
Line the new hinge piece up and slide it into place and reinsert the screws.
Remove the cam screw from the hinge bottom (still attached to the refrigerator) and remove the can pieces
Place the new cam on the hinge bottom and reinstall the screw. The flat side of the cam goes down.
Lift the freezer door back into place by lining up the bottom hinge pieces
Slide the top hinge back into the freezer top and reinstall the bolts
Reinstall the hoses into the connectors on the refrigerator bottom by pushing them in
Plug all the connectors together on the freezer top and reinstall the grounding screw
Space out the connectors so they will fit under the cover and put the top cover back on.
Plug the refrigerator back in and turn on the water supply.
Test the water and ice maker then check the bottom connectors for leaks
Reinstall the bottom grill and congratulate yourself on a job well done
Parts Used:


-
Joseph from LONGWOOD, FL
-
Difficulty Level:Easy
-
Total Repair Time:30 - 60 mins
-
Tools:Screw drivers, Socket set
5 of 6 people
found this instruction helpful.
Was this instruction helpful to you?
Thank you for voting!
Not Draining, Leaking
Unplugged unit, unscrewed screws on top of dishwasher attached to countertop, undid water supply and drain hose that goes into tee with garbage disposal. Using crescent wrench turned front leveling screws up all the way and slid/rocked dishwasher out from under the counter - I had no problem leaving back leveling screws down. Turned dishwasher over on some towels (it WILL leak some water so spread out some towels!) so it was oriented like the directions that came with pump and motor. The directions were good, although color or a picture might have been more helpful. CHECK the new pump/ motor unit CAREFULLY for any loose debris from packing etc. I had a small piece of plastic that was in the top of the motor that goes in the dishwasher bottom that rattled around after I installed everything and put it back. I was able to get to it from the drain assembly in the tub but it made a heck of a racket at first. All in all, I had a great experience. I'm glad I ordered the pump and motor even though I only thought I needed the drain solenoid because when I took the old unit out, the prop on the old impeller was almost gone. Easy to order, good customer service (I called with a question and talked to a wonderful customer service representative!), good directions and easy to do. I'd say a 4 out of 10 in terms of difficulty. Thanks PartSelect!
Parts Used:
-
Brian M. from Hereford, AZ
-
Difficulty Level:Easy
-
Total Repair Time:1- 2 hours
-
Tools:Pliers, Screw drivers, Socket set, Wrench (Adjustable)
5 of 6 people
found this instruction helpful.
Was this instruction helpful to you?
Thank you for voting!
Gas manifold had holes in it.
Removed locking wire from bottom burner assembly then I pulled the element out and replaced with the new one.
Parts Used:
-
Mr. J.C. from Haines City, FL
-
Difficulty Level:Really Easy
-
Total Repair Time:Less than 15 mins
5 of 6 people
found this instruction helpful.
Was this instruction helpful to you?
Thank you for voting!
Motor/Pump Siezed - Only Getting A "Humming" Sound
Only getting "humming" sound from dishwasher. Although water had filled the dishwasher tub, pump/motor would not operate. After some research, figured the motor had siezed and I had to replace the pump/motor assembly as mentioned on this site. The kit came in a couple days and I reserved a Sunday afternoon for the repair which I had never done before. Hardest part of repair was unhooking and removing dishwasher from under counter and then getting it back in proper place. I would suggest providing some instruction within the repair instructions showing how the dishwasher is installed or how to remove it as I had never installed one so I was not quite sure what screws etc I needed to remove on the dishwasher itself to start to remove it? I was able to find the original installation instruction for the dishwasher and found that all you had to do was remove two screws from the inside top of the dishwasher which were securing it to the bottom side of the kitchen counter and then the whole thing just slides out. Once removed, turned dishwasher over to access bottom where pump/motor is located. After determining which diagram to use with the instructions, proceeded to replace the motor/pump assembly. It came out easily after wrestling with some corroded bolts/nuts and the existing pump inlet and outlet hose clamps. Mine were old and worthless and no new ones (3-4") are supplied with the kit. Had to run to hardware store to get new hose clamps for the inlet/outlet of the pump before intalling new one. Suggest new hose clamps be provided with the kit. Only thing that was not too clear in instructions was when reconnecting power wiring harness to motor. By looking closely at the instruction diagram I was able to locate what looked to be the right power extension harness from the bag of parts and attach it to the existing power wire harness and the new motor. Suggest also that you somehow better distinguish or identify the proper way the power wire harness should be fastned to the motor? The existing power wires were both the same color and both the female and male connections for the power at the new motor were identical leaving you to guess which wire goes to which connection. After re-installing dishwasher, put about a gallon of water in bottom of unit prior to starting and then put it through a few cycles. It has been working just like new. Suggest having a helper when removing and re-installing dishwasher from under kitchen counter to assist with the power cord, water line, drain line, and help to turn the dishwasher upside down and right side up again.
Parts Used:
-
Scott from Oklahoma City, OK
-
Difficulty Level:A Bit Difficult
-
Total Repair Time:More than 2 hours
-
Tools:Pliers, Screw drivers, Socket set, Wrench set
5 of 7 people
found this instruction helpful.
Was this instruction helpful to you?
Thank you for voting!
Drum spring broke
Removed top panal found broken parts and pieces, replaced spring and plastic spring holder. Straightened out and reattached drum front boot.
Parts Used:
-
Todd from LAKEWOOD, CO
-
Difficulty Level:Really Easy
-
Total Repair Time:30 - 60 mins
-
Tools:Pliers, Screw drivers
4 of 4 people
found this instruction helpful.
Was this instruction helpful to you?
Thank you for voting!
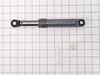
Washer shook in spin cycle
Took front of machine off to access 2 shocks, put back together then removed panel in back to access third shock, watched YouTube video first so things went smooth
Parts Used:
-
Kenneth from CONESUS, NY
-
Difficulty Level:Easy
-
Total Repair Time:30 - 60 mins
-
Tools:Pliers, Screw drivers, Socket set
4 of 4 people
found this instruction helpful.
Was this instruction helpful to you?
Thank you for voting!
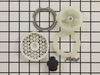
Leaking water pump
Disconnect water line and screws (2) holding dishwasher under cabinet, and clamp for wastewater line. Pulled dishwasher out, turned on its side, and removed pump. Disassembled pump per instructions (great instructions) and installed new parts. Reversed to reassemble and except for a loose clamp that leaked (I tightened) it went well. Just under 1 hour.
Parts Used:
-
John from Palatine, IL
-
Difficulty Level:Easy
-
Total Repair Time:30 - 60 mins
-
Tools:Nutdriver, Screw drivers, Wrench (Adjustable)
7 of 13 people
found this instruction helpful.
Was this instruction helpful to you?
Thank you for voting!
Thanks for sending the correct part. You guys did a great job.

-
Albert from Dallas, TX
-
Difficulty Level:Really Easy
-
Total Repair Time:30 - 60 mins
-
Tools:Nutdriver, Pliers, Socket set, Wrench set
4 of 4 people
found this instruction helpful.
Was this instruction helpful to you?
Thank you for voting!
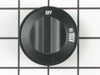
A high flame was coming out of the side of the burner
Easy......pulled out the old one easily and popped in the new one.......saved a lot of money...no repair bill for either diagnostic fee or assembly fee ...No mark up for the part either. Very happy mom!
Parts Used:
-
KAY from BRIDGEPORT, CT
-
Difficulty Level:Really Easy
-
Total Repair Time:Less than 15 mins
5 of 7 people
found this instruction helpful.
Was this instruction helpful to you?
Thank you for voting!
Plunger/magnet capsule fell out of door recepticale because plastic locking tab broke off
Simply inserted new plunger/magnet back into door with thumb&finger until you hear the little locking tabs click. No tools required.
Parts Used:
-
Jo Ann from WYLIE, TX
-
Difficulty Level:Really Easy
-
Total Repair Time:Less than 15 mins
4 of 4 people
found this instruction helpful.
Was this instruction helpful to you?
Thank you for voting!