




















405613 General Electric Dishwasher - Instructions
Keep searches simple. Use keywords, e.g. "leaking", "pump", "broken" or "fit".
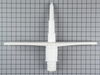
Spray arm buster
Use screw driver for leveage, righty tighty, lefty loosie, easy as that, and thanks to Parts Select, ordered my part on Thursday by dinner time Friday had part, install no washing dishies by hand, Thanks guys
Brian Souza
Vacaville, CA
Brian Souza
Vacaville, CA
Parts Used:
-
Brian from Vacaville, CA
-
Difficulty Level:Really Easy
-
Total Repair Time:Less than 15 mins
-
Tools:Screw drivers
4 of 5 people
found this instruction helpful.
Was this instruction helpful to you?
Thank you for voting!
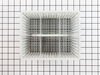
Silverware basket was missing in the condo that we rented
I just plugged in the model number and a screen came up that showed all the part numbers that made up the model. picked out the parts that we needed and ordered it and within 2 day we had the new basket that we needed for our dish washer.
the service and ease was better that going to the appliance store and picking up the basket.
I was very happy the the service.
Donald Brown
the service and ease was better that going to the appliance store and picking up the basket.
I was very happy the the service.
Donald Brown
Parts Used:
-
donald from fullerton, CA
-
Difficulty Level:Really Easy
-
Total Repair Time:Less than 15 mins
4 of 5 people
found this instruction helpful.
Was this instruction helpful to you?
Thank you for voting!
Spray arm not functioning properly
Very simple. By hand, I unscrewed the old spray arm and screwed in the new one. One brief hangup. The old spray arm was very hard to unscrew. Rather than seeming to force it, I called the PartsSelect 800 number and got advice. The tech reassured me that all I had to to was unscrew it and put in new one. So I applied more force and old one came out. A breeze.
Parts Used:
-
Lawrence M from Pollock Pines, CA
-
Difficulty Level:Really Easy
-
Total Repair Time:Less than 15 mins
4 of 5 people
found this instruction helpful.
Was this instruction helpful to you?
Thank you for voting!
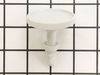
Rinse Aid Fill Cap melted because it landed next to the heating element because it wasn't screwed in
-
Helen from Carol Stream, IL
-
Difficulty Level:Really Easy
-
Total Repair Time:Less than 15 mins
4 of 5 people
found this instruction helpful.
Was this instruction helpful to you?
Thank you for voting!
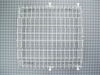
Rusted Racks
Replaced lower rack with new. Upper rack removed front stoppers, removed old rack, slit new rack in and replaced stoppers. Total time about 15 mins.
Parts Used:
-
Eduardo J from San Angelo, TX
-
Difficulty Level:Really Easy
-
Total Repair Time:15 - 30 mins
-
Tools:Screw drivers
4 of 5 people
found this instruction helpful.
Was this instruction helpful to you?
Thank you for voting!
Motor froze up on dishwasher
Removed dishwasher, took off motor, and ordered part. It was delivered in a timely fashion (3 days). Determined which directions to follow. Used screwdriver to hook up motor. Put dishwasher back into cabinet area, made sure there were no leaks before fastening the dishwasher in place. Took about 1/2 hour to complete process. Very satisfied.
Parts Used:
-
Raymond from Oshkosh, WI
-
Difficulty Level:Really Easy
-
Total Repair Time:Less than 15 mins
-
Tools:Screw drivers
5 of 8 people
found this instruction helpful.
Was this instruction helpful to you?
Thank you for voting!
water would not drain at end of cycle
Went to repair parts on troubleshooting and found check valve assembly to be most common problem. Went to parts diagram to locate assembly and found it somewhat confusing as to exact location. Ordered part(s) on percentage as the problem. Received part next day (great)! Pulled dishwasher out and found I did NOT need to do so to replace check valve which is replaced without having to remove dishwasher. The gasket replacement was not necessary as it seals sump area from bottom of dishwasher and not the valve as it appears on the parts diagram. It took about 2 minutes to replace valve itself and it was the cause of the problem.
Parts Used:

-
David from Sheffield, MA
-
Difficulty Level:Really Easy
-
Total Repair Time:Less than 15 mins
-
Tools:Nutdriver, Pliers
4 of 5 people
found this instruction helpful.
Was this instruction helpful to you?
Thank you for voting!
poor dish washing
Read directions. They were poorly drawn. Set them aside. Opened up unit on December 26th. I made careful observation of the wiring, two hoses, one metal bracket, the hose two clamps, and then proceeded. Instructions said 1 to 2 hours, to complete. Ha Ha, perhaps if you've done it before. It was actually really closer to four hours. When done, it worked perfectly. The best part, my wife said: "This was the best Christmas present ever!" That made my day! Dishes are clean again, just like new! Thank you: www.PartsSelect.com.
Parts Used:
-
THOMAS from LACONIA, NH
-
Difficulty Level:A Bit Difficult
-
Total Repair Time:More than 2 hours
-
Tools:Nutdriver, Pliers, Screw drivers, Socket set, Wrench (Adjustable), Wrench set
4 of 5 people
found this instruction helpful.
Was this instruction helpful to you?
Thank you for voting!
Put lower rack in
-
Robert from Hillsborough, NC
-
Difficulty Level:Really Easy
-
Total Repair Time:Less than 15 mins
4 of 6 people
found this instruction helpful.
Was this instruction helpful to you?
Thank you for voting!
Axel for upper rack broke
over time the upper rack axles broke so the rack would just come out of the rollers. I ordered the parts from here and had to youtube how to get the stops out so I didn't have to unscrew the metal guides out making an easy job into a hard one. all you have to do is with a flat head screw driver is slightly bend the plastic end part of the stop which is in the metal guide that stops the wheels from coming out of the guides. once you bend out the plastic end you then turn the stop to get it out of the metal guides. if you youtube it its very easy. just be easy when you bend the plastic piece because I can see it breaking. I didn't break mine so the job was very very easy and took all of about 5 to 10 minutes to complete the entire job. I love this site it had real life info to help out when you need to do a job and trouble shoot your appliance.
Parts Used:
-
Michael from BRONX, NY
-
Difficulty Level:Very Easy
-
Total Repair Time:Less than 15 mins
-
Tools:Screw drivers
4 of 6 people
found this instruction helpful.
Was this instruction helpful to you?
Thank you for voting!
Had cracked roller

-
Gerald from BLUFFTON, SC
-
Difficulty Level:Very Easy
-
Total Repair Time:Less than 15 mins
-
Tools:Screw drivers
5 of 9 people
found this instruction helpful.
Was this instruction helpful to you?
Thank you for voting!
Upper rack would fall down because of worn-out rollers
Determined not to call a repairman for such a simple problem, I watched your extremely helpful video. The ordered parts came right away and all it took was a screw driver and 30 minutes to take off and replace four rollers. So easy, this 75 year-old grandma could do it!
Parts Used:
-
Bettie from ATLANTA, GA
-
Difficulty Level:Very Easy
-
Total Repair Time:15 - 30 mins
-
Tools:Screw drivers
4 of 6 people
found this instruction helpful.
Was this instruction helpful to you?
Thank you for voting!
Upper rack rollers (not the slide rollers) wear out and fall off. Rack falls out when pulled.
Pop the end caps off the slides by pushing the lock tab in with a medium flat screwdriver, through the square hole in the side of the slide. Pull the rack out and set it on the counter. Pop the axles off, with the rollers, with your fingers. They are just clipped on to the rack wire. Pop the new ones on 4 places, fingers only needed to clip them to the wire. Put the rack back in the dishwasher by aligning the rollers in the metal slides and pushing it in like normal. Pop the rack slide end caps in by just pushing them in. If you're smart you bought new ones, they're cheap insurance. Save any good used parts in your kitchen junk drawer for the next time you treat it rough. Less than 5 minutes to fix. So easy a caveman could do it. One just did!
Parts Used:

-
Jack from BELLEFONTE, PA
-
Difficulty Level:Very Easy
-
Total Repair Time:Less than 15 mins
-
Tools:Screw drivers
4 of 6 people
found this instruction helpful.
Was this instruction helpful to you?
Thank you for voting!
Would Not Fill Up With Water , So The Pump Would Not Build Presure
Turned off electical and water - took fillter screen out of inside, unscrewed cap took out valve and replaced it
Parts Used:
-
STEVE from WATERLOO, SC
-
Difficulty Level:Easy
-
Total Repair Time:15 - 30 mins
-
Tools:Nutdriver, Pliers, Screw drivers
4 of 6 people
found this instruction helpful.
Was this instruction helpful to you?
Thank you for voting!
Leaking
I first made a bad assumption that the leaking dishwasher was from the gasket. I replaced the gasket and it still leaked. To find the leak, I took the body off of the dishwasher and ran it to find the leak. It was from the solonoid connection. I took photos of the leaking motor unit and very easily replaced the new motor unit by matching the placement from the photos. The hardest part is tipping the dishwasher on its side and mopping up the water.
It was very easy. All you need is a nut driver and a Phillips screwdriver. Even an over-domesticated, non- tool user can do it.
It was very easy. All you need is a nut driver and a Phillips screwdriver. Even an over-domesticated, non- tool user can do it.
Parts Used:
-
Holly from Watertown, MA
-
Difficulty Level:Really Easy
-
Total Repair Time:15 - 30 mins
-
Tools:Nutdriver, Screw drivers
4 of 6 people
found this instruction helpful.
Was this instruction helpful to you?
Thank you for voting!