




















3865XRW Magic Chef Range - Instructions
Keep searches simple. Use keywords, e.g. "leaking", "pump", "broken" or "fit".
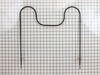
Bake element had burnt in half.
Watched the video that was available and followed the instructions. Unplugged the stove first,removed the old element, and put the new one in. Video was very helpful and the installation was very easy. Was done in about 10 minutes.
Parts Used:
-
Joyce from ROCHESTER, IN
-
Difficulty Level:Really Easy
-
Total Repair Time:Less than 15 mins
-
Tools:Screw drivers
1 person
found this instruction helpful.
Was this instruction helpful to you?
Thank you for voting!
bottom bake element broken and burned
First throw the breaker on the stove. Remove two screws in back of oven then slowly pull out loosen the wire attachements ......got new part in 2 days just as simple reverse the removal directions.,,,I am over 60 female and it was simple.
Parts Used:
-
Carolyn S from white oak, NC
-
Difficulty Level:Really Easy
-
Total Repair Time:Less than 15 mins
-
Tools:Screw drivers
1 person
found this instruction helpful.
Was this instruction helpful to you?
Thank you for voting!
Element burned in half
Took two screws out unplugged the element and plugged the new one in and replaced the screws and turned the breaker back on. Works great...Piece of cake..jk
Parts Used:
-
James from Allyn, WA
-
Difficulty Level:Really Easy
-
Total Repair Time:Less than 15 mins
-
Tools:Screw drivers
1 person
found this instruction helpful.
Was this instruction helpful to you?
Thank you for voting!
The oven heating element burned out like a lit fuse!
Removed 2 phillips screws, unplugged 2 wires, threw away old element. Installation of the new element was just as easy but in reverse order. Piece of cake!
Parts Used:
-
Herbert from Neenah, WI
-
Difficulty Level:Really Easy
-
Total Repair Time:Less than 15 mins
-
Tools:Screw drivers
1 person
found this instruction helpful.
Was this instruction helpful to you?
Thank you for voting!
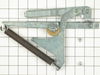
Oven door hinges broken
With the back removed, replacing the lamp receptacle is straight-forward. Likewise, the door gasket is very easy. However, in order to replace the hinges, you have to remove the burner glass top (screws underneath the front lip), and inner and outer side panels. Also the supplied hinges mounting holes were not threaded so I had to use my own bolts, lock-washers and nuts in order to attach them. Total time, including a bit of cleaning, was 5 hours.
Parts Used:


-
Brian from Lakewood, CO
-
Difficulty Level:A Bit Difficult
-
Total Repair Time:More than 2 hours
-
Tools:Pliers, Screw drivers
4 of 10 people
found this instruction helpful.
Was this instruction helpful to you?
Thank you for voting!
Replace the lower oven element
Unplug the 220 cord..remove rear metal back ( 7-8 Ph/screws)... disconnect the red & yellow connectors from the back of the lower element. Remove-the-lift-off Oven door. Remove the two Ph/screws (one on either end of the element) At the very rear of the oven. Install the new element and reverse the about to reassemble.
Parts Used:
-
Tom from ROCKTON, IL
-
Difficulty Level:Really Easy
-
Total Repair Time:30 - 60 mins
-
Tools:Screw drivers
1 person
found this instruction helpful.
Was this instruction helpful to you?
Thank you for voting!
original fixture required bulb - this fixture (all-in-one) was great
Pulled range out from cabinet-wall to get to back side, everthing was clearly exposed tlhen. Just a matter of installing new fixture, putting back on, reconnected power source - put range back in proper place.
Parts Used:
-
wesley from ODENVILLE, AL
-
Difficulty Level:Really Easy
-
Total Repair Time:30 - 60 mins
-
Tools:Pliers, Screw drivers
1 person
found this instruction helpful.
Was this instruction helpful to you?
Thank you for voting!
Replaced upper over light and assembly
I had to pull out the oven and balance the oven on two patio tables. Remove the back of the oven. Pull out the light assembly which was burnt. I was unable to remove the casing around the light, so I destroyed it with a pliers. Reinstalling the new light and assembly was easy. What made this job difficult, I could not remove the light assembly from the front of the oven and had to go in from the back.
Parts Used:
-
Thomas from SAN DIEGO, CA
-
Difficulty Level:Very Difficult
-
Total Repair Time:More than 2 hours
-
Tools:Pliers, Screw drivers
1 person
found this instruction helpful.
Was this instruction helpful to you?
Thank you for voting!
F5 fault code kept appearing
I installed the new oven sensor but the problem continued. So I ordered a new relay board and installed it. Still no luck. So I pulled the new board back out and started trouble shooting it using my electronic background. I discovered the new board was using a pin for L2 that had no exit on the backplane, so I removed it and installed it where I believed it should go. Reinstalled the power relay board and presto. My oven is working lie a champ. Louis
Parts Used:

-
Louis Rodriguez from Granbury, TX
-
Difficulty Level:Very Difficult
-
Total Repair Time:More than 2 hours
-
Tools:Nutdriver, Screw drivers
1 person
found this instruction helpful.
Was this instruction helpful to you?
Thank you for voting!
Oven not heating to desired temp
Had to remove oven from mounting cabinet to get to the back since the wire lenght to the conector was to short to come through the mounting hole.
Other than that the repair was straight forward. 4 screws to dismount the Oven from cabinet, 2 screws to remove Sensor and 3 srews to open the back of the oven once out in the open. New cable adapter that came with the new sensor was needed in my case.
Other than that the repair was straight forward. 4 screws to dismount the Oven from cabinet, 2 screws to remove Sensor and 3 srews to open the back of the oven once out in the open. New cable adapter that came with the new sensor was needed in my case.
Parts Used:
-
Raymond from Ridgecrest, CA
-
Difficulty Level:A Bit Difficult
-
Total Repair Time:1- 2 hours
-
Tools:Nutdriver, Screw drivers
2 of 5 people
found this instruction helpful.
Was this instruction helpful to you?
Thank you for voting!
The Bake Element and Light Bulb Stopped Working
The repair was easy as unplugging the range, unscrewing the bake element from the oven, pulling the wires out, unplugging the element and plugging the new element in. The oven works great after the repair! Too easy!! If I have to explain how I replaced the light bulb; you may not want to try it, you might hurt yourself.
Parts Used:

-
John from Clarkston, MI
-
Difficulty Level:Really Easy
-
Total Repair Time:Less than 15 mins
-
Tools:Screw drivers
1 of 2 people
found this instruction helpful.
Was this instruction helpful to you?
Thank you for voting!
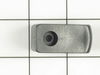
One of the broiler drawer support broke
Piece of cake. Removed the Phillips screw with screwdriver, placed new one on the slide and used old screw to screw it in place. Drawer does not lean to one side anymore.
Parts Used:
-
Jay from Charleston, SC
-
Difficulty Level:Really Easy
-
Total Repair Time:Less than 15 mins
-
Tools:Screw drivers
1 of 2 people
found this instruction helpful.
Was this instruction helpful to you?
Thank you for voting!
oven door seal
easily pulled old seal out and push new seal in place simple and quick.
Parts Used:
-
David from Jacksonville, FL
-
Difficulty Level:Really Easy
-
Total Repair Time:Less than 15 mins
1 of 2 people
found this instruction helpful.
Was this instruction helpful to you?
Thank you for voting!
I had a hole burned threw the heating element.
First I removed the two screws that hold the element in place. I then pulled the element out about 3 inches and disconnected the two wires.
Rehooked up wires on new element, Slid the element in place. Replaced the two screws. Done, very easy.
Rehooked up wires on new element, Slid the element in place. Replaced the two screws. Done, very easy.
Parts Used:
-
jeff from clinton, OH
-
Difficulty Level:Really Easy
-
Total Repair Time:Less than 15 mins
-
Tools:Pliers, Screw drivers
1 of 2 people
found this instruction helpful.
Was this instruction helpful to you?
Thank you for voting!
Oven wouldn't heat
First I removed the two screws that hold the element in place. I then pulled the element out about three inches and disconnected the two wires, being careful not to pull the plugs off. I then inserted the new element and reattached holders. It was very easy and took less than five minutes. The part arrived amazingly quickly. The stove works great now.
Parts Used:
-
James from Jasonville, IN
-
Difficulty Level:Really Easy
-
Total Repair Time:Less than 15 mins
-
Tools:Screw drivers
1 of 2 people
found this instruction helpful.
Was this instruction helpful to you?
Thank you for voting!