




















3638500582 Kenmore Refrigerator - Instructions
Keep searches simple. Use keywords, e.g. "leaking", "pump", "broken" or "fit".
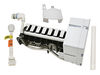
Water leaking and freezing everywhere. Weird shaped ice cubes, more like chunks which jambed the dispenser.
First removed the two screws that holds the old ice maker in place. Unplugged it. The freezer compartment was too narrow to allow the unit to slide out or turn in any other direction. Had to also remove the two front screws from the left side ice bin track and swing it down. The door opening was also too tight. Scratched the plastic door jamb putting the new unit in but other than that all is well and functioning well.
Parts Used:
-
Peter from Riverdale, NJ
-
Difficulty Level:Really Easy
-
Total Repair Time:15 - 30 mins
-
Tools:Nutdriver
3 of 5 people
found this instruction helpful.
Was this instruction helpful to you?
Thank you for voting!
Ice Maker stopped making ice.
Did the repair just as the instruction said, once I read it. The part I didn't read was that if the plug was under the ice maker, you had to take the wire out of the clip on the side. So, had to dismount ice maker, unclip wire, remount maker, plug it in. Still under 30 minutes. Thank you.
Parts Used:
-
Hugh from LADSON, SC
-
Difficulty Level:Really Easy
-
Total Repair Time:15 - 30 mins
-
Tools:Nutdriver
2 of 2 people
found this instruction helpful.
Was this instruction helpful to you?
Thank you for voting!
Ice maker stopped working
-
Mary from WESTON, CT
-
Difficulty Level:Very Easy
-
Total Repair Time:Less than 15 mins
-
Tools:Nutdriver
3 of 5 people
found this instruction helpful.
Was this instruction helpful to you?
Thank you for voting!
lights blown out

-
Gerald from WINTERVILLE, GA
-
Difficulty Level:Very Easy
-
Total Repair Time:Less than 15 mins
6 of 14 people
found this instruction helpful.
Was this instruction helpful to you?
Thank you for voting!
The icemaker quit making ice and the water started forming on the bottom of the ice bucket.
First I removed the electrical plug from the back of the freezer that plugs into the icemaker. I then removed the two hex head screws that hold the icemaker to the wall of the freezer and removed the icemaker. I removed the plastic cover, which incidentally protects the gears, by prying it off with a srewdriver. I removed three small nuts(7mm) which holds the internal cam in place. I removed the cam by pulling it off the shaft. Once I got the part from you folks I reversed the procedure that I just mentioned, and put the icemaker back together. It works great. The part with shipping was around $16.00. A new icemaker was roughly $159.00. If I would have called a technician it would have cost around $300.00 to repair.
Parts Used:
-
John from Anaheim, CA
-
Difficulty Level:Really Easy
-
Total Repair Time:Less than 15 mins
-
Tools:Nutdriver, Screw drivers, Wrench (Adjustable)
2 of 3 people
found this instruction helpful.
Was this instruction helpful to you?
Thank you for voting!
water line cracked
I loosened the compression nut on the valve with my fingers and pulled the water line free from the valve. On the other end, I just pulled it from the hose clamp. Installation in reverse. Force the water line into the fitting on top, Slide the old nut over the line on the bottom. Screw the nut onto the valve. Reach inside the freezer and turn on the ice maker. Done. Before replacing the cardboard grill, you should vacuum the coils on the bottom, front and back. If practical, push it outside and blow it out with an air compressor or a leaf blower.
Parts Used:
-
RUSSELL from BLACK HAWK, SD
-
Difficulty Level:Very Easy
-
Total Repair Time:Less than 15 mins
2 of 3 people
found this instruction helpful.
Was this instruction helpful to you?
Thank you for voting!
Blade on auger became stripped
Ordered at PartSelect and received the auger and blade within days. Printed the parts diagram and proceeded to take the auger apart the time it took would have been much less but I seized the opportunity to do a deep cleaning of the old parts before replacing them....The part diagram was the key to simplicity and the fast shipping was awesome. Thanks I'll be back....
Parts Used:
-
Raymond from Niverville, NY
-
Difficulty Level:Really Easy
-
Total Repair Time:15 - 30 mins
-
Tools:Screw drivers
2 of 3 people
found this instruction helpful.
Was this instruction helpful to you?
Thank you for voting!
Ice maker stopped making ice
I had made a dry run at the repair after watching the instructional film provided by part select and it seemed easy enough.
The only problem was that i needed to use the electrical cord extender (provided) to adapt to my plug type. That presented a problm because it needed to be tucked up out of the way to allow the ice bin to clear. Just needed to be creative in how you wrapped the cord behind the ice maker unit before snugging the attachment screws.
Cranking out ice like crazy.
The only problem was that i needed to use the electrical cord extender (provided) to adapt to my plug type. That presented a problm because it needed to be tucked up out of the way to allow the ice bin to clear. Just needed to be creative in how you wrapped the cord behind the ice maker unit before snugging the attachment screws.
Cranking out ice like crazy.
Parts Used:
-
Robert from Wyckoff, NJ
-
Difficulty Level:Easy
-
Total Repair Time:15 - 30 mins
-
Tools:Screw drivers
2 of 3 people
found this instruction helpful.
Was this instruction helpful to you?
Thank you for voting!
Refrigerator door won't close
First I removed the top hinge of the refrigerator door and then lifted it off the bottom assembly. I had to turn the door on its side to work on the bottom where the broken part was located. I unscrewed the bottom assembly and replaced the broken part with the new door cam. Put it all back together and now the door closes but must be manually pushed to close. When the door was working properly it would shut automatically when released from any position. I think I need to install an additional part - maybe a shim? to make it close automatically. That will be another story.
This was a fairly simple jog to do but since I did not have the proper tools it did take me longer than usual to remove the bolts. I'm happy I did it myself and saved a big repair bill! Thanks to the people at PartSelect.com.
This was a fairly simple jog to do but since I did not have the proper tools it did take me longer than usual to remove the bolts. I'm happy I did it myself and saved a big repair bill! Thanks to the people at PartSelect.com.
Parts Used:
-
CYNTHIA from NEWARK, DE
-
Difficulty Level:Easy
-
Total Repair Time:15 - 30 mins
-
Tools:Wrench (Adjustable)
3 of 6 people
found this instruction helpful.
Was this instruction helpful to you?
Thank you for voting!
Door wouldn't close tight.
I placed books under the door until I had enough to hold the door up about 1/2 inch higher then when it is closed. The books and the magnetic gasket will hold the door, JUST DON'T TRY TO OPEN IT TILL YOU'RE THROUGH. That's about how high the cams lift the door when opened. I removed the two screws holding the door stop. Then removed the two screws holding the lower hinge pin.
It takes two of the cams
and the bottom one is riveted to the hinge. I used a grinder to grind the rivet so I could tap the pin out holding the cam. Put the new cam on and put the pin back in. I didn't put a new rivet, just gravity should hold it. I put the second cam on the hinge pin and one of the screws on the door stop holds it in place after you slide the hinge pin back into the door and replace the screws in the bracket then the door stop.
Make sure your lower door gasket didn't get damaged while the cams weren't working because the door wasn't being lifted up when opened.
It takes two of the cams
and the bottom one is riveted to the hinge. I used a grinder to grind the rivet so I could tap the pin out holding the cam. Put the new cam on and put the pin back in. I didn't put a new rivet, just gravity should hold it. I put the second cam on the hinge pin and one of the screws on the door stop holds it in place after you slide the hinge pin back into the door and replace the screws in the bracket then the door stop.
Make sure your lower door gasket didn't get damaged while the cams weren't working because the door wasn't being lifted up when opened.
Parts Used:
-
charles from moundville, AL
-
Difficulty Level:Really Easy
-
Total Repair Time:15 - 30 mins
-
Tools:Nutdriver
1 person
found this instruction helpful.
Was this instruction helpful to you?
Thank you for voting!
Door Would Not Shut
Same problems as already described .... door would not close, plastic bits on floor, angry, ready to throw-out 15 year old “dog” and blow at least $1,000 on a new appliance!
This repair is dead easy. Remove the two bolts holding the top hinge and lift off the entire door. Don’t be surprised if the original Riser Cam has virtually disintegrated, mine was a wreck. Remove two bolts that retain the old flat metal “shim” and fiber “gasket”.
Fit new Riser Cam and re-use old shim and gasket. Replace door on dome-shape bottom hinge mount and then re-fit top hinge.
If in any doubt order new shim and gasket along with the new cam riser. Or, do as I did, and “manufacture” either of these parts from scrap material found in the workshop ....
This repair is dead easy. Remove the two bolts holding the top hinge and lift off the entire door. Don’t be surprised if the original Riser Cam has virtually disintegrated, mine was a wreck. Remove two bolts that retain the old flat metal “shim” and fiber “gasket”.
Fit new Riser Cam and re-use old shim and gasket. Replace door on dome-shape bottom hinge mount and then re-fit top hinge.
If in any doubt order new shim and gasket along with the new cam riser. Or, do as I did, and “manufacture” either of these parts from scrap material found in the workshop ....
Parts Used:
-
Chris from Lecanto, FL
-
Difficulty Level:Really Easy
-
Total Repair Time:15 - 30 mins
-
Tools:Nutdriver, Socket set
1 person
found this instruction helpful.
Was this instruction helpful to you?
Thank you for voting!
door not closing corecyly
took top bracket off--then removed door--took
bottom bracket off bottom of door and replaced
door closing cam and reasembled---a piece of
cake
bottom bracket off bottom of door and replaced
door closing cam and reasembled---a piece of
cake
Parts Used:
-
steve from winthrop harbor, IL
-
Difficulty Level:Really Easy
-
Total Repair Time:15 - 30 mins
-
Tools:Nutdriver, Screw drivers
1 person
found this instruction helpful.
Was this instruction helpful to you?
Thank you for voting!
Door would close by its self.
After reading the stories here, I purchased one door closing cam. After getting into the problem area, I realized I needed 2 cam, so I put the door back together and ordered another cam. If you have this problem, buy 2 cams.
Parts Used:
-
Kurt from Aurora, IN
-
Difficulty Level:Easy
-
Total Repair Time:15 - 30 mins
-
Tools:Nutdriver
1 person
found this instruction helpful.
Was this instruction helpful to you?
Thank you for voting!
Door would not close due to broken closing cam
First, I was glad I read other posts on this repair as I would have only purchased one of the replacement cams when I needed two! I removed the top door hinge with a screw driver (cover) and small socket set for the door hinge. I then removed the door and removed the bottom hinge (socket set). The bottom hinge had a small rivit that held the bottom cam in place. I used a hack saw to cut off the rivit and replace the cam and secured it with a small machine bolt and nut. I then laid the door on its side and removed the top am from a bracket attached to the bottom of the door. I relaced the cam (second one) and reinserted the screws. I reattached the bottom hinge and then placed the door on the bottom hinge pin. I then held the door in place while inserting the top hinge pin bracket into place and retightening the top screws. I replace the cover with a screw drive which was the ahrdest part in trying to find the hole the small screw gets inserted into. DONE!
Parts Used:
-
Donnette from Flagstaff, AZ
-
Difficulty Level:A Bit Difficult
-
Total Repair Time:15 - 30 mins
-
Tools:Screw drivers, Socket set
1 person
found this instruction helpful.
Was this instruction helpful to you?
Thank you for voting!
Bottom cam at bottom of door broken.
Read the how to's AFTER ordering the part. 2 things....1) I wish I had read the comments first and 2) it was much easier than the comments led me to believe.
Had I read the comments first, I would have known to order BOTH the upper and lower cam....though there not a problem with the operation of the door. It would just have been a tad better if I had both. I'm not wanting to have to pay shipping for an additional part when the door works satisfactorily as it is.
As to the comments on how to do it....I took none of them. I (instead) removed the top hinge, and lifted to door off. I did have to have assistance to get the hole in the door aligned with the post, but that was rather easily done.
Would I do it again.....in a heart beat. I feel that I've save on the repair man making a call at the house, and experience has had me charged $60-$100 for virtually the same amount of service. My cost...shipping and all was under $20.00
Had I read the comments first, I would have known to order BOTH the upper and lower cam....though there not a problem with the operation of the door. It would just have been a tad better if I had both. I'm not wanting to have to pay shipping for an additional part when the door works satisfactorily as it is.
As to the comments on how to do it....I took none of them. I (instead) removed the top hinge, and lifted to door off. I did have to have assistance to get the hole in the door aligned with the post, but that was rather easily done.
Would I do it again.....in a heart beat. I feel that I've save on the repair man making a call at the house, and experience has had me charged $60-$100 for virtually the same amount of service. My cost...shipping and all was under $20.00
Parts Used:
-
Wayne from Concord, NC
-
Difficulty Level:Easy
-
Total Repair Time:15 - 30 mins
-
Tools:Screw drivers, Socket set
1 person
found this instruction helpful.
Was this instruction helpful to you?
Thank you for voting!