




















36368437894 Kenmore Refrigerator - Instructions
Keep searches simple. Use keywords, e.g. "leaking", "pump", "broken" or "fit".
had no access cover on back
-
Ronnie from BATON ROUGE, LA
-
Difficulty Level:Very Easy
-
Total Repair Time:Less than 15 mins
-
Tools:Nutdriver
1 person
found this instruction helpful.
Was this instruction helpful to you?
Thank you for voting!
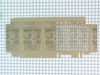
family member melted fan with hair dryer
Unplugged fridge.Removed 2 screws holding a panel. After panel removed took off old fan and inserted new. Quite simple.
Parts Used:
-
Lauraine from Rocky Hill, CT
-
Difficulty Level:Really Easy
-
Total Repair Time:Less than 15 mins
-
Tools:Screw drivers
1 person
found this instruction helpful.
Was this instruction helpful to you?
Thank you for voting!
Light went out in refrigerator
Pop out switch, pull wires, attach wires to new switch and pop back in. Easy smeasy!
Parts Used:

-
Gary from EAST JORDAN, MI
-
Difficulty Level:Really Easy
-
Total Repair Time:Less than 15 mins
-
Tools:Pliers, Screw drivers
1 person
found this instruction helpful.
Was this instruction helpful to you?
Thank you for voting!
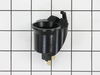
Fridge light dead even with new bulb
1- youtubed the potential diagnoses, 2- resourced and ordered parts, 3- removed old socket, installed new one :-)... My fridge is an older fridge and could've used a screwdriver for eyeglasses. Plug and play easy... YAY!
Parts Used:
-
marj from NEWBURY PARK, CA
-
Difficulty Level:Really Easy
-
Total Repair Time:15 - 30 mins
-
Tools:Screw drivers
1 person
found this instruction helpful.
Was this instruction helpful to you?
Thank you for voting!
The light inside the oven had burned out
0. As a safety precaution, unplug the range or hit the relevant fuse breaker before you start. You might also want to grab a flashlight. Definitely do not try to do this while the oven is hot.
1. Pinch the wire over the light bulb cap to remove it. This is inside the oven at the back.
2. Pop off the hemispherical glass cap.
3. Unscrew the old light bulb, and screw the new light bulb in its place.
4. Put the cap back.
5. Secure the cap by putting the wire back in its slots on the cap.
No tools needed, the cap is just held in place with pressure from the wire.
1. Pinch the wire over the light bulb cap to remove it. This is inside the oven at the back.
2. Pop off the hemispherical glass cap.
3. Unscrew the old light bulb, and screw the new light bulb in its place.
4. Put the cap back.
5. Secure the cap by putting the wire back in its slots on the cap.
No tools needed, the cap is just held in place with pressure from the wire.
Parts Used:

-
Catherine from SEATTLE, WA
-
Difficulty Level:Very Easy
-
Total Repair Time:Less than 15 mins
3 of 7 people
found this instruction helpful.
Was this instruction helpful to you?
Thank you for voting!
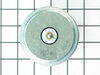
Fridge wasn't cooling and half freezing
Part was perfect fit .Removed fan .three screws.replaced that s it
Parts Used:
-
Wendell Hayes from Dillob, SC
-
Difficulty Level:Really Easy
-
Total Repair Time:30 - 60 mins
-
Tools:Screw drivers
1 person
found this instruction helpful.
Was this instruction helpful to you?
Thank you for voting!
Defrost Heater too old
I disconnected the old defrost heater removing 2 small screws and the electrical connectors, afterward I attached the new part, reconnecting back the electrical connectors and screwing the removed 2 screws.
Parts Used:
-
paula from KEY BISCAYNE, FL
-
Difficulty Level:Really Easy
-
Total Repair Time:1- 2 hours
-
Tools:Wrench set
1 person
found this instruction helpful.
Was this instruction helpful to you?
Thank you for voting!
water leaking from under dishwasher
Water was leaking from under the GE dishwasher, but once we pulled it out, had apparently been going on for a little while. Turning the water off to the dishwasher made it stop, so it was happening even when the unit was not running, potentially indicating somewhere early in the path of the water to and into the machine.
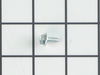
Indeed, inspecting the water inlet vale showed a slow leak. Getting the replacement part was fine, and it fit the electrical, water inlet (existing 90-degree water inlet elbow), and water outlet connections just fine - but the original machine screws that held on the original water inlet valve did not work. It took a little research to figure out the new type of screw required, which was apparently a 10/16 Type AB, which seemed to be a less common type of sheet metal screw (with a point), as opposed to the original flat-ended machine screws. So, after ordering those separately (which were a bit expensive), it went together fine.
A note on the water inlet valve part just indicating the the threading on those parts has changed over time, so potentially ordering the screws to attach it might be worthwhile, would be good information to add about the water inlet valve.
Indeed, inspecting the water inlet vale showed a slow leak. Getting the replacement part was fine, and it fit the electrical, water inlet (existing 90-degree water inlet elbow), and water outlet connections just fine - but the original machine screws that held on the original water inlet valve did not work. It took a little research to figure out the new type of screw required, which was apparently a 10/16 Type AB, which seemed to be a less common type of sheet metal screw (with a point), as opposed to the original flat-ended machine screws. So, after ordering those separately (which were a bit expensive), it went together fine.
A note on the water inlet valve part just indicating the the threading on those parts has changed over time, so potentially ordering the screws to attach it might be worthwhile, would be good information to add about the water inlet valve.
Parts Used:
-
Edward from E LONGMEADOW, MA
-
Difficulty Level:A Bit Difficult
-
Total Repair Time:30 - 60 mins
-
Tools:Pliers, Socket set, Wrench (Adjustable)
1 person
found this instruction helpful.
Was this instruction helpful to you?
Thank you for voting!
Change bulb
-
Louis from LEAGUE CITY, TX
-
Difficulty Level:Really Easy
-
Total Repair Time:30 - 60 mins
-
Tools:Nutdriver
3 of 8 people
found this instruction helpful.
Was this instruction helpful to you?
Thank you for voting!
Broken light switch
took a little more effort than the video show to remove old module and replace new. Works fine now.
Parts Used:
-
Ted from SANDWICH, IL
-
Difficulty Level:Easy
-
Total Repair Time:15 - 30 mins
-
Tools:Screw drivers
1 of 2 people
found this instruction helpful.
Was this instruction helpful to you?
Thank you for voting!
Light was flicking
-
Stephanie from KEARNY, NJ
-
Difficulty Level:Really Easy
-
Total Repair Time:Less than 15 mins
-
Tools:Screw drivers
1 of 2 people
found this instruction helpful.
Was this instruction helpful to you?
Thank you for voting!
Short in the light socket.
Un Plugged the frig. Unlocked the socket by pressing down on the latch. Pulled the socket out ensuring I had enough slack. Unplugged the old socket installed the new. Plugged the frig back in. Tested the switch . Very easy-to-use.
Parts Used:
-
ED from ENON, OH
-
Difficulty Level:Very Easy
-
Total Repair Time:Less than 15 mins
1 of 2 people
found this instruction helpful.
Was this instruction helpful to you?
Thank you for voting!
Fan blade broken
Removed the broken fan blade (just pulled off) and replaced with part purchased PartSelect. Very easy repair, no tools required.
Parts Used:
-
John from Cumberland, MD
-
Difficulty Level:Really Easy
-
Total Repair Time:Less than 15 mins
2 of 5 people
found this instruction helpful.
Was this instruction helpful to you?
Thank you for voting!
Light burnt out.
Turned the wire protector to the side. Turned out the old bulb and replaced it with the new. Turned the wire protector back in place and I'm like new.
Parts Used:
-
Roscoe G from ROCHESTER, NY
-
Difficulty Level:Very Easy
-
Total Repair Time:Less than 15 mins
2 of 6 people
found this instruction helpful.
Was this instruction helpful to you?
Thank you for voting!
socket had melted
pluged the wire harness into the new socket from the back and snaped the socket in place.
Parts Used:
-
Chris from Charlotte, NC
-
Difficulty Level:Really Easy
-
Total Repair Time:Less than 15 mins
1 of 3 people
found this instruction helpful.
Was this instruction helpful to you?
Thank you for voting!