




















36363703600 Kenmore Microwave - Instructions
Keep searches simple. Use keywords, e.g. "leaking", "pump", "broken" or "fit".
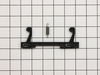
broken latch hook
Removed. Inside frame with putty knife replace new latch attach spring and line up notch of latch in slots. That was the most difficult part replace inside frame. Done!
Parts Used:
-
David from Pittsburgh, PA
-
Difficulty Level:Easy
-
Total Repair Time:15 - 30 mins
Was this instruction helpful to you?
Thank you for voting!
Problem door latch
Snap the plastic trim piece from the inside of the door off.took broken latch out and put the new one in.PS your part came really fast.Thanks
Parts Used:
-
Ron from Southampton, PA
-
Difficulty Level:Easy
-
Total Repair Time:15 - 30 mins
-
Tools:Screw drivers
Was this instruction helpful to you?
Thank you for voting!
Bottom door latch was broken. Microwave was dead.
Read instructions and viewed video. Project would have been very difficult without the instructions and video. Step 1 removed vent grill at top to microwave, by removing two scres. Step 2 removed microwave door by lifting. Step 3 used a one inch plaster knife to separate the plastic interior cover of the door. The video was most helpful. Use the thin blade of the plaster knife to locate snap locations of the plastic cover. Step 4 removed broken latch by applying slight pressure to the outside. Observed the attachment of the 'spring'. Step 5 installed new latch and spring. Step 6 reinstalled interior plastic cover. Step 7 install door. Step 8 install vent cover with two screws. Step 9 test unit.
Parts Used:
-
James from Severn, MD
-
Difficulty Level:A Bit Difficult
-
Total Repair Time:30 - 60 mins
-
Tools:Screw drivers
Was this instruction helpful to you?
Thank you for voting!
microwave won't heat
bought a fuse but that didn't solve the problem. Guess I need a new microwave
Parts Used:

-
Stephanie from Kernersville, NC
-
Difficulty Level:Really Easy
-
Total Repair Time:Less than 15 mins
-
Tools:Pliers, Screw drivers
Was this instruction helpful to you?
Thank you for voting!
Oven would not operate after we noticed that the catch inside the door was broken
Removed the door, removed the old choke cover (breaking all the stap catches), removed the slide door latch assembly from the spring (the most difficult task) then reassembly of the latch to spring, sliding into the grooves along the inside of the door, the installing the new choke cover (very easy with the new one) taking care not the break any of the staps. Easy enough! Another difficult task was to re-install the door to the frame. It appears that the lower "hinge" is slightly bent down to allow easy install but the door now makes a slight sweeking sound when opening and closing.
Parts Used:
-
Peter from Madison, AL
-
Difficulty Level:Really Easy
-
Total Repair Time:Less than 15 mins
-
Tools:Screw drivers
Was this instruction helpful to you?
Thank you for voting!
broken door latch
I held the door open while the repair man took the black facing off and replaced the latch and reinstalled the facing I was worn out
Parts Used:
-
Mark from Meridian, TX
-
Difficulty Level:Really Easy
-
Total Repair Time:Less than 15 mins
Was this instruction helpful to you?
Thank you for voting!
I broke the glass tray
I'm writing because I have never in my life had such an easy time finding a part, ordering it, and receiving it! Your service is truly unbelievable. I still don't believe it and I experienced it. Nothing went wrong and it could not have been easier. Please don't go away.
Parts Used:

-
Kimberly from San Tan Valley, AZ
-
Difficulty Level:Really Easy
-
Total Repair Time:Less than 15 mins
Was this instruction helpful to you?
Thank you for voting!
Glass rotating tray cracked and broke when cooking
This is the tray the glass cooking tray rest on and rotates the glass during cooking. The metal tray was installed upside down. The rotating glass tray was not properly installed. The oven was at a very high temp. and the weight of the utensil on the glass was not supported correctly. Result, big " pop " and broken glass tray. Note this is the second glass repaced. The first one dropped while removing it from the oven. It stuck to the bottom of the cooking dish and then fell to the floor. Pop, big breakage. Maybe you can learn from my mistakes.
Parts Used:
-
paul g. from westlake village, CA
-
Difficulty Level:Really Easy
-
Total Repair Time:Less than 15 mins
Was this instruction helpful to you?
Thank you for voting!
drop and shattered the glass tray
It was so easy to order the part on this website. It came carefully packaged and quickly! Thank you!
Parts Used:
-
Nicole from Lathrop, CA
-
Difficulty Level:Really Easy
-
Total Repair Time:Less than 15 mins
Was this instruction helpful to you?
Thank you for voting!
Broken Glass Cooking Tray: need replacement part
Took item from sealed box and removed protective bubble wrap. Placed tray in microwave, aligning tray with turntable sprockets. Perfect fit, perfect match! And the part arrived in three days and was very competitively priced. What more is there to stay? Will use PartSelect for other replacement parts. No brainer!
Parts Used:
-
Steven D from Seminole, FL
-
Difficulty Level:Really Easy
-
Total Repair Time:Less than 15 mins
Was this instruction helpful to you?
Thank you for voting!
Broken Glass Tray
-
ISAAC from MADAWASKA, ME
-
Difficulty Level:Really Easy
-
Total Repair Time:Less than 15 mins
Was this instruction helpful to you?
Thank you for voting!
broken micro tray
-
william from San Marcos, CA
-
Difficulty Level:Really Easy
-
Total Repair Time:Less than 15 mins
Was this instruction helpful to you?
Thank you for voting!
Glass tray broke in microwave
-
Ralph from Puyallup, WA
-
Difficulty Level:Really Easy
-
Total Repair Time:Less than 15 mins
Was this instruction helpful to you?
Thank you for voting!
Broken microwave glass tray
-
Frank from Arlington, VA
-
Difficulty Level:Really Easy
-
Total Repair Time:Less than 15 mins
Was this instruction helpful to you?
Thank you for voting!
Change a burnt out bulb
Opened the lid over the bulb by removing one screw. Removed old bulb; a bayonet type with delicate prongs. Inserted new bulb. Best to turn off circuit breaker toi the micro for safety reasons.
Parts Used:

-
George from Fort Myers, FL
-
Difficulty Level:Really Easy
-
Total Repair Time:Less than 15 mins
-
Tools:Screw drivers
Was this instruction helpful to you?
Thank you for voting!