




















36361542310 Kenmore Washer Dryer Combo - Instructions
Keep searches simple. Use keywords, e.g. "leaking", "pump", "broken" or "fit".
dryer handle broke off

-
TERESA from IRONDALE, AL
-
Difficulty Level:Very Easy
-
Total Repair Time:Less than 15 mins
7 of 9 people
found this instruction helpful.
Was this instruction helpful to you?
Thank you for voting!
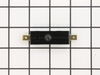
Dishwasher wouldn’t start
Took the screws out of the back of the doorl located the switch and replaced it put screws back in and it was fixed
Parts Used:
-
Stephen from MARENGO, OH
-
Difficulty Level:Really Easy
-
Total Repair Time:30 - 60 mins
-
Tools:Screw drivers
7 of 10 people
found this instruction helpful.
Was this instruction helpful to you?
Thank you for voting!
The Front Drum Glides wore out
I first unplugged the unit, opened the top, disconnected and took off the control panel, took off the front panel to determine the source of the squeaking noise coming from the Dryer. I saw that 3 of the 4 Front Drum Glides were gone and the drum had worn away significant amounts of plastic from the Top Bearing Assembly. I purchased the Top Bearing Assembly and a set of 4 Front Drum Glides. Disassembled the damaged parts and reassembled with the new replacement parts. The reassembly took less than 20 minutes. I plugged in the Dryer and viola! It works as good as new.
Parts Used:

-
Al from Elmhurst, IL
-
Difficulty Level:Really Easy
-
Total Repair Time:15 - 30 mins
-
Tools:Screw drivers
6 of 7 people
found this instruction helpful.
Was this instruction helpful to you?
Thank you for voting!
Dishwasher would not start
Removed panel to access the interlock switches. There were two. The button on one switch was fine and the button on the other would not depress. Ran a continuity test and it failed. The switch also had a burnt smell
Parts Used:
-
Dameon from SMYRNA, DE
-
Difficulty Level:Easy
-
Total Repair Time:1- 2 hours
-
Tools:Pliers, Screw drivers, Socket set
6 of 7 people
found this instruction helpful.
Was this instruction helpful to you?
Thank you for voting!
Tub seal leaking, grinding noise on spin.
Purchased spanner wrench for tub nut wouldn’t budge, impacted off. Then spin tub took 2days to get loose, lots of WD40 , also heated up center area, used a small sledgehammer head to hit a socket on the large part of the shaft . Had to take out outer tub to replace seal and support bearing unit.
Parts Used:
-
Lee from GRANDVILLE, MI
-
Difficulty Level:Difficult
-
Total Repair Time:More than 2 hours
-
Tools:Pliers, Screw drivers, Socket set
5 of 5 people
found this instruction helpful.
Was this instruction helpful to you?
Thank you for voting!
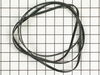
The dryer drum wasn't spinning, but I could hear the motor and feel the heat from the heating element.
UNPLUG the dryer. I removed the top panel by removing the two screws at the top of the dryer door. There are some hooks toward the back of the top panel, so you'll need to slide it to the left to get it off. The front panel needs to be removed by removing two screws just inside the top left and right corners. Lift and set it aside. I didn't disconnect the door wiring, but you can if you need to do so. I just spun the front panel to the left and out of the way. With the drum exposed, I confirmed the belt was broken. I replaced the belt, then the front panel and top panel. While I was inside the dryer, I did a through cleaning with the vacuum to get all the lint.
The video on the site is easy to understand and a snap to follow.
The video on the site is easy to understand and a snap to follow.
Parts Used:
-
David from LAWRENCEVILLE, GA
-
Difficulty Level:Really Easy
-
Total Repair Time:30 - 60 mins
-
Tools:Screw drivers
5 of 5 people
found this instruction helpful.
Was this instruction helpful to you?
Thank you for voting!
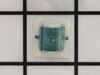
Plastic housing for the door latch mounted in the chassis of the dryer was damaged so the section of the latch in the door wouldn't align.
This kept the interlock open and shut off the dryer when the door swung open The broken latch was popped out using a flat blade screwdriver and the replacement snapped into place by hand. Good as new!
Parts Used:
-
STAN from UPPER ARLNGTN, OH
-
Difficulty Level:Very Easy
-
Total Repair Time:Less than 15 mins
-
Tools:Screw drivers
5 of 5 people
found this instruction helpful.
Was this instruction helpful to you?
Thank you for voting!
Tub seal leaking, hub nut stuck, tub stuck.
If you're handy with a right angle grinder and a cutoff wheel, it can be done.
Order the washer hub, hub nut, and the spring washer above the hub nut.
Get the agitator out. a pair of flat bars and some hammering on the agitator retaining bolt helps a lot. Loosen the retaining nut a few turns, pry and hammer at the same time, repeat until he agitator comes out.
On the bottom of the tub assembly is a brown plastic bracket that holds the spin solenoid. Remove it before you dismount the tub assembly. It's easy to break, and it costs $65.
Dismount the tub assembly from the cabinet. Turn it over and remove the motor. Unbolt everything that can be unbolted. Cut away enough of the large metal plate that was bolted to the bottom of the tub so that the tub assembly will stand upright on a five gallon bucket.
Stand the tub assembly upright on the five gallon bucket. Cut away the hub nut. Try not to cut into the black steel disk on the bottom of the tub. Soak the metal parts with PB Blaster, Kroil, or similar. Slip a three foot long piece of 1 1/4 pipe or conduit over the stem that held the agitator. Hold the pipe upright. Drop a four foot long steel rod into the pipe. Use the steel rod as a slide hammer and whale away. Stop frequently to spray your penetrant, and keep hammering. Eventually you'll drive the old washer hub out of the drum. Remember, everything is plastic and not indestructible..
Before reassembly turn the tub over and clean up the mating surfaces, ditto the agitator. When reassembling use antisieze compound on the mating surfaces.
Order the washer hub, hub nut, and the spring washer above the hub nut.
Get the agitator out. a pair of flat bars and some hammering on the agitator retaining bolt helps a lot. Loosen the retaining nut a few turns, pry and hammer at the same time, repeat until he agitator comes out.
On the bottom of the tub assembly is a brown plastic bracket that holds the spin solenoid. Remove it before you dismount the tub assembly. It's easy to break, and it costs $65.
Dismount the tub assembly from the cabinet. Turn it over and remove the motor. Unbolt everything that can be unbolted. Cut away enough of the large metal plate that was bolted to the bottom of the tub so that the tub assembly will stand upright on a five gallon bucket.
Stand the tub assembly upright on the five gallon bucket. Cut away the hub nut. Try not to cut into the black steel disk on the bottom of the tub. Soak the metal parts with PB Blaster, Kroil, or similar. Slip a three foot long piece of 1 1/4 pipe or conduit over the stem that held the agitator. Hold the pipe upright. Drop a four foot long steel rod into the pipe. Use the steel rod as a slide hammer and whale away. Stop frequently to spray your penetrant, and keep hammering. Eventually you'll drive the old washer hub out of the drum. Remember, everything is plastic and not indestructible..
Before reassembly turn the tub over and clean up the mating surfaces, ditto the agitator. When reassembling use antisieze compound on the mating surfaces.
Parts Used:

-
David from ABINGDON, IL
-
Difficulty Level:Very Difficult
-
Total Repair Time:More than 2 hours
-
Tools:Socket set, Wrench (Adjustable), Wrench set
5 of 6 people
found this instruction helpful.
Was this instruction helpful to you?
Thank you for voting!
Replaced Drum Bearing Front And Rear
Pulled the unit all apart to replace the rear drum bearing. Also replaced the front bearing. Works like brand new. Easier then I thought
Parts Used:
-
philip from pickens, SC
-
Difficulty Level:Easy
-
Total Repair Time:1- 2 hours
-
Tools:Nutdriver, Screw drivers, Socket set
5 of 6 people
found this instruction helpful.
Was this instruction helpful to you?
Thank you for voting!
Rattling noise and banging during spin cycles
I removed the washer front cover and slanted cover between washer and drier to see where the noise was coming from. I found 2 rubber stabilizing straps broken away from the tub cap and popped off the snap on tub cap to see if I could repair it. I could not, so, I ordered a new tub drip cap thinking that would solve the problem. Well, the new cap was not identical to the one I took out. The pegs that the straps are supposed to connect to were nonexistent ... frustrating. After reading several help files, I discovered that GE had changed the design of the drip cap intentionally and had done away with the stabilizing straps. There was no mention of the design change in the instructions that came with the new part. Okay, now the real fun began...LOL. Removing those darned tub hangers was a challenge because I was working alone and in a very confined area. The instructions said to remove the 2 front hangers and let the tub sit on the floor. I did not like doing that for fear of damaging other parts under the tub. Additionally, I could not reach the rear hangers if I did it the recommended way. So, I used some oak boards and straps to lift (jack up) the tub as high as possible and to remove the weight off of the tub hangers. With the weight removed from the hangers, they snapped out of place...not easily. The 2 rear hangers are hard to reach and the plastic hanger caps were difficult to unsnap. I had to slam the plastic caps against the frame to get them unsnapped from the metal rods. The instructions did not contain any description of how the hangers are connected or how to get them removed. Anyway, I put it all back together and tested it. Everything is working fine now...minus the stabilizing straps. It would be very easy to injure yourself doing this job. Take your time and consider the consequences before jumping into this alone or with improper lifting equipment or mechanical skills. It was tedious and frustrating but not impossible. Good luck!
Parts Used:

-
MIKE from W JEFFERSON, NC
-
Difficulty Level:Difficult
-
Total Repair Time:More than 2 hours
-
Tools:Screw drivers
4 of 4 people
found this instruction helpful.
Was this instruction helpful to you?
Thank you for voting!
dishwasher did not start
Took out interlock switch (two leads) and replaced with new one. As simple as that.
Parts Used:
-
Lawrence from ROLESVILLE, NC
-
Difficulty Level:Very Easy
-
Total Repair Time:Less than 15 mins
7 of 13 people
found this instruction helpful.
Was this instruction helpful to you?
Thank you for voting!
Old handle broke off.
-
Emily from BUENA VISTA, CO
-
Difficulty Level:Very Easy
-
Total Repair Time:Less than 15 mins
4 of 4 people
found this instruction helpful.
Was this instruction helpful to you?
Thank you for voting!
Dryer only runs when Start button is pressed
Originally I thought that the Start switch was the issue, and ordered one. After taking the machine apart and running some tests, the issue was clearly not this switch, but a different switch that cuts power when the belt tension is no longer being applied to the idler pulley spring. I fixed this by bypassing this switch, which in my opinion, is error prone and serves no purpose. The switch can be accessed by removing the control panel, then top cover, then front cover, then drum. The bogus switch is screwed to the bottom left, near the motor. The idler pulley spring rests against it. Just disconnect the switch wires, then clip, strip and crimp then together to bypass the switch, and voila! Now if the belt breaks or comes off the pulley, the motor will continue to run, but you wont hear the wet clothes flopping around, so that will be the indication that you have a belt problem. Hope that helps!
Parts Used:
-
Tim from Pembroke, NH
-
Difficulty Level:A Bit Difficult
-
Total Repair Time:30 - 60 mins
-
Tools:Nutdriver, Screw drivers
5 of 7 people
found this instruction helpful.
Was this instruction helpful to you?
Thank you for voting!
Dryer was catching clothes and would not release without very hard pulling, consequently twisted and grease marked fabric, ruining items.
I followed the very easy YouTube video and got the three tools I needed before beginning. I started with removing the parts of the dryer and that was extremely simple by following the steps in the video. Took the door off last, located the parts that need replaced that didn't require any tools at all. Then put all the parts of the dryer back on in the order I removed them. The entire process was about 25 minutes but I would say I spent more time really cleaning the dryer and lint build up than actually doing the repair. Video was super thorough and easy to follow, I've never attempted any kind of repair of an appliance and I'm extremely happy that I had the video and the parts that were recommended to fix my problem, were spot on. Saved me hundreds of dollars and time. Thank you so much!
Parts Used:

-
De Ann from FORKS, WA
-
Difficulty Level:Very Easy
-
Total Repair Time:15 - 30 mins
-
Tools:Screw drivers
3 of 3 people
found this instruction helpful.
Was this instruction helpful to you?
Thank you for voting!
Clothes were catching between the drum and front of dryer. Also was squeaking at times.
Opened dryer door and removed two screws that held front of top panel on. Lifted top panel off and removed two screws that held front panel to side panels. Tipped front panel forward and replaced all four slides. Cleaned everything off and put back together. Works great again. Thanks for this site and for others that have done these repairs before and posted their stories.
Parts Used:
-
Karl from Milford, NE
-
Difficulty Level:Easy
-
Total Repair Time:Less than 15 mins
-
Tools:Screw drivers
3 of 3 people
found this instruction helpful.
Was this instruction helpful to you?
Thank you for voting!