




















36358895894 Kenmore Refrigerator - Instructions
Keep searches simple. Use keywords, e.g. "leaking", "pump", "broken" or "fit".
Water line was broken at the bottom of the freezer door.
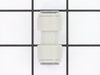
There is no access to the inside of the door to replace the water line. I was able to insert a 1/4" drip line barbed connector into the old line at the base of the door and then connect that to a piece of the plastic tubing which I then connected back to the original water supply tubing with the 5/16" union. It took three attempts to get the tubing through the bottom hinge without a crimp in it. It's best to have a second person to hold the door while you "fish" the tubing through the hinge.
Parts Used:
-
Eugene from Palm Springs, CA
-
Difficulty Level:Difficult
-
Total Repair Time:1- 2 hours
-
Tools:Nutdriver, Screw drivers
8 of 12 people
found this instruction helpful.
Was this instruction helpful to you?
Thank you for voting!
Refrigerator would not defrost
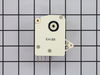
When it was discovered there was a cooling problem in the refrigerator, I went to parts select web site and went through the troubleshooting section. Then I tested the defrost timer and the defrost element as directed by the web site. I then found out doing this, that is was the defrost timer. I ordered the part online and it was delivered THE NEXT DAY! I removed the bottom panel of the fridge, removed the screw holding the old timer, removed the wires, and reversed the procedure to install the new one. It has been 1 week, and everything is working great. Thank you PartSelect.
I have since then recommended you to a relative who was having the same problem. Thanks again.
I have since then recommended you to a relative who was having the same problem. Thanks again.
Parts Used:
-
Thomas from Dresden, OH
-
Difficulty Level:Really Easy
-
Total Repair Time:Less than 15 mins
-
Tools:Nutdriver
7 of 10 people
found this instruction helpful.
Was this instruction helpful to you?
Thank you for voting!
Coroded Water Valve-no longer dispensing water, then leaked water from bottom of fridge
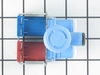
Ordered the replacement parts-both water valves, printed the schmatic, then removed and replaced both parts. Was fairly straight forward, rmeember to unplg the fridge before you start. Problem solved, should be good for another 10 yrs.
Hard water prob caused the corrosion. Also replaced the water hose while I was back there, water tastes 100% better.
Hard water prob caused the corrosion. Also replaced the water hose while I was back there, water tastes 100% better.
Parts Used:
-
Christian from chandler, AZ
-
Difficulty Level:Easy
-
Total Repair Time:15 - 30 mins
-
Tools:Screw drivers, Wrench (Adjustable)
7 of 10 people
found this instruction helpful.
Was this instruction helpful to you?
Thank you for voting!
Refrigerator water dispenser tube (5/16"OD) broken at the back by valve
Tube was too short so I used the union to attach additional tubing to reach the valve at the lower rear of refrigerator
Parts Used:
-
Peter from Marietta, GA
-
Difficulty Level:Really Easy
-
Total Repair Time:15 - 30 mins
-
Tools:Wrench set
6 of 7 people
found this instruction helpful.
Was this instruction helpful to you?
Thank you for voting!
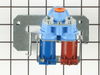
the connection on the valve was stripped
After trying to reconnect a flexible hose to the water valve several times I stripped the connection to the water valve, causing it to have a slow leak.
Twice I tried to have an appliance parts store order the part without success. (I even brought them the part from the refrigerator to show them how it looked. ) they ordered the wrong part two times and then said they could not figure out what part I needed.
Finally my wife and I went on line, keyed in the model number and searched for parts of the refrigerator related to the ice maker. We saw the correct part and ordered it ourselves.
It was a success. I changed the part within 30 minutes and the ice maker has been working ever since. I would search and find a part on my own again before trusting someone who supposedly sold parts as their business.
Twice I tried to have an appliance parts store order the part without success. (I even brought them the part from the refrigerator to show them how it looked. ) they ordered the wrong part two times and then said they could not figure out what part I needed.
Finally my wife and I went on line, keyed in the model number and searched for parts of the refrigerator related to the ice maker. We saw the correct part and ordered it ourselves.
It was a success. I changed the part within 30 minutes and the ice maker has been working ever since. I would search and find a part on my own again before trusting someone who supposedly sold parts as their business.
Parts Used:
-
James from St. Louis, MO
-
Difficulty Level:Easy
-
Total Repair Time:15 - 30 mins
-
Tools:Pliers, Screw drivers
8 of 14 people
found this instruction helpful.
Was this instruction helpful to you?
Thank you for voting!
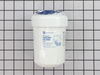
union connector leaking
replaced with new connector and it worked great. also replaced the water filter and that was super easy!
Parts Used:
-
Amy from Bryan, TX
-
Difficulty Level:Really Easy
-
Total Repair Time:15 - 30 mins
-
Tools:Pliers
7 of 11 people
found this instruction helpful.
Was this instruction helpful to you?
Thank you for voting!
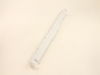
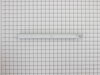
Broken drawer slides.
Pretty much self explanatory.Removed drawer and anything on top of glass shelf.Remove two screws holding on slide.Replace with new slide.Repeat on other side.Replace shelf and drawer.
Parts Used:
-
H T from South Haven, MI
-
Difficulty Level:Really Easy
-
Total Repair Time:15 - 30 mins
-
Tools:Screw drivers
5 of 5 people
found this instruction helpful.
Was this instruction helpful to you?
Thank you for voting!
Ice trap door would not open
1. Unplug refrigerator or flip breaker to kill power to the refrigerator.
2. With hands, gently pull the bottom lip of the 3" X 11" face plate panel above the dispenser head.
3. Remove the 4 screws that are under the removed panel.
4. Tip the assemby down to reveal 2 plugs.
5. Gently pull the 2 plugs to disconnect.
6. Open the assembly to reveal the solenoid.
7. There are 3 screws at the base of the solenoid. The center screw attaches to the green ground wire.
8. Remove the three screws.
9. Observe: The bracket at the top of the solenoid unit tucks behind a 4th screw above the solenoid. You may need to loosen this screw to relesae the solenoid.
10.Unplug the yellow and red connector to the solenoid. It should not be totally free to remove.
11. Put the plunger into the solenoid. Note that the plunger has an opening to insert the white plastic trigger for the trap door. Make sure the trigger is inserted into this opening before reassembling.
12. Plug the yellow and red connector into the new solenoid.
13. Position the new solenoid to match the screw holes. The bracket at the top of the solenoid tucks under the 4th screw. Tighten as necessary.
14. Insert the green ground wire into the middle screw hole at the base of the solenoid and tighten.
15. Insert the two screws to either side of the ground wire and tighten.
16. Gently reconnect the two plugs.
17. Tip the assembly back into place making sure the trap door and hoses are lined up correctly.
18. Replace the 4 screws.
19. Snap the face plate back into place.
20. Turn on the power and give it a try!
I used other instructions provided by customers on the website. They were very useful.
This is the second time we replaced this unit. The first replacement failed within the one-year warranty period. I called customer service and they had a replacement part and refund for the previous part on its way immediately. Excellent service!
2. With hands, gently pull the bottom lip of the 3" X 11" face plate panel above the dispenser head.
3. Remove the 4 screws that are under the removed panel.
4. Tip the assemby down to reveal 2 plugs.
5. Gently pull the 2 plugs to disconnect.
6. Open the assembly to reveal the solenoid.
7. There are 3 screws at the base of the solenoid. The center screw attaches to the green ground wire.
8. Remove the three screws.
9. Observe: The bracket at the top of the solenoid unit tucks behind a 4th screw above the solenoid. You may need to loosen this screw to relesae the solenoid.
10.Unplug the yellow and red connector to the solenoid. It should not be totally free to remove.
11. Put the plunger into the solenoid. Note that the plunger has an opening to insert the white plastic trigger for the trap door. Make sure the trigger is inserted into this opening before reassembling.
12. Plug the yellow and red connector into the new solenoid.
13. Position the new solenoid to match the screw holes. The bracket at the top of the solenoid tucks under the 4th screw. Tighten as necessary.
14. Insert the green ground wire into the middle screw hole at the base of the solenoid and tighten.
15. Insert the two screws to either side of the ground wire and tighten.
16. Gently reconnect the two plugs.
17. Tip the assembly back into place making sure the trap door and hoses are lined up correctly.
18. Replace the 4 screws.
19. Snap the face plate back into place.
20. Turn on the power and give it a try!
I used other instructions provided by customers on the website. They were very useful.
This is the second time we replaced this unit. The first replacement failed within the one-year warranty period. I called customer service and they had a replacement part and refund for the previous part on its way immediately. Excellent service!
Parts Used:
-
Susan from Polson, MT
-
Difficulty Level:Really Easy
-
Total Repair Time:15 - 30 mins
-
Tools:Screw drivers
6 of 8 people
found this instruction helpful.
Was this instruction helpful to you?
Thank you for voting!
Water leaking from refrigerator
First, I moved the refrigerator out from the wall, unplugged from the electrical outlet, disconnected the copper tubing to the refrigerator, removed screws holding the cardboard backing, removed the nuts holding the assembly to the refrigerator and pulled it out. At that point, I disconnected the tubing units and wiring connectors from the assembly one by one attaching to the new assembly as I went.
However, this was not possible in the case of two wiring connectors. Evidently, the replacement part was made differently than the original. I had to rewire the replacement part as it allowed and then put the reconnected assembly back in place. I then placed the cardboard panel and reattached the copper tubing. Everything is working and no more leaks!
However, this was not possible in the case of two wiring connectors. Evidently, the replacement part was made differently than the original. I had to rewire the replacement part as it allowed and then put the reconnected assembly back in place. I then placed the cardboard panel and reattached the copper tubing. Everything is working and no more leaks!
Parts Used:
-
Kenneth from Pompano Beach, FL
-
Difficulty Level:Easy
-
Total Repair Time:1- 2 hours
-
Tools:Screw drivers, Wrench set
6 of 8 people
found this instruction helpful.
Was this instruction helpful to you?
Thank you for voting!
Unit had stopped making ice
Ordered the icemaker replacement. unplugged the unit, followed the simple instructions and got it done in less than 30 minutes. It did take a LONG time to start making ice. But it's working now.
Parts Used:
-
Ron from ORANGE, CA
-
Difficulty Level:Really Easy
-
Total Repair Time:30 - 60 mins
-
Tools:Nutdriver, Screw drivers
5 of 5 people
found this instruction helpful.
Was this instruction helpful to you?
Thank you for voting!
Cold water for door - leaked on floor
Pulled new tubing to the tank and put a union about 8 inches down from tank to new tubing. Great repair. Parts not readily available locally.
Parts Used:
-
JOSEPH from SURFSIDE, FL
-
Difficulty Level:Easy
-
Total Repair Time:30 - 60 mins
5 of 5 people
found this instruction helpful.
Was this instruction helpful to you?
Thank you for voting!
The Ice Flapper warped and clogged up the Ice Shoot
I bought a Flapper replacement part from Parts Select. I installed it following their very complete on-line video directions. Their complete and easy to follow directions made my job very easy, and the work was completed without any problems and just as good as if it were done by a professional repair person. I am proud of my work, it couldn't have been done without their video insructions. Also I got delivery of the part within two days of my order. I will alway look for Parts Select any time I need an applicance repaired. Thanks to Parts Select!
Parts Used:
-
Ronald from Elkridge, MD
-
Difficulty Level:Really Easy
-
Total Repair Time:15 - 30 mins
-
Tools:Screw drivers
5 of 6 people
found this instruction helpful.
Was this instruction helpful to you?
Thank you for voting!
slide rail broke causing shelf to fall
repair was simple removed glass shelf and removed the two screws holding rail in place. I was really amazed at the quick service that I had receiced, I ordered two of the same part and they had the instructions to send back the additional part in my email the next day. Thanks for your help.
Parts Used:
-
Mark from Albuquerque, NM
-
Difficulty Level:Really Easy
-
Total Repair Time:15 - 30 mins
-
Tools:Nutdriver
5 of 6 people
found this instruction helpful.
Was this instruction helpful to you?
Thank you for voting!
Ice Maker would not fill.
Was concerned that new icemaker was quite a bit different than the one we were replacing. Called GE to confirm it was correct.
Went ahead and installed the unit, using the supplied electric cable adapter.
A little difficult to deal with the extra cable, but everything worked OK and it's making ice normally.
Went ahead and installed the unit, using the supplied electric cable adapter.
A little difficult to deal with the extra cable, but everything worked OK and it's making ice normally.
Parts Used:
-
Charles from Keller, TX
-
Difficulty Level:Easy
-
Total Repair Time:15 - 30 mins
-
Tools:Screw drivers
5 of 6 people
found this instruction helpful.
Was this instruction helpful to you?
Thank you for voting!
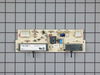
ice being made but would not dispense
Easy repair. Snapped cover off control panel. Removed 4 phillips head screws on control board assembly. Removed (2) connectors from assembly and pulled out defective unit. Installed new control board in reverse order. Everything now working. Very fast and easy repair once you have the part.
Parts Used:
-
Robert from Orlando, FL
-
Difficulty Level:Easy
-
Total Repair Time:15 - 30 mins
-
Tools:Screw drivers
5 of 6 people
found this instruction helpful.
Was this instruction helpful to you?
Thank you for voting!