




















36314582100 Kenmore Dishwasher - Instructions
Keep searches simple. Use keywords, e.g. "leaking", "pump", "broken" or "fit".
Leaked at bottom of door
I took the inside of door off to install both gasket and gasket insert. Much easier this way. Also it’s much easier to fish locking handle through the door if you extend the handle half way and put through opening when raising the door.
Parts Used:

-
Harry from CLEVELAND, OH
-
Difficulty Level:Really Easy
-
Total Repair Time:15 - 30 mins
2 of 2 people
found this instruction helpful.
Was this instruction helpful to you?
Thank you for voting!
door latch broken
I watched the convenient video and saved an old machine that I've grown to love. Plus I didn't have to pay a repair service or have to buy a new machine.
Thanks GE,
T. Dunn
Thanks GE,
T. Dunn
Parts Used:
-
Thomas from COLUMBUS, GA
-
Difficulty Level:Really Easy
-
Total Repair Time:15 - 30 mins
-
Tools:Screw drivers
2 of 2 people
found this instruction helpful.
Was this instruction helpful to you?
Thank you for voting!
replace door gasket
from the information previous customers had written.
it saved a lot of fustration and time
and best of all the dish washer does not leak.
it saved a lot of fustration and time
and best of all the dish washer does not leak.
Parts Used:
-
forrest from stuart, FL
-
Difficulty Level:Really Easy
-
Total Repair Time:15 - 30 mins
-
Tools:Screw drivers
2 of 3 people
found this instruction helpful.
Was this instruction helpful to you?
Thank you for voting!
Leaking small hose.
At first I thought I would call a repair man.Then I thought-that will be at least $100!So we went online and found the part.Took about four days to arrive.I pulled the dishwasher out and turned it on it's front.The little leaking hose was easy to remove,two clamps,and the new one installed.Total cost-$14.00.
Parts Used:
-
Bruce from Isleton, CA
-
Difficulty Level:Easy
-
Total Repair Time:15 - 30 mins
-
Tools:Pliers, Screw drivers
2 of 3 people
found this instruction helpful.
Was this instruction helpful to you?
Thank you for voting!
dishwasher did'nt drain water . solinoid was melted and stuck
First I removed the two screws that hold the solinoid in place,then I removed the e clip and unpluged the wire and pulled out the plastic lever with the solinoid and springs. To install Solinoid:First I bolted on the bracket ,then I hooked in the spring in the plastic lever and installed lever on shaft then I hooked in the long spring to the bracket small hole in the bottum then I installed the e clip next I pluged in the wire.Then I tried the Washer .Averthing works fine.
Parts Used:
-
Ben from florida, MI
-
Difficulty Level:Easy
-
Total Repair Time:15 - 30 mins
-
Tools:Screw drivers
2 of 3 people
found this instruction helpful.
Was this instruction helpful to you?
Thank you for voting!
water left in dishwasher after wash
Open door, remove lower wash rack, remove 4 screws holding screen in rear of inside tub with 1/4 inch socket. Unscrew piston and nut assy for checkvalve, sounds like a mouthful but it is only 1 part. Checkvalve has 2 small ears on it which allow you to twist it out, it has treads on it. Flapper on check valve flapper rots away and water pumps back into tub instead of being routed to drain line to garbage disposal. Part with shipping was just over $20.
Parts Used:
-
mike from tampa, FL
-
Difficulty Level:Easy
-
Total Repair Time:15 - 30 mins
-
Tools:Socket set
2 of 3 people
found this instruction helpful.
Was this instruction helpful to you?
Thank you for voting!
The dishwasher would not drain water out.
I removed 2 screws a wire plug connector and replaced the old part. The total repair including putting the cover plate back on only took about 15 minutes. Also I saved approximately $130.00 by doing this repair my self.
Parts Used:
-
Rick from Rimersburg, PA
-
Difficulty Level:Really Easy
-
Total Repair Time:Less than 15 mins
-
Tools:Screw drivers, Socket set
2 of 3 people
found this instruction helpful.
Was this instruction helpful to you?
Thank you for voting!
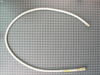
Couldn't drain water
I connected one end of hose to the drain using a hose clamp and screwdriver then connected the other end to the dishwasher using anouther hose clamp and a screwdriver..
Parts Used:
-
Janice from Rockville, MO
-
Difficulty Level:Really Easy
-
Total Repair Time:Less than 15 mins
-
Tools:Screw drivers
4 of 9 people
found this instruction helpful.
Was this instruction helpful to you?
Thank you for voting!
Water not draining.
Removed the 4 screws on front inspection plate and had easy access to solenoid switch. Unplugged unit and switched out with repair kit. So easy a caveman could do it...
Parts Used:
-
Eric from Mayetta, KS
-
Difficulty Level:Really Easy
-
Total Repair Time:Less than 15 mins
-
Tools:Screw drivers
2 of 3 people
found this instruction helpful.
Was this instruction helpful to you?
Thank you for voting!
leaking water out of the bottom of dishwasher door
Simply opened the dishwasher door, removed the gasket insert located in the middle inside of the door and replaced with new. Also went ahead and replaced the seal on the inner edge of the inside dishwasher door. Found very simple instructions on Google on how to do make this repair. Very easy!
Parts Used:
-
stephanie from loganville, GA
-
Difficulty Level:Really Easy
-
Total Repair Time:Less than 15 mins
-
Tools:Screw drivers
3 of 6 people
found this instruction helpful.
Was this instruction helpful to you?
Thank you for voting!
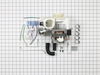
Dishwasher would not drain
Ordered motor and pump and replaced. Motor pump kit also comes with a drain solinoid so if that was the problem the kit repaired it. One issue is the size of the hanger to ensure the pump does not just hang on its mount. The directions were not very clear and after some trial and error I got it to work to.
Parts Used:
-
kevin from wellington, FL
-
Difficulty Level:Easy
-
Total Repair Time:30 - 60 mins
-
Tools:Nutdriver, Screw drivers, Wrench set
2 of 3 people
found this instruction helpful.
Was this instruction helpful to you?
Thank you for voting!
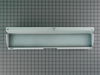
Panels were accidentally thrown out
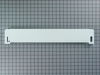
The access panel fit perfectly. The screw holes lined up just right and the screws went in without any trouble. The toe kick panel was a different story. It almost seems like it is a generic, one panel fits all part. I couldn't figure out how to attach it to the dishwasher. None of the holes/slots lined up with anything, so it is just sitting there being held in place by the access panel and the floor.
Parts Used:
-
Jacob from Lafayette, LA
-
Difficulty Level:A Bit Difficult
-
Total Repair Time:15 - 30 mins
-
Tools:Screw drivers
3 of 7 people
found this instruction helpful.
Was this instruction helpful to you?
Thank you for voting!
water remained in the dishwasher after the running cycle
After two repair people were unable to solve the problem, I read similar stories in your forum and decided to replace the check value as a last ditch effort. Looking at your diagrams it seemed like an easy repair. Removed four screws with nutdriver and replaced value by hand. Ran washer three times and water drained completely. Still puzzled that this wasn't the first thing a repair person would check.
Websight very helpful.
Websight very helpful.
Parts Used:
-
charles from baunbridge, GA
-
Difficulty Level:Easy
-
Total Repair Time:15 - 30 mins
-
Tools:Nutdriver, Pliers
1 person
found this instruction helpful.
Was this instruction helpful to you?
Thank you for voting!
water would not drain
Loosened the clamps connecting the pump, disconnected all electric and stabilizer arm. Simply unscrewed the solenoid bracket and replaced with new part.
Parts Used:
-
stan from philadelphia, PA
-
Difficulty Level:Easy
-
Total Repair Time:15 - 30 mins
-
Tools:Nutdriver, Screw drivers
2 of 4 people
found this instruction helpful.
Was this instruction helpful to you?
Thank you for voting!
pump unit does not work, motor stucked
after I let the unit rest on its side to expose the bottom part, I took a picture just in case for reference; I marked all electrical connections, so it would go to right place into the new unit; removed the old pump unit by loosening the rubber clamps, for the inlet and outlet; detached the support sling for the motor unit; installed the new pump unit; it fits like a charm and it was wonderful; I had some bad experiences of replacement parts from other suppliers, on many things that I fix , that won't really fit like the original, but this one fits like a charm; I made my first test run with just water with out the detergent and after one cycle I used the necessary dishwasher detergent and it works just like brand new; Thank you, PartSelect, I will be ordering any of my part needs from you. - G.V.
Parts Used:
-
g from el monte, CA
-
Difficulty Level:Easy
-
Total Repair Time:More than 2 hours
-
Tools:Pliers, Screw drivers, Socket set, Wrench set
2 of 4 people
found this instruction helpful.
Was this instruction helpful to you?
Thank you for voting!