




















2ET22DKXJW00 Whirlpool Refrigerator - Instructions
Keep searches simple. Use keywords, e.g. "leaking", "pump", "broken" or "fit".
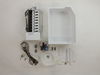
Was not making ice and the filler tray was chipping material.
With a socket set and screw driver I removed the old ic e maker . It took about 1 hr. I worked slowly as not to make a mistake. The only part that gave me a problem was the plug. You need to take off the face cover to press down on the plastic release clip. Putting it back took half the time because you knew what to look for.Just plug it in and mount the screws back in place , make sure it was level and I had ice in about an hour.
Parts Used:
-
Robert from Hummelstown, PA
-
Difficulty Level:Easy
-
Total Repair Time:15 - 30 mins
-
Tools:Screw drivers, Socket set
16 of 24 people
found this instruction helpful.
Was this instruction helpful to you?
Thank you for voting!
Condensation in fresh food area
I just removed the old seal cleaned the area and simply installed the new seal. The instructions were easy to follow and project was completed in less than 1 hour.
Parts Used:

-
Larry from Goffstown, NH
-
Difficulty Level:Easy
-
Total Repair Time:30 - 60 mins
-
Tools:Nutdriver
14 of 18 people
found this instruction helpful.
Was this instruction helpful to you?
Thank you for voting!
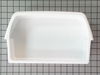
cracked bins
Two bins were cracked. I simply unhooked the broken bins and put the new ones in their place.
Parts Used:
-
David from Media, PA
-
Difficulty Level:Really Easy
-
Total Repair Time:Less than 15 mins
12 of 13 people
found this instruction helpful.
Was this instruction helpful to you?
Thank you for voting!
Broken glass shelf
While cleaning the refrigerator I had taken the bottom glass shelf out to clean it in my sink and unfortunately it broke into thousands of little pieces. After clean up the mess and my cut thumb, I went online to see about replacing it. First went to Whirlpool site, they had the broken shelf but for considerably more than I found on your site. Your website was easy to use and the part and the shipping was much more reasonable. I ordered on a Sat afternoon and the shelf, which was exactly the same as the one that had broken, was on my front porch by Tues @ 9:00 am. You never know when you make a purchase online with a company you are not familiar with, but I can say this was a great experience.
Parts Used:

-
MELISSA from CUMBERLAND, MD
-
Difficulty Level:Really Easy
-
Total Repair Time:Less than 15 mins
13 of 16 people
found this instruction helpful.
Was this instruction helpful to you?
Thank you for voting!
Scratches in Surface
This product comes in a bottle with a brush like Liquid Paper. It goes on incredibly easy. A second coat might be needed. I wanted to prevent rust from setting in so I covered the scratches and dings. The paint is a little brighter since my washer is 10 years old but it still looks great.
Parts Used:
-
Michelle from Richardson, TX
-
Difficulty Level:Really Easy
-
Total Repair Time:Less than 15 mins
83 of 227 people
found this instruction helpful.
Was this instruction helpful to you?
Thank you for voting!
Replaced Freezer Door and Refrigerator Door Gaskets
!st removed the doors from the unit, then laid them on the floor. Next, on a long side of the door, cut through the gasket so I could pull it off the door in one piece without separating the door liner from the outer door. Then, starting at a corner, started pushing the stiff black part of the replacement gasket between the liner and outer door, making sure to push it completely under as I went. Used a thick flat bladed screwdriver to carefully help push the final corner section in. Repeated on both doors, rehung, plugged in and done!
Parts Used:

-
Robin from VENICE, FL
-
Difficulty Level:Really Easy
-
Total Repair Time:15 - 30 mins
-
Tools:Screw drivers
11 of 13 people
found this instruction helpful.
Was this instruction helpful to you?
Thank you for voting!
Didn't know if I needed Left or Right.
The item is listed as R, meaning right hand side. If you need it for the left hand side, simple turn it over. It is designed to work on both sides of the door.
Parts Used:

-
Joyce from Kerrville, TX
-
Difficulty Level:Really Easy
-
Total Repair Time:Less than 15 mins
11 of 14 people
found this instruction helpful.
Was this instruction helpful to you?
Thank you for voting!
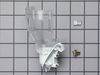
socket melted with bulb in it.
-
martin l. from JACKSONVILLE,, IL
-
Difficulty Level:Really Easy
-
Total Repair Time:Less than 15 mins
12 of 18 people
found this instruction helpful.
Was this instruction helpful to you?
Thank you for voting!
There was no light on in refrig area
Just replaced the switch, but unfortunately that was not the problem; nor was it the bulb....so I am back to square one.
But Parts Select is a great place to order from. Thank you.
But Parts Select is a great place to order from. Thank you.
Parts Used:

-
Lori from Chuluota, FL
-
Difficulty Level:Easy
-
Total Repair Time:Less than 15 mins
-
Tools:Screw drivers
12 of 19 people
found this instruction helpful.
Was this instruction helpful to you?
Thank you for voting!
Broken parts in refrigerator
Replaced with new parts
Parts Used:

-
Harald from Cape Coral, FL
-
Difficulty Level:Really Easy
-
Total Repair Time:Less than 15 mins
11 of 16 people
found this instruction helpful.
Was this instruction helpful to you?
Thank you for voting!
I cracked mine :D
-
Lisa from Fort Myers, FL
-
Difficulty Level:Really Easy
-
Total Repair Time:Less than 15 mins
11 of 16 people
found this instruction helpful.
Was this instruction helpful to you?
Thank you for voting!
light not working in fridge
It was so easy!
Thanks for the rush to my home on the part.
I just unscrewed the plate that locks in the light switch (screwdriver) and unplugged the old faulty part and plugged in the new switch, screwed the cover back on and I was done!
Easy!
And I am not Mr. Fix-it!
Thanks for the rush to my home on the part.
I just unscrewed the plate that locks in the light switch (screwdriver) and unplugged the old faulty part and plugged in the new switch, screwed the cover back on and I was done!
Easy!
And I am not Mr. Fix-it!
Parts Used:
-
Michael from East Meadow, NY
-
Difficulty Level:Really Easy
-
Total Repair Time:Less than 15 mins
-
Tools:Screw drivers
7 of 8 people
found this instruction helpful.
Was this instruction helpful to you?
Thank you for voting!
Running edges of meat drawer were cracked and broken from the door closing with the drawer open.
I slid out the old one and threw it away and slid in the new one. 10 second repair. The kind I like.
Parts Used:
-
Joseph from Rockwall, TX
-
Difficulty Level:Really Easy
-
Total Repair Time:Less than 15 mins
7 of 9 people
found this instruction helpful.
Was this instruction helpful to you?
Thank you for voting!
Broken door handle
I removed screws, removed handles, replaced screws and both handles.
Parts Used:
-
Larry from Midlothian, MD
-
Difficulty Level:Really Easy
-
Total Repair Time:Less than 15 mins
-
Tools:Screw drivers
7 of 9 people
found this instruction helpful.
Was this instruction helpful to you?
Thank you for voting!
All three lights are not working...lights are off but refrigerator still cooling. Also, the control box not lit up to show the temparture for freezer and refrigerator
Used a screw driver to pull old switch. Pulled one wire at a time, only two wires. After wires instlled to new switch push new one back in place where the old one was.
Parts Used:
-
Antonio from San Antonio, TX
-
Difficulty Level:Really Easy
-
Total Repair Time:Less than 15 mins
-
Tools:Screw drivers
7 of 10 people
found this instruction helpful.
Was this instruction helpful to you?
Thank you for voting!