




















2848H20 Roper Range - Instructions
Keep searches simple. Use keywords, e.g. "leaking", "pump", "broken" or "fit".
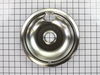
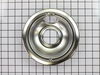
replace the cook stove's drip bowls instead of cleaning them
I removed the burners and then the older drip bowls of the cook stove--and then I put on the new drip bowls and put back on the burners. My mechanical skills were sufficient for the replacement of the drip bowls.
Parts Used:
-
Dallas from Arlington, TX
-
Difficulty Level:Really Easy
-
Total Repair Time:Less than 15 mins
Was this instruction helpful to you?
Thank you for voting!
The surface burner socket that the burner plugs into melted.
Cut the old wires off, removed the screw holding the clamp, installed the new parts. Problems I encountered were the wire nuts. They were too small for the wire gage of the replacement part and the original oven. I had larger wire nuts in my workshop. Also, why so many extra parts like the shrink wrap tubing, two metal clamps to hold the socket, etc.
Parts Used:

-
Gary from Chesapeake, VA
-
Difficulty Level:Easy
-
Total Repair Time:Less than 15 mins
-
Tools:Screw drivers
Was this instruction helpful to you?
Thank you for voting!
I needed to replace to two 8* drip bowls on the kitchen range
(a) I took out (and threw away) two stained 8* chrome drip bowls on my kitchen range; (b) ti put in two new 8" chrome drip bowls on my kitchen range. I'm pleased that I was equal to the task.
Parts Used:
-
Dallas from Arlington, TX
-
Difficulty Level:Really Easy
-
Total Repair Time:Less than 15 mins
Was this instruction helpful to you?
Thank you for voting!
Stove needed new bowls
-
Karen from Kettering, OH
-
Difficulty Level:Really Easy
-
Total Repair Time:Less than 15 mins
Was this instruction helpful to you?
Thank you for voting!
Old dirty drip pans
Removed heating element, installed new drip pan, replaced heating element. Was amazed at fast delivery - ordered in afternoon, arrived fed ex next morning!
Parts Used:
-
gizella from mays landing, NJ
-
Difficulty Level:Really Easy
-
Total Repair Time:Less than 15 mins
Was this instruction helpful to you?
Thank you for voting!
The drip pans needed replacing.
Put in the new drip pan -- which are really nice shiny ones.
Parts Used:
-
Alison from Carnation, WA
-
Difficulty Level:Really Easy
-
Total Repair Time:Less than 15 mins
Was this instruction helpful to you?
Thank you for voting!
Dirty drip bowls
Just remove old bowls from range top and put new ones. That is all ... just super simple! :)
Parts Used:
-
Paul from Carnegie, PA
-
Difficulty Level:Really Easy
-
Total Repair Time:Less than 15 mins
Was this instruction helpful to you?
Thank you for voting!
Dirty drip bowl
-
Paul from Carnegie, PA
-
Difficulty Level:Really Easy
-
Total Repair Time:Less than 15 mins
Was this instruction helpful to you?
Thank you for voting!
burner not working
burner was shorting out replaced part works great
Parts Used:
-
gene from kent, WA
-
Difficulty Level:Really Easy
-
Total Repair Time:Less than 15 mins
-
Tools:Screw drivers
Was this instruction helpful to you?
Thank you for voting!
burner would not heat up the connection was bad
loosened the screw holding the block pulled it out toget to wire cut it about 4 inches long followed the inst.with block kit and it was a breeze. burner working fine now should have did it sooner.
Parts Used:
-
Earl from Union Mills, NC
-
Difficulty Level:Really Easy
-
Total Repair Time:Less than 15 mins
-
Tools:Screw drivers
Was this instruction helpful to you?
Thank you for voting!
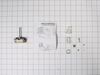
Original burner switch fell apart
Replacement was simple. Old switch was easily removed. Once I swapped the wires from old to new we were in business. One thing I would do differently than the included directions called for. I wish I had waited until I had installed the new switch to set the shaft length. I snapped off one too many sections of the shaft after measuring the original shaft as recommended. If I had installed the replacement switch and then set the shaft length it would have been more accurate. Everything still works but one knob is now slightly lower than the other three.
Parts Used:
-
Jim from Addison, TX
-
Difficulty Level:Really Easy
-
Total Repair Time:Less than 15 mins
-
Tools:Pliers, Screw drivers
Was this instruction helpful to you?
Thank you for voting!
old burner unit needed replacing
Isimply pulled the old burner unit and followed the instructions that came with the replacement.
Parts Used:

-
Linda from Eagle Bridge, NY
-
Difficulty Level:Really Easy
-
Total Repair Time:Less than 15 mins
-
Tools:Pliers
Was this instruction helpful to you?
Thank you for voting!
plastic post for knob broke off
I broke the correct post from the new cluster of post selections and stuck it on. I had the kit for a couple of weeks before I realized that this was not an electrical problem. It would have been good of you to send only the new plastic post. That kit was intimidating for a 73 year old woman who lives in the country and does most of her own plumbing and other household repairs. The repair took less that one minute.
Parts Used:
-
Graham from Bridgeville, CA
-
Difficulty Level:Really Easy
-
Total Repair Time:Less than 15 mins
Was this instruction helpful to you?
Thank you for voting!
two of the burners were working intermittently
I shut off the breaker checked for power then cut old plugs making sure to allow a little slack. Tightened down wire nuts put on a couple wraps of electrical tape and that was it. Burners work great now I would reccomend this product to anyone with a similar problem.
Parts Used:
-
Kevin from Desoto, MO
-
Difficulty Level:Really Easy
-
Total Repair Time:15 - 30 mins
-
Tools:Screw drivers
Was this instruction helpful to you?
Thank you for voting!
Burners did not get hot or went on and off
After carefully inspecting existing burner receptacles, I unscrewed them, raised and propped stove top. Determined which bracket to use from new kit and proceeded to cut and strip wires, twist ends together with supplied ceramic caps and heated shrink wrap on that junction. Works great. BTW got parts in 2 days in great shape and good directions.
Parts Used:
-
Boyd from kalamazoo, MI
-
Difficulty Level:Easy
-
Total Repair Time:15 - 30 mins
-
Tools:Nutdriver, Pliers, Screw drivers
Was this instruction helpful to you?
Thank you for voting!