




















25370313213 Kenmore Refrigerator - Instructions
Keep searches simple. Use keywords, e.g. "leaking", "pump", "broken" or "fit".
freezer section upper shelf slide assy broken, captive ball slides fell out
Remove frozen food and ice cubes to coolers so they stay frozen.
Remove shallow wire shelf.
Slide out both sides of slide assemblies. Defective slide unclip the front corner front frame remembering to remove the plastic retention rivet first. It has a centre pin that needs to be pulled out first. Support the rest of the frame on the bottom shelf/basket frame
There is one cap head square driver screw to remove on the wall of the freezer holding the slide in place. Leave the other two flat head screws alone. Slide the defective frame off the other two flat head screws. Take new part and attachment is the reverse of the disassembly you have just done. The front frame corner clip is a bit difficult to put together there is a top and bottom spring clip then the plastic "rivet" where you need to push in the centre pin to retain it in the joint. [a bit flimsy so be careful].
The shallow basket should be carefully placed on the front and side clips, and make sure everything is square. Then slide the shelf to make sure it goes into the freezer properly. Then you can re-load the food and ice cubes.
Remove shallow wire shelf.
Slide out both sides of slide assemblies. Defective slide unclip the front corner front frame remembering to remove the plastic retention rivet first. It has a centre pin that needs to be pulled out first. Support the rest of the frame on the bottom shelf/basket frame
There is one cap head square driver screw to remove on the wall of the freezer holding the slide in place. Leave the other two flat head screws alone. Slide the defective frame off the other two flat head screws. Take new part and attachment is the reverse of the disassembly you have just done. The front frame corner clip is a bit difficult to put together there is a top and bottom spring clip then the plastic "rivet" where you need to push in the centre pin to retain it in the joint. [a bit flimsy so be careful].
The shallow basket should be carefully placed on the front and side clips, and make sure everything is square. Then slide the shelf to make sure it goes into the freezer properly. Then you can re-load the food and ice cubes.
Parts Used:
-
John from Littleton, CO
-
Difficulty Level:Really Easy
-
Total Repair Time:30 - 60 mins
-
Tools:Pliers, Screw drivers
2 of 2 people
found this instruction helpful.
Was this instruction helpful to you?
Thank you for voting!
Thin, flexible edge on outermost door gasket was tearing from the main gasket, likely due to being rubbed when accessing refrigerator..
Gasket is held in place by an extrusion on the back side. Simply remove the old gasket and press the new gasket's extrusion into the track on the door.
Parts Used:

-
Dennis from Oley, PA
-
Difficulty Level:Really Easy
-
Total Repair Time:Less than 15 mins
2 of 2 people
found this instruction helpful.
Was this instruction helpful to you?
Thank you for voting!
GASKET WORN AND LEAKING
SIMPLY REMOVE THE OLD GASKET PULLING LIGHTLY BY HAND
THEN PUSHING THE NEW GASKET BY HAND
THEN PUSHING THE NEW GASKET BY HAND
Parts Used:
-
Dennis from Lancaster, SC
-
Difficulty Level:Very Easy
-
Total Repair Time:Less than 15 mins
2 of 2 people
found this instruction helpful.
Was this instruction helpful to you?
Thank you for voting!
Refrigerator wasn't staying cool enough
Easily removed the old gasket and put the new ones on exactly the same way the old ones came off but in reverse
Parts Used:
-
Karl from Brookfield, CT
-
Difficulty Level:Really Easy
-
Total Repair Time:Less than 15 mins
2 of 2 people
found this instruction helpful.
Was this instruction helpful to you?
Thank you for voting!
Replaced door gaskets with new ones
Removed the old door gaskets by hand and attached the new ones by inserting the edges in the existing grooves
Parts Used:
-
Andres from Golden Valley, MN
-
Difficulty Level:Really Easy
-
Total Repair Time:Less than 15 mins
2 of 2 people
found this instruction helpful.
Was this instruction helpful to you?
Thank you for voting!
Balls fell out so I needed a new slide
Basically took the broken piece off and put the new one on after removing the part on the new assembly I didn't need to replace ( It was still secure on the freezer) just popped that bad boy on
Parts Used:
-
Donna from POUGHKEEPSIE, NY
-
Difficulty Level:Really Easy
-
Total Repair Time:Less than 15 mins
1 person
found this instruction helpful.
Was this instruction helpful to you?
Thank you for voting!
The little plastic bàlls came out of old part
Just took old one off and installed new. The company was great to work with.
Parts Used:
-
Culver from RHINELANDER, WI
-
Difficulty Level:Really Easy
-
Total Repair Time:Less than 15 mins
-
Tools:Screw drivers
1 person
found this instruction helpful.
Was this instruction helpful to you?
Thank you for voting!
Flipper mullion assembly broke
Removed 1 screw and unplugged flipper mullion assembly and removed it. Plugged in new flipper and one screw and done. Works as it should.
Parts Used:

-
Cynthia from CIRCLEVILLE, OH
-
Difficulty Level:Really Easy
-
Total Repair Time:Less than 15 mins
-
Tools:Screw drivers
1 person
found this instruction helpful.
Was this instruction helpful to you?
Thank you for voting!
Original ice maker not working leaking water water out door
Removed exterior housing, sliding old unit forward to release. New unit went in easily. Caution wires don't get pinched.
Parts Used:
-
Michael from FREE SOIL, MI
-
Difficulty Level:Really Easy
-
Total Repair Time:30 - 60 mins
-
Tools:Screw drivers, Socket set
1 person
found this instruction helpful.
Was this instruction helpful to you?
Thank you for voting!
very Simple!
Insert the bottom part of the trim first, then pull up to snap on the top. PartSelect.com is a fantastic website!!
Parts Used:
-
Lorraine from Arlington, VA
-
Difficulty Level:Really Easy
-
Total Repair Time:Less than 15 mins
1 of 3 people
found this instruction helpful.
Was this instruction helpful to you?
Thank you for voting!
unit was not cooling or freezing.
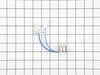
found the coil to be frozen like a block of ice. defrosted same, then looked up what defrost thermastat i needed and once it was received, i took the back of the freezer compartment off again, (two hex nuts, one on each end, and a small screwdriver to remove guard around fan. once this was removed, you then remove this panel, and you will see the evaperator coil, which will be frozen like a block of ice like i said. then remove defrost therm(small round piece with two wires connected to unit, disengage and re engage new thermostat. then put unit back!. no more freeze ups.also, therm was on top right of evaPERATOR. IT also snaps off on the bottom of thermastat. (just pull to or away from you and it should come off.
Parts Used:
-
JACK from OAK LAWN, IL
-
Difficulty Level:A Bit Difficult
-
Total Repair Time:30 - 60 mins
-
Tools:Nutdriver
Was this instruction helpful to you?
Thank you for voting!