




















25360643613 Kenmore Refrigerator - Instructions
Keep searches simple. Use keywords, e.g. "leaking", "pump", "broken" or "fit".
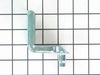
cracked bottom hinge
My 4 year old grandson used the frig door as a swing.The bottom hinge cracked, then the door wouldn't seal. I propped the door up with some books, removed the broken hinge (2 bolts) and replaced with the new part. Simple fix on the door, only time will fix the 4 year old!
Parts Used:
-
LEE from LEO, IN
-
Difficulty Level:Really Easy
-
Total Repair Time:Less than 15 mins
-
Tools:Socket set
16 of 21 people
found this instruction helpful.
Was this instruction helpful to you?
Thank you for voting!
Shattered crisper pan glass

-
Stacia from Salem, OH
-
Difficulty Level:Really Easy
-
Total Repair Time:Less than 15 mins
16 of 21 people
found this instruction helpful.
Was this instruction helpful to you?
Thank you for voting!
Plastic retainer on end had broken
Just popped it onto retainer nubs on door. Had been a little concerned, as it was replacing part # 240337900, but it fit just fine.
Parts Used:

-
Jonathan from Portland, OR
-
Difficulty Level:Really Easy
-
Total Repair Time:Less than 15 mins
14 of 16 people
found this instruction helpful.
Was this instruction helpful to you?
Thank you for voting!
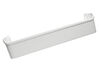
Bottom shelf on door cracked and broke
I ordered the Door Shelf Bin from PartSelect.com on Friday and received it on Saturday!! I was shocked, but thrilled. The easy to use diagram helped me to pick the right part and I easily replaced the broken one. I have already started to recommend PartSelect.com I was so thrilled with their service!
Parts Used:
-
Jamie from Greensburg, PA
-
Difficulty Level:Really Easy
-
Total Repair Time:Less than 15 mins
12 of 14 people
found this instruction helpful.
Was this instruction helpful to you?
Thank you for voting!
Plastic Shelf Broke
-
Jim from Carlsbad, CA
-
Difficulty Level:Really Easy
-
Total Repair Time:Less than 15 mins
11 of 11 people
found this instruction helpful.
Was this instruction helpful to you?
Thank you for voting!
gasket broken and old and shelves broken
the gasket simply pushed on and shelves went right in place
Parts Used:

-
Rose from BATH SPRINGS, TN
-
Difficulty Level:Very Easy
-
Total Repair Time:Less than 15 mins
15 of 24 people
found this instruction helpful.
Was this instruction helpful to you?
Thank you for voting!
Leaky Seal
Just snaps in. Pull the old one out push the new one in. It has a groove it fits into no fasteners to undo, Just pull the old one out with steady pressure.
Parts Used:
-
Travis from Tecumseh, OK
-
Difficulty Level:Really Easy
-
Total Repair Time:Less than 15 mins
11 of 14 people
found this instruction helpful.
Was this instruction helpful to you?
Thank you for voting!
Leaking Door Gasket
Open door remove old gasket, remove new one out of packaging install new gasket
Parts Used:
-
Ulrich from Ontario, CA
-
Difficulty Level:Really Easy
-
Total Repair Time:Less than 15 mins
12 of 18 people
found this instruction helpful.
Was this instruction helpful to you?
Thank you for voting!
refrigerator door would not fully close
Took old gasket off and put new gasket into place. Part came in the mail in 2 days. Hardest part was finding the model number of the refrigerator.
Parts Used:
-
Elizabeth from Chicago, IL
-
Difficulty Level:Really Easy
-
Total Repair Time:15 - 30 mins
-
Tools:Screw drivers
10 of 12 people
found this instruction helpful.
Was this instruction helpful to you?
Thank you for voting!
Coming from the refrigerator, there was an intermittent "clicking noise", occurring about every 30 seconds. The frig. eventually failed .
I removed the back cover and removed the clip holding the compressor- run capacitor and start relay. I replaced these 2 components and clean the dust from the frig., and from the bottom of the floor. I replaced the back cover ; Loss about $300 worth of meat when when the frig. failed. Then I thought that, during these turbulent times, there are many which don't have a refrigerator or any meat to place in it, The refrigerator is "running" normal again.
Parts Used:

-
winifred from LOUISVILLE, KY
-
Difficulty Level:Easy
-
Total Repair Time:30 - 60 mins
-
Tools:Nutdriver, Pliers
11 of 16 people
found this instruction helpful.
Was this instruction helpful to you?
Thank you for voting!
The Gasket was not holding tight and I replaced with a new one.
-
Kebreab from NASHVILLE, TN
-
Difficulty Level:Very Easy
-
Total Repair Time:15 - 30 mins
9 of 10 people
found this instruction helpful.
Was this instruction helpful to you?
Thank you for voting!
Door Shelf Was borken held together by duck tape
I receive the part the next day eventhough I paid for 3-5 day delivery. It took lest than 10 seconds to snap into place and now it looks like new.
Parts Used:
-
Letitia from OFallon, IL
-
Difficulty Level:Really Easy
-
Total Repair Time:Less than 15 mins
9 of 12 people
found this instruction helpful.
Was this instruction helpful to you?
Thank you for voting!
refrig. door fell off lower hinge
took door off to see damage / what caused it . put door back on with temporary fix. /
looked up parts online / ordered parts online.
received parts very quickly. removed doors again, put on repair parts , tested - ok now.
looked up parts online / ordered parts online.
received parts very quickly. removed doors again, put on repair parts , tested - ok now.
Parts Used:

-
Patrick from Hollis, ME
-
Difficulty Level:A Bit Difficult
-
Total Repair Time:30 - 60 mins
-
Tools:Nutdriver, Screw drivers, Socket set
18 of 39 people
found this instruction helpful.
Was this instruction helpful to you?
Thank you for voting!
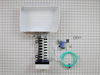
Bought a new refrigerator. Did not come with an Icemaker.
Remove access cover at bottom of case w/socket wrench (4 screws).
Attach supply line to water valve with adjustable wrench. Attach water line to ice maker on back of case (twist lock) no tools required.
Attach water line from ice maker to water valve (push connection) no tools required. Attache water valve to case at bottom w/one screw. (nut driver)
Reassemble access cover to bottom of case w/socket wrench (4 screws). Remove plastic cover inside freezer (w/screw driver to release from evap cover) to expose ice maker harness connection. Remove two plastic plugs (carefully w screw driver) exposing screw anchors for mounting Ice maker. Assemble two mounting screws w/nut driver. (Do not dtrive all the way in) Plug ice maker harness to plug on back of evap cover.(no tools required) Place cover over harness connection) no tools required. Guide water fill tube into fill cup on ice maker. (no tools required) Hang ice maker on mounting screws. Level Ice maker and tighten screws. (torpedo level makes it easy if you have one handy. Place Ice bucket under Ice maker on freezer shelf (lower position). Turn ice maker on and you are ready to go. Easy Job!!!!
Attach supply line to water valve with adjustable wrench. Attach water line to ice maker on back of case (twist lock) no tools required.
Attach water line from ice maker to water valve (push connection) no tools required. Attache water valve to case at bottom w/one screw. (nut driver)
Reassemble access cover to bottom of case w/socket wrench (4 screws). Remove plastic cover inside freezer (w/screw driver to release from evap cover) to expose ice maker harness connection. Remove two plastic plugs (carefully w screw driver) exposing screw anchors for mounting Ice maker. Assemble two mounting screws w/nut driver. (Do not dtrive all the way in) Plug ice maker harness to plug on back of evap cover.(no tools required) Place cover over harness connection) no tools required. Guide water fill tube into fill cup on ice maker. (no tools required) Hang ice maker on mounting screws. Level Ice maker and tighten screws. (torpedo level makes it easy if you have one handy. Place Ice bucket under Ice maker on freezer shelf (lower position). Turn ice maker on and you are ready to go. Easy Job!!!!
Parts Used:
-
MICHAEL from GEORGETOWN, IN
-
Difficulty Level:Really Easy
-
Total Repair Time:30 - 60 mins
-
Tools:Nutdriver, Wrench (Adjustable)
7 of 7 people
found this instruction helpful.
Was this instruction helpful to you?
Thank you for voting!
no problem just added ice maker
insatlled ic maker was very eays and fast.how ever not enouh clamps for hose;s in kit in my apinion
Parts Used:
-
eugene a from sycamore, IL
-
Difficulty Level:Really Easy
-
Total Repair Time:30 - 60 mins
-
Tools:Nutdriver, Wrench (Adjustable)
35 of 93 people
found this instruction helpful.
Was this instruction helpful to you?
Thank you for voting!