




















25360302613 Kenmore Refrigerator - Instructions
Keep searches simple. Use keywords, e.g. "leaking", "pump", "broken" or "fit".
Refrigerator light stopped working
The bulb wasn't the issue so I was hopeful the switch was. utube helped me some, but figuring my model was different than any on utube. Got the switch in and plugged it back in. Moment of truth. Didn't light. Ugggh! Out $50 for switch plus $20 for nut driver set.
Parts Used:

-
Karla from UNION, MO
-
Difficulty Level:Difficult
-
Total Repair Time:1- 2 hours
-
Tools:Socket set
1 person
found this instruction helpful.
Was this instruction helpful to you?
Thank you for voting!
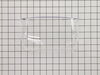
The Dairy door was cracked by an item in the refrigerator and broke into two pieces
This was not technical at all. The old door fell out and the replacement door snapped right into position. It was simple.
Parts Used:
-
George from Pottsville, PA
-
Difficulty Level:Really Easy
-
Total Repair Time:Less than 15 mins
1 person
found this instruction helpful.
Was this instruction helpful to you?
Thank you for voting!
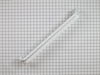
Shelf rack broke.
Ordered part easily with modal number ( they tell you where to find it). Received quickly and snapped paper in. They also had a video instruction. Will definitely use again!
Parts Used:
-
Nancy from SELINSGROVE, PA
-
Difficulty Level:Really Easy
-
Total Repair Time:Less than 15 mins
1 person
found this instruction helpful.
Was this instruction helpful to you?
Thank you for voting!
The original shelf cracked and fell off. No glue or tape would hold.
-
Christina from Essington, PA
-
Difficulty Level:Really Easy
-
Total Repair Time:Less than 15 mins
1 of 2 people
found this instruction helpful.
Was this instruction helpful to you?
Thank you for voting!
Easy and simple!
-
Mordechai from Brooklyn, NY
-
Difficulty Level:Really Easy
-
Total Repair Time:Less than 15 mins
1 of 2 people
found this instruction helpful.
Was this instruction helpful to you?
Thank you for voting!
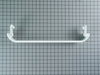
Kid broke to bottom door rack
This was so easy it took longer to open the door than it did to install the rack. WOW. Nice to see something fits without messing with it. Thanks.
Parts Used:
-
W. Noah from Leominster, MA
-
Difficulty Level:Really Easy
-
Total Repair Time:Less than 15 mins
1 of 2 people
found this instruction helpful.
Was this instruction helpful to you?
Thank you for voting!
replacing broken door racks
Super easy it took no more than 5 minutes to replace the fridge door racks. Starting from opening the box when it arrived to closing the fridge door with the new racks in place. no tools needed, except a knife to open the box.
Parts Used:
-
francine from brick, NJ
-
Difficulty Level:Really Easy
-
Total Repair Time:Less than 15 mins
1 of 2 people
found this instruction helpful.
Was this instruction helpful to you?
Thank you for voting!
Needed a replacement door for the dairy compartment
It simply snapped into place. No tools required. A very simple repair.
Parts Used:
-
Steven from MARYVILLE, MO
-
Difficulty Level:Very Easy
-
Total Repair Time:Less than 15 mins
1 of 2 people
found this instruction helpful.
Was this instruction helpful to you?
Thank you for voting!
very Simple!
Insert the bottom part of the trim first, then pull up to snap on the top. PartSelect.com is a fantastic website!!
Parts Used:
-
Lorraine from Arlington, VA
-
Difficulty Level:Really Easy
-
Total Repair Time:Less than 15 mins
1 of 3 people
found this instruction helpful.
Was this instruction helpful to you?
Thank you for voting!
light bilb went out

-
Denise from Landover, MD
-
Difficulty Level:Really Easy
-
Total Repair Time:Less than 15 mins
2 of 6 people
found this instruction helpful.
Was this instruction helpful to you?
Thank you for voting!
The new motor mount screw holes were not threaded.
I had to tap the screw holes with a 8/32 tap so that the screws would not bind.
Parts Used:

-
Greg from henrico, VA
-
Difficulty Level:A Bit Difficult
-
Total Repair Time:1- 2 hours
-
Tools:Nutdriver, Socket set
1 of 5 people
found this instruction helpful.
Was this instruction helpful to you?
Thank you for voting!
no heat when drying
-
Glen from North Tonawanda, NY
-
Difficulty Level:Easy
-
Total Repair Time:30 - 60 mins
-
Tools:Nutdriver
Was this instruction helpful to you?
Thank you for voting!
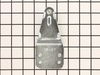
Original plastic hinge cracked across the middle
Removed 2 hex screws & old hinge, placed new hinge on cabinet & found that it didn't fit; one hole was about 1/8" off. Had to drill a new hole in cabinet top in order to attach new hinge. Hinge works fine now. I'm glad to find the hinge is metal; original one was plastic.
Parts Used:
-
Al from Sarver, PA
-
Difficulty Level:A Bit Difficult
-
Total Repair Time:15 - 30 mins
-
Tools:Nutdriver
Was this instruction helpful to you?
Thank you for voting!
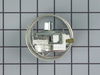
has lights,no fan or compressor
jump thermostat,fan and compressor came on, ordered thermo from this excllent parts supplier, part came in 4 days later, it was exact replacement, works exactly right!
Parts Used:
-
francis from arlington, WA
-
Difficulty Level:Really Easy
-
Total Repair Time:15 - 30 mins
-
Tools:Nutdriver
Was this instruction helpful to you?
Thank you for voting!
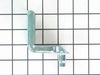
Refrigerator door sagged, had to push the door to close it.
Used wood blocks to raise the door off the lower hinge bracket then unscrewed the suspect hinge. Cut a small shim, two layers of soda can, to place under the lower edge of the new hinge bracket and doubled the washers by using the old one to ensure I had adequate clearance for the door. After a little silicone lube I installed the new hinge bracket. All better now.
Parts Used:
-
Michael Jude from Saint Martinville, LA
-
Difficulty Level:Really Easy
-
Total Repair Time:15 - 30 mins
-
Tools:Nutdriver
Was this instruction helpful to you?
Thank you for voting!