




















25351624102 Kenmore Refrigerator - Instructions
Keep searches simple. Use keywords, e.g. "leaking", "pump", "broken" or "fit".
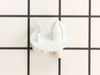
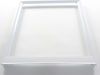
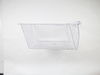
Guides damaged, crisper pan cracked
1.Got on line to Partselect ordered the parts we needed .they arrived Quickly and in good condition 2.Except the tray was sent in error delaying the repair. 3.contacted Partselect costumer services for assistance 4.Followed their direction and reorder the correct one hoping the correct one would arrive .it did the next day .5.On to repair, removed broken stud with panel stud puller with the aide of a putty knife to spread the pressure of tool stud came out 6.reinserted new stud 7.replaced the new upper crisper drawer cover glass not included . 8.Upper Crisper pan to complete the repair. 9.all in all successful with the help of Partselect superior parts and helpful guides.
Parts Used:
-
Darin from Nicholasville, KY
-
Difficulty Level:Easy
-
Total Repair Time:Less than 15 mins
25 of 43 people
found this instruction helpful.
Was this instruction helpful to you?
Thank you for voting!
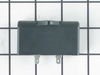
just quit working
-
Denise from Lowell, MI
-
Difficulty Level:Really Easy
-
Total Repair Time:Less than 15 mins
19 of 25 people
found this instruction helpful.
Was this instruction helpful to you?
Thank you for voting!
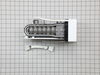
Ice Would Not Work - But Water Disp Did
Shut off water/power - pulled tray -loosened two screws holding ice maker - lifted it up and off - unhooked power connection installed new maker in reverse of above - power supply line was much to long but just pushed it under the ice tray ( away from the maker ) prior to ordering looked at comments from others regarding installation
Parts Used:
-
JAMES from HENDERSON, NV
-
Difficulty Level:Really Easy
-
Total Repair Time:15 - 30 mins
-
Tools:Screw drivers, Socket set
17 of 19 people
found this instruction helpful.
Was this instruction helpful to you?
Thank you for voting!
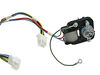
Freezer is working but not the refrigerator.
Removed the cover inside the freezer. Found out that the motor/fan was not working. Ordered through PartSelect. Got the parts in 3 days. Installed it for less than 30 minutes. Very easy. It saved me hundreds of dollars. We considered buying a new fridge but not anymore. , it only cost me $70 including shipment charges. (Make sure you unplug the appliance first before opening the cover. Remember safety first.)
Parts Used:
-
Neptali from Groton, MA
-
Difficulty Level:Really Easy
-
Total Repair Time:15 - 30 mins
-
Tools:Wrench set
17 of 19 people
found this instruction helpful.
Was this instruction helpful to you?
Thank you for voting!
Ice make just stopped
I want to first say that before I ordered this part from "Part Select" I first went and talked with a local appliance repair shop. They quoted me a $120 charge to come out and check the problem. Then $30 and hour service fee, plus parts. He provided me a quote of about $250 for the job.
I found this part easily on the web site $77. It was very easy to instal. The only problem I had was the fact that in the side by side it was very difficult for me to get two hands inside the freezer to install it. (I have wide shoulders). Two screws loosened, no need to remove them. Just life the entire unit straight up. Unplug wire harness. Then just reverse order. Could not be easier. If you can change a light bulb you can do this.
I found this part easily on the web site $77. It was very easy to instal. The only problem I had was the fact that in the side by side it was very difficult for me to get two hands inside the freezer to install it. (I have wide shoulders). Two screws loosened, no need to remove them. Just life the entire unit straight up. Unplug wire harness. Then just reverse order. Could not be easier. If you can change a light bulb you can do this.
Parts Used:
-
David from Beavercreek, OH
-
Difficulty Level:Easy
-
Total Repair Time:15 - 30 mins
-
Tools:Screw drivers
16 of 16 people
found this instruction helpful.
Was this instruction helpful to you?
Thank you for voting!
Glass Shelf Broken

-
ROBERT from DOYLESTOWN, PA
-
Difficulty Level:Really Easy
-
Total Repair Time:Less than 15 mins
23 of 38 people
found this instruction helpful.
Was this instruction helpful to you?
Thank you for voting!
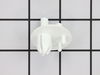
2 broken shelving supports
The shelving brackets are install much like a blind rivet. I simply used a punch and gently pushed in the plastic center pin / mandrel. I then used a butter knife as a wedge to pull out the shelving supports enough to grab them with a pair of pliers. Simple to do!
Parts Used:
-
Victor from Wilton, CA
-
Difficulty Level:Really Easy
-
Total Repair Time:Less than 15 mins
-
Tools:Pliers
16 of 18 people
found this instruction helpful.
Was this instruction helpful to you?
Thank you for voting!
Ice maker burned out
Removing the old unit was easy enough, just loosened two screws that attach unit to side of freezer and disconnected the wiring harness. But the new unit never goes in quite as easily because it's always just a little different from the original. In this case, the wiring ended up being about six inches longer and the excess had to be stuffed behind a shield at the rear of the unit. Theoretically, the wire could have been pushed back through the opening, but it got jammed and wouldn't go. I had to remove side rails and pry the shield forward in order to get the wiring back out of the way. The unit is a narrow side by side, so there wasn't a lot of room to move around. But it wasn't difficult, just tedious. I had to make sure the wiring did not come into contact with the heating element at the bottom of the icemaker. Once installed it worked great.
Parts Used:
-
John from Alexandria, VA
-
Difficulty Level:A Bit Difficult
-
Total Repair Time:30 - 60 mins
-
Tools:Screw drivers
17 of 21 people
found this instruction helpful.
Was this instruction helpful to you?
Thank you for voting!
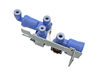
drip from door water dispenser
The 4 lines attached to water valve have compression fittings.New valve has pex fittings.I cut each line just behind the ferrel and inserted each line into the proper fitting and reattached the 3 electrical plugs.Turned water back on.I immediately got water from thr door without dripping.For whatever reason it was not making ice for the first 3 days,I pulled the plug on the icemaker solenoid and reattached.It is working now.
Parts Used:
-
Paul from Anderson, IN
-
Difficulty Level:Easy
-
Total Repair Time:15 - 30 mins
-
Tools:Nutdriver, Pliers
16 of 19 people
found this instruction helpful.
Was this instruction helpful to you?
Thank you for voting!
Filter Housing Froze Up and Burst
I had to replace this unit after a repair by the local appliance repairman. The thermostat/ damper control failed and the refrigerator section of a side by side froze up.
As far as installing this unit it goes as follows.
1.) You may want to turn off the water supply to the unit just as a safety.
2.) Remove the two screws holding the unit to the back of the refrigerator.
3.) Disconnect the two lines noting which one goes where. A simple pulling of the hose connection sleeve ( pull toward the hose ) will release the hose's
4.) Reverse the process and turn the water back on. Check for any leaks and re-attach to the back wall.
As far as installing this unit it goes as follows.
1.) You may want to turn off the water supply to the unit just as a safety.
2.) Remove the two screws holding the unit to the back of the refrigerator.
3.) Disconnect the two lines noting which one goes where. A simple pulling of the hose connection sleeve ( pull toward the hose ) will release the hose's
4.) Reverse the process and turn the water back on. Check for any leaks and re-attach to the back wall.
Parts Used:
-
Dwayne from Broadway, VA
-
Difficulty Level:Easy
-
Total Repair Time:15 - 30 mins
-
Tools:Nutdriver
17 of 22 people
found this instruction helpful.
Was this instruction helpful to you?
Thank you for voting!
Replaced the heater-core motor
It was fairly easy. Only had to remove the back cardboard. Remove 3 screws and the power plug.
Replacing the screws took a little time the motor mount didn't seem to be tapped exactly for the screws supplied and it was in a tight area. Its working great now.
Replacing the screws took a little time the motor mount didn't seem to be tapped exactly for the screws supplied and it was in a tight area. Its working great now.
Parts Used:
-
John from Roanoke, VA
-
Difficulty Level:Easy
-
Total Repair Time:15 - 30 mins
-
Tools:Socket set
17 of 22 people
found this instruction helpful.
Was this instruction helpful to you?
Thank you for voting!
Ice maker quit working
Followed the steps in the video on your site, really easy to do.
Parts Used:
-
Steve from ORANGE, TX
-
Difficulty Level:Really Easy
-
Total Repair Time:15 - 30 mins
-
Tools:Nutdriver
16 of 20 people
found this instruction helpful.
Was this instruction helpful to you?
Thank you for voting!
Refrig door would not close automatically
Replaced the plastic/nylon piece on the door. First, I remove the door hinge cover by unscrewing the one bolt. Second, unbolted the two bolts that hold the door in place. Third, lifted the door off the bottom hinge. Four, remove the bottom plate that is held in place by 3 screws. Five, using pliers move the old plastic piece from the bottom of the door. Six, press into place the replacement part. Seven, re-install the bottom plate. Eight, rehang the door on the bottom hinge. Nine, restall the top hinge and rebolt the two bolts that hold the hinge in place. Ten, reinstall the top cover. Finished.
Parts Used:
-
Michael from Lithia, FL
-
Difficulty Level:Really Easy
-
Total Repair Time:15 - 30 mins
-
Tools:Pliers, Screw drivers, Wrench set
14 of 14 people
found this instruction helpful.
Was this instruction helpful to you?
Thank you for voting!
Crisper Supports broken
Removed supports with pliers and used center punch to push broken plugs out of hole and inserted the new supports.
Parts Used:
-
GEORGE from ASHEVILLE, NC
-
Difficulty Level:Really Easy
-
Total Repair Time:Less than 15 mins
-
Tools:Wrench set
14 of 15 people
found this instruction helpful.
Was this instruction helpful to you?
Thank you for voting!
Refrigerator was not cooling
This was a simple job. Raised the flap in the back that houses the compressor, removed the wire that holds the relay, pulled out the old relay and pushed the new one on. Replaced wire holder and that was it. Plugged it frig and freezer is at zero and lower compartment at 35. As easy as brushing your teeth!
Parts Used:
-
Vicki from Johnson City, TX
-
Difficulty Level:Really Easy
-
Total Repair Time:Less than 15 mins
17 of 24 people
found this instruction helpful.
Was this instruction helpful to you?
Thank you for voting!