




















25344359406 Kenmore Refrigerator - Instructions
Keep searches simple. Use keywords, e.g. "leaking", "pump", "broken" or "fit".
Replaced Ice Maker
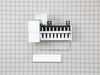
Unplugged refrigerator from the wall plug. Removed ice tray cover, removed ice container, lossen the two screws on the ice marker holding it to the back of the fridge, dropped the ice marker down and unplugged the electrical connection. Then removed the ice maker.
Took the new ice marker, plugged the electrical connection back into the back of the new ice marker, screwed the two screws back in where the ice marker goes and tighen the screws to told the ice marker in place.
Replaced the ice container, replaced the ice cover.
Plugged the fridge electrical cord back in to the wall socket.
Done.
It started making ice again in about 10 minutes.
Took the new ice marker, plugged the electrical connection back into the back of the new ice marker, screwed the two screws back in where the ice marker goes and tighen the screws to told the ice marker in place.
Replaced the ice container, replaced the ice cover.
Plugged the fridge electrical cord back in to the wall socket.
Done.
It started making ice again in about 10 minutes.
Parts Used:
-
Robert from Franklin, TN
-
Difficulty Level:Really Easy
-
Total Repair Time:15 - 30 mins
-
Tools:Socket set
3 of 3 people
found this instruction helpful.
Was this instruction helpful to you?
Thank you for voting!
Ice maker non functioning, Ice maker not sending signal for w
Remove the old ice maker by loosening the screws and disconnect wire harness , next fit new ice maker in place connect wire harness and place new ice maker in place put screws in and tighten.
Parts Used:
-
Marcus from Bessemer, AL
-
Difficulty Level:Really Easy
-
Total Repair Time:15 - 30 mins
-
Tools:Socket set
4 of 6 people
found this instruction helpful.
Was this instruction helpful to you?
Thank you for voting!
Repaired Oven Range Light Bulb
The bulb has a plastic clear cover. That cover can just be carefully removed using a screwdriver. It's held in by a metal bracket. After you remove the cover. You'll just need to replace the bulb and then re-install the cover and bracket.
Parts Used:

-
Alan from SAN MATEO, CA
-
Difficulty Level:Very Easy
-
Total Repair Time:Less than 15 mins
-
Tools:Screw drivers
3 of 3 people
found this instruction helpful.
Was this instruction helpful to you?
Thank you for voting!
Refrigerator was in storage over the winter and the housing froze and broke.
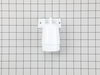
I removed the screws holding the shield covering the filter housing and cup. Unscrewed the cup, removed the filter. Then removed the pressure fittings holding the water lines on the housing. Then I removed the housing. Reversed the process with the new housing.
Parts Used:
-
Steven from Washington, IA
-
Difficulty Level:Easy
-
Total Repair Time:Less than 15 mins
-
Tools:Nutdriver, Screw drivers
3 of 3 people
found this instruction helpful.
Was this instruction helpful to you?
Thank you for voting!
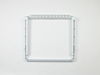
The frame for the meat pan in my Frigidaire refrigerator broke in the middle front, which made opening the drawer a little tricky.
No big deal. I took out the glass in the frame, took out the meat drawer, and removed the broken frame, which doesn't take any tools. After removing the frame, I inserted the new frame, which pops in to two clips in the back, and two in the front on each side. I cleaned the glass and put it into the frame. I re-inserted the drawer into the frame. And VOILA!
Parts Used:
-
Patricia from VICTORVILLE, CA
-
Difficulty Level:Very Easy
-
Total Repair Time:Less than 15 mins
3 of 3 people
found this instruction helpful.
Was this instruction helpful to you?
Thank you for voting!
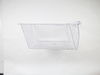
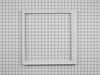
Drawer was cracked and shelf was broken on one side
No repair needed just replace shelf and drawer
Parts Used:
-
Karin from FAYETTEVILLE, NC
-
Difficulty Level:Very Easy
-
Total Repair Time:Less than 15 mins
3 of 4 people
found this instruction helpful.
Was this instruction helpful to you?
Thank you for voting!
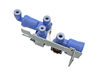
Ice maker was over filling.
Old valve comes out with 2 screws, water lines removed and reinstalled on new valve just as they came off the old valve. Entire job took less than 10 minutes. Very easy replacement.
Parts Used:
-
Richard from Marco Island, FL
-
Difficulty Level:Easy
-
Total Repair Time:Less than 15 mins
-
Tools:Screw drivers
5 of 10 people
found this instruction helpful.
Was this instruction helpful to you?
Thank you for voting!
Fridge started making a loud racket. Condenser Fan Blade then disintegrated to dust and pieces. The plastic had degraded significantly.
The repair itself total time was quick and easy. Since the original fan blade blew apart, it was only a matter of putting the new one on in it's place. This can be done by feeding the blade between the cowling and Condenser coil and applying pressure to get it on the shaft.
If your fan is still on the shaft, simply push it off and extract it the same way. Then place the new one on the shaft.
In my case, since the part would take a couple days to get, and I had food both in the fridge and the freezer, I removed and unplugged the Condenser Fan Motor and the cowling frame and temporarily spliced a small fan I had into the line for the condenser motor. This kept the fridge working long enough to get the replacement part.
Side note. Direction of airflow is towards the Compressor, and draws air across the Condenser coils.
Hope this helps someone. :)
If your fan is still on the shaft, simply push it off and extract it the same way. Then place the new one on the shaft.
In my case, since the part would take a couple days to get, and I had food both in the fridge and the freezer, I removed and unplugged the Condenser Fan Motor and the cowling frame and temporarily spliced a small fan I had into the line for the condenser motor. This kept the fridge working long enough to get the replacement part.
Side note. Direction of airflow is towards the Compressor, and draws air across the Condenser coils.
Hope this helps someone. :)
Parts Used:

-
Jack from WALLING, TN
-
Difficulty Level:Really Easy
-
Total Repair Time:15 - 30 mins
-
Tools:Nutdriver, Socket set
4 of 7 people
found this instruction helpful.
Was this instruction helpful to you?
Thank you for voting!
Ice maker would not dischare ice
-
DAVE from CRESTON, IA
-
Difficulty Level:Really Easy
-
Total Repair Time:1- 2 hours
-
Tools:Nutdriver, Pliers, Screw drivers
3 of 4 people
found this instruction helpful.
Was this instruction helpful to you?
Thank you for voting!
No water to ice maker
Repair was easy. Unplug refrigerator, turn off water to ice maker, remove back panel, disconnect water inlet valve, disconnect water supplies and electrical connections. Cut ends off tubing to modify to new part connections, connect tubing, connect electrical supplies, reinstall back panel, plug refrigerator in, turn water supply back on. We made sure that there was no ice build up in the supply tube into the ice maker and made sure that everything worked correctly before putting it all back together. It was an easy repair.
Parts Used:
-
Joel from SODUS POINT, NY
-
Difficulty Level:Really Easy
-
Total Repair Time:30 - 60 mins
-
Tools:Nutdriver, Wrench (Adjustable)
3 of 4 people
found this instruction helpful.
Was this instruction helpful to you?
Thank you for voting!
Icemaker was producing hollow ice due to water was free flowing out the water dispenser during fill time for icemaker.
Removed old water valve w/ screwdriver, cut threads off old hose (as they just plug straight into new valve) & pushed hoses into new water valve. Solved both problems!!!!
Parts Used:
-
Melissa from Olden, TX
-
Difficulty Level:Really Easy
-
Total Repair Time:15 - 30 mins
-
Tools:Screw drivers
3 of 4 people
found this instruction helpful.
Was this instruction helpful to you?
Thank you for voting!
water leaking inside of refrigerator from filter area
I just removed the filter and then removed the filter housing. The housing is mounted using two screws. The only difficult part was removing the elbows from the water in and out lines. I don't believe the elbows are reusable. So I would go ahead and order new elbows when replacing this part.
Parts Used:
-
Reubon from Phenix City, AL
-
Difficulty Level:Easy
-
Total Repair Time:15 - 30 mins
-
Tools:Pliers, Screw drivers
3 of 4 people
found this instruction helpful.
Was this instruction helpful to you?
Thank you for voting!
Part broke though normal use
Called "local" repair warehouse and ordered part. They shipped the wrong part. Went on-line to Part Select and got the right part.
Parts Used:
-
Hugh from Berthoud, CO
-
Difficulty Level:Easy
-
Total Repair Time:30 - 60 mins
-
Tools:Nutdriver, Pliers, Screw drivers
7 of 17 people
found this instruction helpful.
Was this instruction helpful to you?
Thank you for voting!
The ice crushing housing was broken.
The repair went easily after watching the video, took me less than an hour to complete the repair.
Parts Used:
-
Les from LIVERMORE, CA
-
Difficulty Level:Very Easy
-
Total Repair Time:30 - 60 mins
-
Tools:Nutdriver, Pliers, Screw drivers
2 of 2 people
found this instruction helpful.
Was this instruction helpful to you?
Thank you for voting!
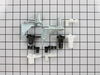
Door would not close properly.
Remove the food items from the shelves on the door, Phillips screwdriver to take the top cap off. Adjustable wrench to take the two screws off the top hinge. Lift out the door and set aside. Remove two bolts from the lower hinge, reinstall with the new hinge and spacer. Reinstall door on lower hinge. Lift into place to reattach the upper hinge. Put the food back in and you're done.
Parts Used:
-
Brian from ROY, UT
-
Difficulty Level:Really Easy
-
Total Repair Time:30 - 60 mins
-
Tools:Screw drivers, Wrench (Adjustable)
2 of 2 people
found this instruction helpful.
Was this instruction helpful to you?
Thank you for voting!