




















25336801892 Kenmore Refrigerator - Instructions
Keep searches simple. Use keywords, e.g. "leaking", "pump", "broken" or "fit".
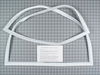
Old gasket not fitting correctly
-
Larry from San Marcos, CA
-
Difficulty Level:Easy
-
Total Repair Time:30 - 60 mins
-
Tools:Nutdriver
2 of 8 people
found this instruction helpful.
Was this instruction helpful to you?
Thank you for voting!
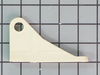
We Are Moving Out Of Military Housing And We Had To Replace The Freezer Door Holder Before We Moved Or We Would Have Had To Pay For The Wholr Refrigerator
We replace the end pieces to hook the holder back on the door.
Parts Used:
-
Christopher from Fort Sill, OK
-
Difficulty Level:Really Easy
-
Total Repair Time:Less than 15 mins
0 of 2 people
found this instruction helpful.
Was this instruction helpful to you?
Thank you for voting!
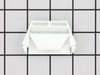
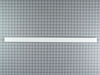
broken shelf bar with missing end brackets.
Ordered the parts from the product discription (photo) as well as chart showing actual size. Got the parts( in two separate shipments) cut the bar to length and snapped them inot place. Bingo!
Parts Used:
-
Robert from Oconomowoc, WI
-
Difficulty Level:Really Easy
-
Total Repair Time:Less than 15 mins
0 of 2 people
found this instruction helpful.
Was this instruction helpful to you?
Thank you for voting!
Getting the light socket to snap back in properly
-
Robert from HELENA, AL
-
Difficulty Level:A Bit Difficult
-
Total Repair Time:Less than 15 mins
-
Tools:Screw drivers
1 of 5 people
found this instruction helpful.
Was this instruction helpful to you?
Thank you for voting!
coil Iceing up
took 4 screws out of the discharge vent on top of the refrigerator section and unpluged the wiring harness and put the section on the counter and unscrewed the timer and put the new one in and reinstalled the assembly and plugged the Jack and put the 4 screws back in, and rotated the timer and put it on defrost removed the back and check the heaters and drain .
Parts Used:
-
Thomas from Stuart, FL
-
Difficulty Level:Really Easy
-
Total Repair Time:15 - 30 mins
-
Tools:Nutdriver, Screw drivers
0 of 2 people
found this instruction helpful.
Was this instruction helpful to you?
Thank you for voting!
gasket was deformed
The gasket was held to the door by the door's interior plastic shelves. Remove the 12 screws holding the interior mold to the door and the gasket comes off too. Then it is just a matter of fitting the new gasket around the mold and then screwing the mold back onto the door.
Parts Used:
-
Rose from Honesdale, PA
-
Difficulty Level:Easy
-
Total Repair Time:15 - 30 mins
-
Tools:Screw drivers
Was this instruction helpful to you?
Thank you for voting!
Refrig unit was frosting up top and bottom, did not properly defrost and stop cooling especially in lower compartment.
Unplug the refrigerator unit from wall. I removed freezer rack, plastic light cover, the ice rack shelf on the right side, then removed the plastic back cover panel, (4) retaining screws, gently tilting the panel toward me, unplug the wiring harness by depressing the clips on the side of the plug, removed panel from unit, set aside. If the unit was froze up, so I defrosted the cooling coils carefully with a common hair dryer until it was thawed. Be careful not to touch or bend the coils , since they are very fragile and SHARP! I located the old thermostat unit attached to a straight length of coolant line. The new unit looked like the old one, so it was easy to locate. I cut the two wires of the old unit close to the round base to make sure I would have enough wire to reconnect. Since my new unit did not indicate a polarity(Neg or Pos), I just wired each wire I cut to one of the new unit. I used the shrink tubing provided and heated the shrink till it was fully melted. I double ck'd to see if the wires were basically waterproof and a good connect. Also, before I replaced the rear panel, I made sure that both wires I had spliced had a drip loop to it so water would not drip down into the newly spliced union. Also made sure the wires will not interfere with the colling fan on the back of the rear panel. Reverse the procedure in reassembling. Plug in unit, and wait and listen for the unit coming back on..I kept a regular thermometer in the upper and lower compartments. Allow 24 hrs. for the unit to return to normal operation. It may defrost several times till the whole operation is back in sync.
Parts Used:
-
BILL from GENOA, WV
-
Difficulty Level:Really Easy
-
Total Repair Time:15 - 30 mins
-
Tools:Nutdriver
Was this instruction helpful to you?
Thank you for voting!
shelf end caps broke, needed replaced.
I watched the video from your company and within a couple of minutes replaced them. Very easy.
Parts Used:
-
Clifford H. from Lakeland, FL
-
Difficulty Level:Really Easy
-
Total Repair Time:Less than 15 mins
Was this instruction helpful to you?
Thank you for voting!
Freezer Worked Fine, Refrigerator Was 47 Degrees
I went on partselect put in make and model number, a list showed the probable cause. I watched the how to video. When I received the part in short order I loosened 2 screws disconnected the wiring plug (sprayed it with contact cleaner) pluged it in, removed screws from old part put them in new one. Put timer back in its location and tightened the screws. Very eazy, works fine.
Parts Used:
-
Allan E from Manhattan, IL
-
Difficulty Level:Really Easy
-
Total Repair Time:Less than 15 mins
-
Tools:Screw drivers
Was this instruction helpful to you?
Thank you for voting!
Overheat coils at the bottom inside of the freezer
I pick up very fast at these kind of small jobs but because of my very busy schedule I decided to call (2 times) technicians about my problem but none of them had any idea. About my repair, I removed the grill at the bottom of the refrigerator, unscrew a small plate (located on the bottom left side) that's holding the defrost timer. I plug on the new part, screw back the plate with the defrost timer and that was it. Don't forget to turn clockwise with your finger the timer until you hear a "click" and then turn it slightly more to the right. There is also a video on U-tube.
Parts Used:
-
Costas from new hyde park, NY
-
Difficulty Level:Really Easy
-
Total Repair Time:Less than 15 mins
-
Tools:Screw drivers
Was this instruction helpful to you?
Thank you for voting!
Broken Glass Shelf
1) Remove glass from shipping Container. 2) Using fingers, place glass ever so gingerly in the shelf tray. 3) Pour a glass of wine to celebrate.
Parts Used:

-
Annie from West Plam Beach, FL
-
Difficulty Level:Really Easy
-
Total Repair Time:Less than 15 mins
Was this instruction helpful to you?
Thank you for voting!
fridge side was getting warm.
open freezer door two screws just below unscrew slide piece to side unplug reinstall very simple.
Parts Used:
-
Darryl from Russellville, KY
-
Difficulty Level:Really Easy
-
Total Repair Time:Less than 15 mins
-
Tools:Screw drivers
Was this instruction helpful to you?
Thank you for voting!
freezer was freezing and no refrigerator
-
Michael E from Uniontown, PA
-
Difficulty Level:Really Easy
-
Total Repair Time:Less than 15 mins
-
Tools:Nutdriver, Screw drivers
Was this instruction helpful to you?
Thank you for voting!
freezer cold--frig was warm
You guys at Partselect are the best!!! Went to your site, typed in my appliance symptoms, and received possible fixes. Ordered the suggested parts (under $50) on a Sunday night and got em Tuesday am. Installed the easiest one first and Voila!!!! Frig is working great. Thanks Bob S
Parts Used:
-
Robert from Chicago, IL
-
Difficulty Level:Really Easy
-
Total Repair Time:Less than 15 mins
-
Tools:Screw drivers
Was this instruction helpful to you?
Thank you for voting!
Refrigerator was not cooling
Remove 4 screws that hold up overhead controls, this is also the part that holds the light. Unplug the timer and replace. Super simple and runs great now. After you plug it in it may take a few minutes to kick on the compressor but it will. Also I was pleased it was a factory Frigidare part. Price was right.
Parts Used:
-
Scott from Norman, OK
-
Difficulty Level:Really Easy
-
Total Repair Time:Less than 15 mins
-
Tools:Nutdriver
Was this instruction helpful to you?
Thank you for voting!