




















2300 Cooktop - Instructions
Keep searches simple. Use keywords, e.g. "leaking", "pump", "broken" or "fit".
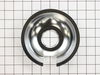
My drip pans had rusted and I had a hole in one of them.
I just pulled the electric element out of the slot and dropped the drip pan in place and slipped the electric element back in place and it was ready to go. It looks almost new. We built a new house in 95. It took 17 months to build it. I got the stainless steel cook top that you can have the grill on one side or you can pull the grill off and slip in the burners. It is only 4 burners but it is plenty to work with. It has a down draft.
Parts Used:

-
Bobby from Paragould, AR
-
Difficulty Level:Really Easy
-
Total Repair Time:Less than 15 mins
0 of 1 people
found this instruction helpful.
Was this instruction helpful to you?
Thank you for voting!
easy as pie
Just remove the old ones and replace them with the new ones. no tools necessary.
Parts Used:

-
Michelle from College Station, TX
-
Difficulty Level:Really Easy
-
Total Repair Time:Less than 15 mins
0 of 1 people
found this instruction helpful.
Was this instruction helpful to you?
Thank you for voting!
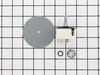
The switch didn't control the heat range
Took the front panel off by removing 4 screws. Then remove the switch by loosing the nut hold it. Then replace the wire on the new the way they were on the old switch. Put the panel back on.
Parts Used:
-
Samuel L. from Cardington, OH
-
Difficulty Level:Really Easy
-
Total Repair Time:Less than 15 mins
-
Tools:Pliers, Screw drivers
0 of 1 people
found this instruction helpful.
Was this instruction helpful to you?
Thank you for voting!
Filter needed replacement. Old one was falling apart.
Removed old filter, dropped in the new one.
(This really was not a "repair")
(This really was not a "repair")
Parts Used:
-
Sophie from Warrenton, VA
-
Difficulty Level:Really Easy
-
Total Repair Time:Less than 15 mins
0 of 1 people
found this instruction helpful.
Was this instruction helpful to you?
Thank you for voting!
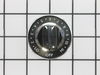
Knobs were worn and illegible
Removed the old ones and snapped on the new.
It was a snap and what a difference! Even though the cooktop is over 20 years old, it looks new again. Thanks to the knowledgeable support people at Part Select.Com we picked the right knobs the first time.
It was a snap and what a difference! Even though the cooktop is over 20 years old, it looks new again. Thanks to the knowledgeable support people at Part Select.Com we picked the right knobs the first time.
Parts Used:
-
Denise from Huntington, NY
-
Difficulty Level:Really Easy
-
Total Repair Time:Less than 15 mins
0 of 1 people
found this instruction helpful.
Was this instruction helpful to you?
Thank you for voting!
20 year old countertop - dials unreadable
Two dials available, chose the wrong one, PartSelect paid to have the wrong ones returned and issued credit, while helping to select the correct ones. Friendly, REAL people, who absolutely sealed the deal. I'll always check here first for parts, filters, anything. Thanks PartSelect
Parts Used:
-
Carolyn from Fulshear, TX
-
Difficulty Level:Really Easy
-
Total Repair Time:Less than 15 mins
0 of 1 people
found this instruction helpful.
Was this instruction helpful to you?
Thank you for voting!
knobs sloppy and discolored and filter bent
This has been a wonderful cooktop and I could only hope todays quality is equally as good but after 25 yrs. I doubt it especially after looking at new dishwashers in the last couple of days. too sad. but these repairs were minor and no trouble. what amazed me most was ordering one afternoon and the parts were here the following day ! great service
Parts Used:
-
Robert from Meredith, NH
-
Difficulty Level:Really Easy
-
Total Repair Time:Less than 15 mins
0 of 1 people
found this instruction helpful.
Was this instruction helpful to you?
Thank you for voting!
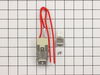
one of wire melted and broken off from receptacle
Cut broken wire and existed wire off and put splice on both new and old wires to connect them.
It's easy job.
It's easy job.
Parts Used:
-
Young from Cordova, TN
-
Difficulty Level:Easy
-
Total Repair Time:15 - 30 mins
-
Tools:Pliers, Screw drivers
0 of 1 people
found this instruction helpful.
Was this instruction helpful to you?
Thank you for voting!
Burner shorted out and runied the switch
Replaced the switch and put the new surface element in and it works great.
Parts Used:
-
DALE from NORTH MANCHESTER, IN
-
Difficulty Level:Easy
-
Total Repair Time:15 - 30 mins
-
Tools:Screw drivers, Wrench (Adjustable)
1 of 4 people
found this instruction helpful.
Was this instruction helpful to you?
Thank you for voting!
Sockets for the burner elementss were burned out
I removed the burner elements for three burners by lifting the surface top and unplugging them. I snapped out the plug sockets that were burned out and cut the two wires, one element at a time. Using the included wire nuts I stripped the ends of the cut wire and connected each wire to one of the wires on the new socket. Once the wires were connected I snapped the sockets in place and reinstalled the elements, lowered the surface top and the range was ready to use.
Parts Used:
-
Martin from Manchester, MD
-
Difficulty Level:Really Easy
-
Total Repair Time:15 - 30 mins
0 of 1 people
found this instruction helpful.
Was this instruction helpful to you?
Thank you for voting!
cooks "high" on all settings
Turn off the power. Remove 2 screws (in the blower compartment) and lift up the control panel. Release the switch by removing the fastnut. Unplug each wire from the old switch and place it in the cooresponding lug on the new switch. Screw everything back together and cook.
Parts Used:
-
Robert from Jacksonville, FL
-
Difficulty Level:Really Easy
-
Total Repair Time:15 - 30 mins
-
Tools:Pliers, Screw drivers
0 of 1 people
found this instruction helpful.
Was this instruction helpful to you?
Thank you for voting!
range handle fell off and screw got lost
It was worth the money for that little screw, since I didn't have to run all over trying to find the right one.
Parts Used:

-
Frances from palm beach gardens, FL
-
Difficulty Level:Really Easy
-
Total Repair Time:15 - 30 mins
-
Tools:Screw drivers
1 of 4 people
found this instruction helpful.
Was this instruction helpful to you?
Thank you for voting!
Screws holding recepticles in place had to be drilled out.
Removed screws by drilling one and using a pliers to remove 2nd one. At first did not have enough wire to pull recepticles out until I relized wires were clipped to back of range to hold in place. Unclipped wires, pulled recepticles out, cut wires and attached new recepticles by connecting wires with wire nuts (I think wire nuts were to small so I used my own a size larger). Another problem that I found was that the recepticles on my range were held in place only by the screws that attached the recepticles to the drip pan flang. I had to bend an L bracket to prop under each recepticle to hold the back of it up so the burner element would sit level over the drip pan.
Parts Used:
-
Dennis from Bacliff, TX
-
Difficulty Level:A Bit Difficult
-
Total Repair Time:1- 2 hours
-
Tools:Pliers, Screw drivers
0 of 1 people
found this instruction helpful.
Was this instruction helpful to you?
Thank you for voting!
Electrical receptacle for burner was defective.
After buying a 'universal' part at Lowe's and it not fitting correctly and shorting out the burner, I went online and found this source for an exact replacement part. Beside having to disassemble the drop in stove burner two or three times it went well when I had the correct part. I lost one screw somewhere and that delayed me a short time to find a replacement. Thus the 1 to 2 hours. It would have been about a 30 minute job if I had been smarter.
Parts Used:
-
gerald from Hillsboro, TN
-
Difficulty Level:Easy
-
Total Repair Time:1- 2 hours
-
Tools:Pliers, Screw drivers, Socket set
0 of 1 people
found this instruction helpful.
Was this instruction helpful to you?
Thank you for voting!
My 8 inch stove top element would not heat
I first replaced the element and the receiver. This required splicing lines which was very easy. It still did not heat (even though my element indicator light was on) so I replaced the switch regulator. This took a little time because of the small space on my model. In fact, I had to replace a wire that had shorted by splicing a 3 inch section into it. When that was done, I simply re-connected the 5 wires in the original positions and reattached the cover. It works like a charm and my wife is delighted because we are hosting a family reunion/baby shower tomorrow!
Parts Used:
-
clifford from mead, WA
-
Difficulty Level:Easy
-
Total Repair Time:30 - 60 mins
-
Tools:Pliers, Screw drivers
0 of 1 people
found this instruction helpful.
Was this instruction helpful to you?
Thank you for voting!