




















20135 Jenn-Air Range - Instructions
Keep searches simple. Use keywords, e.g. "leaking", "pump", "broken" or "fit".
Broken Surface Burner control
Remove 4 screws that holds down panel;removed dial;removed screw that held switch to panel. Took off wire one at a time ann put on corresponding lug. Repeated above in reverse.
Parts Used:
-
Thomas from Batavia, NY
-
Difficulty Level:Easy
-
Total Repair Time:30 - 60 mins
-
Tools:Pliers, Screw drivers
1 of 2 people
found this instruction helpful.
Was this instruction helpful to you?
Thank you for voting!
burned burner control out of warranty
switch power supply off at breaker panel
unscrew control box assembly from stove
slide control out of stove
unscrew burner control out of assembly
transfer wiring from old control to new in same relative location
reassemble in reverse order
restore power
test burner in all positions
unscrew control box assembly from stove
slide control out of stove
unscrew burner control out of assembly
transfer wiring from old control to new in same relative location
reassemble in reverse order
restore power
test burner in all positions
Parts Used:
-
Daniel from Temple, TX
-
Difficulty Level:A Bit Difficult
-
Total Repair Time:30 - 60 mins
-
Tools:Pliers, Screw drivers
1 of 2 people
found this instruction helpful.
Was this instruction helpful to you?
Thank you for voting!
Blower motor had frozen up.
Removed front wooden kick panel(2 cross recessed screws).
Removed 2 bolts holding blower to floor. Loosened 2 vent clamp screws on vent from stove(2 clamps). Pulled vent off of blower housing. Removed blower from under stove. Using a nut driver, removed 4 nuts from blower and removed the motor cover & motor from the blower housing, removed 3 screws from motor cover and removed the motor cover from the motor. Ordered new motor. After new motor was rcvd (about 3 days plus wk end) I removed the squirel cage from the motor shaft using a metric allen wrench. Then removed the mounting clamp from the old motor by loosening 1 screw. Placed the motor clamp and the squirel cage on the new motor, then placed the motor cover on the motor. Placed blower mtg bkt and motor on blower housing w/ the 4 nuts removed earlier. Placed blower motor assy under stove being careful not to damage the exaust vent behind the blower motor as I carefully put the blower motor into the exhaust vent. Placed vent from stove on stove and blower housing and secured w/the 2 vent clamps removed earlier. Attached the blower motor base to the floor w/ 2 bolts. Wala........complete
Removed 2 bolts holding blower to floor. Loosened 2 vent clamp screws on vent from stove(2 clamps). Pulled vent off of blower housing. Removed blower from under stove. Using a nut driver, removed 4 nuts from blower and removed the motor cover & motor from the blower housing, removed 3 screws from motor cover and removed the motor cover from the motor. Ordered new motor. After new motor was rcvd (about 3 days plus wk end) I removed the squirel cage from the motor shaft using a metric allen wrench. Then removed the mounting clamp from the old motor by loosening 1 screw. Placed the motor clamp and the squirel cage on the new motor, then placed the motor cover on the motor. Placed blower mtg bkt and motor on blower housing w/ the 4 nuts removed earlier. Placed blower motor assy under stove being careful not to damage the exaust vent behind the blower motor as I carefully put the blower motor into the exhaust vent. Placed vent from stove on stove and blower housing and secured w/the 2 vent clamps removed earlier. Attached the blower motor base to the floor w/ 2 bolts. Wala........complete
Parts Used:
-
Joe from Fair Oaks Ranch, TX
-
Difficulty Level:Easy
-
Total Repair Time:More than 2 hours
-
Tools:Nutdriver, Screw drivers
2 of 5 people
found this instruction helpful.
Was this instruction helpful to you?
Thank you for voting!
burned up switch
Opened the back of the cooktop and found upper right element control switch burned. I removed the retaining screws and wires and spent two weeks chasing the switch at a local dealer. Found exactly what I needed at PartSelect.com and paid less even with shipping than at the local. Installed the switch with original screws and presto!! it worked.
Parts Used:
-
Scott from Chehalis, WA
-
Difficulty Level:Really Easy
-
Total Repair Time:15 - 30 mins
-
Tools:Screw drivers, Socket set
1 of 2 people
found this instruction helpful.
Was this instruction helpful to you?
Thank you for voting!
Control switch would not operate
Looked up schematic. Removed 3 screws holding cover. after I shut power off of course. Took off knob. Oriented new control to the one on panel. Disconnected each wire one at at time and immediately attached it to the new control for each wire. Removed screws holding old control and inserted and screwed to the new control and put the knob back on. Put the cover back on. Worked fine. Probably should replace the others as they don't turn as easily as the new one. Probably will spray some contact cleaner which will give me a few more years.
Parts Used:
-
Thomas from Batavia, NY
-
Difficulty Level:Easy
-
Total Repair Time:15 - 30 mins
-
Tools:Pliers, Screw drivers
1 of 2 people
found this instruction helpful.
Was this instruction helpful to you?
Thank you for voting!
not a prblem,just necessary to replace
even though these sre washable filters it's still necessary to change them after so much time
Parts Used:
-
Peter from Wilson, NC
-
Difficulty Level:Really Easy
-
Total Repair Time:Less than 15 mins
1 of 2 people
found this instruction helpful.
Was this instruction helpful to you?
Thank you for voting!
broiler pan missing
-
RAYMOND from JACKSONVILLE, FL
-
Difficulty Level:Really Easy
-
Total Repair Time:Less than 15 mins
1 of 2 people
found this instruction helpful.
Was this instruction helpful to you?
Thank you for voting!
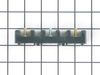
I snapped a bolt on the main power terminal block when connecting the pigtail.
Removed the small metal panel covering the main power terminal in back of the electric range. Removed the nuts holding the red, white and black electrical wires from the range using the appropriate socket (there will be two nuts on each bolt end). Removed the two screws holding the main power terminal block with appropriate screw driver. Connect the new main power terminal block to the range using the two screws. Reconnect the red, black and white electrical wires coming from the range using one nut for each wire. IMPORTANT: do no over tighten the nuts because the bolts could snap. Reconnect the pigtail and secure the small metal panel covering the main power panel.
Parts Used:
-
Frank from Palm Coast, FL
-
Difficulty Level:Easy
-
Total Repair Time:15 - 30 mins
-
Tools:Screw drivers, Socket set
3 of 8 people
found this instruction helpful.
Was this instruction helpful to you?
Thank you for voting!
front burner stayed on high
We unplugged the range from the wall first so as not to get electrocuted. We removed the face of the control panel by removing the screws and 2 hex nuts underneath that hold it in place, and removed the trim. Then we disconnected the malfunctioning control switch, taking note of what order the wires go in. Hooked the new switch up and popped it through the face of the control panel. We then put the trim back, and reattached the control panel with the screws. Very easy!!
Parts Used:
-
Natalie from North Reading, MA
-
Difficulty Level:Really Easy
-
Total Repair Time:Less than 15 mins
-
Tools:Screw drivers, Wrench (Adjustable)
1 of 3 people
found this instruction helpful.
Was this instruction helpful to you?
Thank you for voting!
Very Easy Repair
The door came off easily after I removed the two hinge covers that are attached to the oven. Taking the door off can be done with one person but ideally two.
The new parts fit in perfectly and the hinge pin used for shipping comes out easiest with a pair or wire cutters (you do not cut it just grab it and pull).
After that, re-assemble the door and drop in place. It was a snap.
FYI...the shipping was ultra fast and the price was great.
No issues whatsover with the entire process.
The new parts fit in perfectly and the hinge pin used for shipping comes out easiest with a pair or wire cutters (you do not cut it just grab it and pull).
After that, re-assemble the door and drop in place. It was a snap.
FYI...the shipping was ultra fast and the price was great.
No issues whatsover with the entire process.
Parts Used:
-
Donald from Edmond, OK
-
Difficulty Level:Really Easy
-
Total Repair Time:15 - 30 mins
-
Tools:Screw drivers
2 of 6 people
found this instruction helpful.
Was this instruction helpful to you?
Thank you for voting!
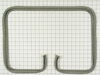
worn door seal on oven
takes two people to put the oven door back in place but otherwise very simple as long as you keep all your screws and pads in place
Parts Used:
-
Sarah from Albany, GA
-
Difficulty Level:Really Easy
-
Total Repair Time:15 - 30 mins
-
Tools:Screw drivers
1 of 3 people
found this instruction helpful.
Was this instruction helpful to you?
Thank you for voting!
burned oven bulb
The hardest part was taking out original light bulb because screws on shield where hard to unscrew after all this years . The old bulb vent out leaving neck in socket. It took narrow electrical pliers to get neck out .The generic appliance bulb did not fit and had aluminum neck ,not recommended for brass sockets in ovens.Putting new light bulb in was not the problem.
Parts Used:

-
Ivanka from Atlantra, GA
-
Difficulty Level:Really Easy
-
Total Repair Time:30 - 60 mins
-
Tools:Pliers, Screw drivers
3 of 9 people
found this instruction helpful.
Was this instruction helpful to you?
Thank you for voting!
replaced the current warn-out grease filter
removed the old by pulling it out of track and replaced it with the new filter
Parts Used:
-
Joseph from East Greenwich, RI
-
Difficulty Level:Really Easy
-
Total Repair Time:Less than 15 mins
1 of 3 people
found this instruction helpful.
Was this instruction helpful to you?
Thank you for voting!
the above knobs were worn couldn't read anymore
pulled off the old and pushed on the new. the entire experience was great. would use again in a heart beat!
Parts Used:

-
Pamela J from Lynwood, IL
-
Difficulty Level:Really Easy
-
Total Repair Time:Less than 15 mins
1 of 3 people
found this instruction helpful.
Was this instruction helpful to you?
Thank you for voting!
control switch was no good
I remove fore screwsfrom the front panel. Then remove two screws to remove the switch and removed the wire plugs then put everything back together again.
Parts Used:
-
Valentine from Bow, NH
-
Difficulty Level:Really Easy
-
Total Repair Time:Less than 15 mins
-
Tools:Screw drivers
0 of 1 people
found this instruction helpful.
Was this instruction helpful to you?
Thank you for voting!