




















1985816150 Kenmore Freezer - Instructions
Keep searches simple. Use keywords, e.g. "leaking", "pump", "broken" or "fit".
Wouldn't flow cold water
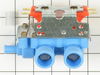
Pushed machine out from wall; disconnected the supply hoses (after closing the valves at the wall); unplugged electrical cord; removed two wires from the solenoid connectors; removed two screws that secure valve assembly to backplane of machine. Installation of new assembly was the opposite procedure. We have private well, and silt was plugging the cold water side of valve. So, I also installed a large sediment filter behind the washer, so this will never happen again.
Parts Used:
-
Walter from College Station, TX
-
Difficulty Level:Easy
-
Total Repair Time:30 - 60 mins
-
Tools:Pliers, Screw drivers, Wrench (Adjustable)
0 of 1 people
found this instruction helpful.
Was this instruction helpful to you?
Thank you for voting!
Wsher did not fill or run
Solved theprobel m by noticiing the HOT water filled the tub and it began to run when it was full. Figured out it was the solenoid valve. Ordered a new one. Simple to install and then it ran just fiine.
Parts Used:
-
James from Westwood, MA
-
Difficulty Level:Easy
-
Total Repair Time:30 - 60 mins
-
Tools:Nutdriver, Pliers, Screw drivers
0 of 1 people
found this instruction helpful.
Was this instruction helpful to you?
Thank you for voting!
water would continue to drip after washer stopped.
Did the same as others. Loosened the three screws diconnected the wires and put them on the new valve. Disconnected fill hose and connected to new valve. 10-15 minutes. Replaced panel and tested new part. perfect, My repair was a little longer, I vaccumed up all the dust bunnies I could find before moving washer back. Good for another 35 years, I hope. Thanks for the help and experiences.
Parts Used:
-
vern from magnolia, TX
-
Difficulty Level:Easy
-
Total Repair Time:30 - 60 mins
-
Tools:Pliers, Screw drivers
0 of 1 people
found this instruction helpful.
Was this instruction helpful to you?
Thank you for voting!
water kept on filling tub even when not washing
-
wayne from battle creek, MI
-
Difficulty Level:Easy
-
Total Repair Time:15 - 30 mins
-
Tools:Nutdriver, Pliers, Screw drivers
0 of 1 people
found this instruction helpful.
Was this instruction helpful to you?
Thank you for voting!
washer filled with water very slowly
unplugged electricity from socket, turned water feed off at spigots, put plastic basin to catch water under place where hoses connect to washer, used pliers to turn disconnect hoses from washer and let them drain into basin. unfastened top screw on panel (only one) and tipped the old water inlet valve connections out over basin -- still spilled water onto floor, though. unfastened two screws holding old valve assembly to panel, set panel aside. loosened clamp screw on hose, moved hose off old valve -- a little water spilled out. held new assembly in similar position as moved wires one by one. used dry cloth to make sure electrical connections dry, then put hose back on, tightened clamp screw, fastened assembly to panel, fastened panel to washer, fastened hoses to valve, waited a half hour hoping any water on wires had dried, turned on water, washed clothes -- success!
Parts Used:
-
J. Michael from Champaign, IL
-
Difficulty Level:Easy
-
Total Repair Time:15 - 30 mins
-
Tools:Pliers, Socket set
0 of 1 people
found this instruction helpful.
Was this instruction helpful to you?
Thank you for voting!
Inlet Valve wasn't allowing cold water into washing machine.
Made sure I had the right part. Inlet Valve looked just like the one on the website. Unpluged washer. Removed screws and water hoses. Disconnected wires from old Inlet valve and reconnected to new Valve. Disconnected water line from Inlet valve to washer tub. Reconnected water lines. Ran a test cycle. Works great. Wife very happy. Therefore, so am I.
Parts Used:
-
Michael from Olathe, KS
-
Difficulty Level:Easy
-
Total Repair Time:15 - 30 mins
-
Tools:Pliers, Screw drivers
0 of 1 people
found this instruction helpful.
Was this instruction helpful to you?
Thank you for voting!
Washer was leaking. After removing the front panel I could see the leak was coming form the solonoid valve.
I removed the front of the washer then lifted the top up and swiveled it to the right. The solenoid is located in the back left. I remove the solenoid retaining screws from the the back of the washer, pulled the wires form the connectors on the top and bottom solenoids (hot and cold) and removed the defective valve. The new unit fit exactly! the total time to replace the solenoid valve was 25 minutes.
Parts Used:
-
Steven from Sterling, VA
-
Difficulty Level:Easy
-
Total Repair Time:15 - 30 mins
-
Tools:Nutdriver, Screw drivers
0 of 1 people
found this instruction helpful.
Was this instruction helpful to you?
Thank you for voting!
Water would not shut off
First thing unpluged power cord from wall outlet, removed hot and cold water supply hoses.Then took out srew holding metal plate ,pulled plate out exposing valve, marked wires and diconnected.Pulled clamp and hose from valve.Pulled out valve and reinstalled new.Reconnected wires and hose.Installed screw to hold in place, reconnected hot and cold supply hoses.Plug unit back in. Job done.Washer works like new.
Parts Used:
-
Mark from La Mirada, CA
-
Difficulty Level:Easy
-
Total Repair Time:15 - 30 mins
-
Tools:Nutdriver, Pliers
0 of 2 people
found this instruction helpful.
Was this instruction helpful to you?
Thank you for voting!
broken water inlet valve
followed simple directions... no brainer.
just be careful - shut off water and unlug first.
just be careful - shut off water and unlug first.
Parts Used:
-
Ed from Chesterland, OH
-
Difficulty Level:Easy
-
Total Repair Time:15 - 30 mins
-
Tools:Nutdriver, Pliers, Screw drivers
0 of 2 people
found this instruction helpful.
Was this instruction helpful to you?
Thank you for voting!
No power. blown fuse. replaced fuse no hot water. Ordered part. fill.
Shut water off and unplugged. Used channel locks to remove hoses. Used nut driver to remove mounting plate. Disconnected electrical connections to solenoids. Broke one. Had to replace. Used nut driver to loosen fill hose. Rusty and broke. Cut hose. Used new clamp to secure fill hose to fill solenoids. Stripped and crimped on new connector and replaced electrical connections as they were removed. Reinstalled hoses and plugged in. Tested A-OK.
Parts Used:
-
Bob from Rochester, NY
-
Difficulty Level:Easy
-
Total Repair Time:15 - 30 mins
-
Tools:Nutdriver
Was this instruction helpful to you?
Thank you for voting!
Water leaking into tub.
The most important part of my repair was watching the video that was sent to me with my order confirmation. After I viewed it, the rest was easy. The only hard part was moving the washer away from the wall!
Parts Used:
-
Scott from Lincoln, NE
-
Difficulty Level:Easy
-
Total Repair Time:15 - 30 mins
-
Tools:Nutdriver, Screw drivers
Was this instruction helpful to you?
Thank you for voting!
Cracked Water Inlet Valve
I ordered the part. Watched the video and did the repair. I removed the cover plate on the washer, removing the screws. I then, removed the broken water inlet valve and replaced it with the new one. I placed the cover plate back onto the rear of the washer and "VOILE", it was done. I am a divorced mother of three, who has never attempted to do any type of home repairs, however, the way PartSelect has set up the website, it made it easy to determine what part I needed and provided me with a video which gave me step by step instructions on how to repair it. I even posted my victory on Facebook! Thanks PartSelect.
Parts Used:
-
Kajanda from Oak Brook, IL
-
Difficulty Level:Easy
-
Total Repair Time:15 - 30 mins
-
Tools:Nutdriver, Screw drivers, Socket set
Was this instruction helpful to you?
Thank you for voting!
Hot water not coming out
First check that the screens are not plugged. There are fine screens in the mixing valve and at times you will find them in either end of the inlet hoses. Not a hard job if you can get to the back of the machine, just a few small screws, swap the wires to the new part and swap the outlet hose from the valve and screw it back together. Wife will think you are a wiz kid.
Parts Used:
-
Philip from Mariposa, CA
-
Difficulty Level:Easy
-
Total Repair Time:15 - 30 mins
-
Tools:Nutdriver, Screw drivers
Was this instruction helpful to you?
Thank you for voting!
Water inlet body developed a leak in the plastic molded body.
Removed hoses and inlet valve from washer, replaced inlet valve by attaching the electrical connectors, reattached new water lines, returned inlet valve to its place in rear of washer. Checked for leaks, washed a load of clothes, everything worked properly.
Parts Used:
-
Darrell from Powell, OH
-
Difficulty Level:Easy
-
Total Repair Time:15 - 30 mins
-
Tools:Nutdriver, Wrench (Adjustable)
Was this instruction helpful to you?
Thank you for voting!
Cold water was just dribbling into the washer and the hot water pressure was diminished, also.
Disconnected the electric plug and removed the water hoses from the washer. Took off the old water inlet valve under a plate on the washer and hooked in the new one. As we dismantled each section of the valve hook-up we connected that area of the new valve to be sure we got it connected correctly.
Parts Used:
-
Susan from Camano Island, WA
-
Difficulty Level:Easy
-
Total Repair Time:15 - 30 mins
-
Tools:Screw drivers, Wrench (Adjustable)
Was this instruction helpful to you?
Thank you for voting!