




















15781-0 General Electric Range - Instructions
Keep searches simple. Use keywords, e.g. "leaking", "pump", "broken" or "fit".
fried oven control using raid
replaced oven clock control ref maintenance manual, 4 screws and 8 wires. plugged in new control and op checks good.
Parts Used:
-
Kerry from Loveland, CO
-
Difficulty Level:Really Easy
-
Total Repair Time:15 - 30 mins
-
Tools:Nutdriver, Screw drivers
4 of 13 people
found this instruction helpful.
Was this instruction helpful to you?
Thank you for voting!
burner was inoperative
verified switch operation , checked continuity of burner element found open ordered new part and installed next day
after extremely fast
service from partselect thank you
after extremely fast
service from partselect thank you
Parts Used:
-
bryan from cocoa, FL
-
Difficulty Level:Really Easy
-
Total Repair Time:15 - 30 mins
-
Tools:Nutdriver, Pliers, Screw drivers
0 of 2 people
found this instruction helpful.
Was this instruction helpful to you?
Thank you for voting!
Orignal oven door handle had multiple fractures and was fast becoming useless.
-
Gerald from Omaha, NE
-
Difficulty Level:Really Easy
-
Total Repair Time:15 - 30 mins
-
Tools:Screw drivers
2 of 8 people
found this instruction helpful.
Was this instruction helpful to you?
Thank you for voting!
eye wouldnt come on
removed the top section on stove and removed the wires off swtitch and put on new one then put new switch in
Parts Used:
-
daniel from valentines, VA
-
Difficulty Level:Really Easy
-
Total Repair Time:15 - 30 mins
-
Tools:Nutdriver
0 of 2 people
found this instruction helpful.
Was this instruction helpful to you?
Thank you for voting!
Burner not heating.
Isolated to control switch.
Replaced
Replaced
Parts Used:
-
Jack from Greensboro, GA
-
Difficulty Level:Really Easy
-
Total Repair Time:30 - 60 mins
-
Tools:Screw drivers
1 of 5 people
found this instruction helpful.
Was this instruction helpful to you?
Thank you for voting!
light keep burning out in oven.
Remove the door. Just open a little and pull up. Removed racks. Removed 3 screws with nutdriver. Pulled out housing. Disconnected 2 wires. Assembled new housing with with bulb receptacle and gasket. Reconnected wires and crimped a little to make them snug. Pushed housing back into hole. Put 3 screws back in, inserted bulb and cover. Slid door back on and done. 30 minutes at most.
Parts Used:


-
john from Mc Kees Rocks, PA
-
Difficulty Level:Really Easy
-
Total Repair Time:30 - 60 mins
-
Tools:Nutdriver
2 of 8 people
found this instruction helpful.
Was this instruction helpful to you?
Thank you for voting!
The electronic board controls failed to illuminate or work after very strong power surge associated with lightening. The stove top burners still worked fine but not the clock and controlls for the oven.
I found a video on Youtube with a similar circuit board repair and decided that I could probably do it. First and most important is to be certain the range is disconnected from its electric circuit. I did this by turning off the breaker at the electrical panel and then unplugging the range. Second, I removed a panel (four screws) on the back of my stove to expose the circuit board, Next I removed the board (four screws) without disconnecting the wiring. Then I removed the flexible plastic covering from the board which has the control button identities on it. This was the most difficult part because the glue was very sticky and I did not want to tear the cover. After removal, I stuck the plastic covering (still sticky) onto the new circuit board and made sure the buttons were in the correct position. Then, I unplugged the wires one at a time from the old circuit board and made sure I plugged them into the new board in the correct position. Finally, I reattached the new board and the back panel on the stove. This repair was easy and no problem for the average "do it yourself" type.
Parts Used:
-
Leon from Cullowhee, NC
-
Difficulty Level:Easy
-
Total Repair Time:30 - 60 mins
-
Tools:Nutdriver, Pliers
Was this instruction helpful to you?
Thank you for voting!
Shorted Control Unit -
Control unit was easy to remove ,wires color coded-the face plate(key pad) needed to be separated from the old unit. Carefully used a hair dryer to warm the decal. . . Secured the old unit gently in a vise, warmed ( and separated slowly, with a razor blade and thin putty knife(patience). . Once removed, applied to the new unit. . . 5 Stars to partselect for service. . . . Turned a $400 repair into $100 do-it your self. Partselect will be my 1st "go to" from now-on.
Parts Used:
-
Gerald from Plantsville, CT
-
Difficulty Level:A Bit Difficult
-
Total Repair Time:30 - 60 mins
-
Tools:Nutdriver, Screw drivers
Was this instruction helpful to you?
Thank you for voting!
Burner Would Not Turn Off
-
BILLY from WEBSTER, FL
-
Difficulty Level:Really Easy
-
Total Repair Time:30 - 60 mins
-
Tools:Nutdriver
Was this instruction helpful to you?
Thank you for voting!
one leg of the terminal block was loose and overheated under load.the terminal block melted and could have caused a fire.
I took a picture of the setup and damage . I then disconnected the burnt wires and replaced the wires . Then I installed the new terminal block and connected the wires to the proper positions. The reason for the failure was that the delivery people didn't tighten the cord when they installed the stove . I would check the connections periodically as to avoid another situation like this .
Parts Used:
-
brendan from lebanon, NH
-
Difficulty Level:Easy
-
Total Repair Time:30 - 60 mins
-
Tools:Pliers, Screw drivers, Socket set, Wrench set
Was this instruction helpful to you?
Thank you for voting!
Rusted oven door trim
Removed old part by removing the screws at the boottom of the oven door. I wasn't sure if the glass oven door cover would remain in place once the trim piece was removed, fortunately I was ready when it came down. The glass cover is large and heavy so you need to be ready to handle the bulk of this piece once the last screw is removed. Cleaned everything and with the help of my wife, who secured the oven door cover in place, secured the new trim piece by replacing the screws. What a difference, looks like new! PartSelect provided great service in terms of speed and part acciracy.
Parts Used:
-
Todd from Pittsburgh, PA
-
Difficulty Level:Easy
-
Total Repair Time:30 - 60 mins
-
Tools:Nutdriver
Was this instruction helpful to you?
Thank you for voting!
Replace Door Gasket
Slide out oven door. Remove handle screw and handle. Pick up white insulation. Remove screws to the door gasket. Replace new Door Gasket. It had to te streched to fit. I wish that the new door gasket would be 2 in. longer so it would be easier to install.
Parts Used:
-
Herbert from Brooklyn, NY
-
Difficulty Level:Difficult
-
Total Repair Time:30 - 60 mins
-
Tools:Screw drivers, Socket set
Was this instruction helpful to you?
Thank you for voting!
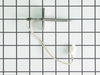
Oven Sensor Replacement
The part was just like the old one and would have been an easy fix except our range suffered from a lighting hit. The clips had melted together. Called a dealer and asked about a new wiring harness. He said in those cases just cut the clip off and hard wire with wire clips,or firecrackers. We used wire nuts and taped all together and the oven works just great. Nothing is ever as easy as it should be.
Parts Used:
-
Barbara from Edwardsville, IL
-
Difficulty Level:A Bit Difficult
-
Total Repair Time:30 - 60 mins
-
Tools:Nutdriver
Was this instruction helpful to you?
Thank you for voting!
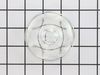
Wall oven: light flickered or did not work in a loose poreclain socket.
Shut off power at the panel to the electric oven. Removed 2 phillips screws holding bulb unit in place in the top of teh oven chamber. One wire was so frayed it came out of the push on connector. Stripped off insulation and reinstalled onto the connector, using pliers to snug the wires down. Installed the new porcelain socket from Parts Select, replaced the unit in the top of the oven unit. Installed a new bulb, then snapped the new glass housing into place with the existing retaining wire clip. Presto: works like it's brand new. Thanks to Parts Select for the right parts, and for such quick delivery. I will use them again!
Parts Used:
-
Robert from Owings Mills, MD
-
Difficulty Level:Really Easy
-
Total Repair Time:30 - 60 mins
-
Tools:Pliers, Screw drivers
Was this instruction helpful to you?
Thank you for voting!
oven continued to get F2, F3 and F5 error messages when ovewn got hot
This repair was quite a bit more difficult then what had been described on the web site. First off, I have a double wall oven that is built in. Sliding it out of the cabinet was difficult and because oven was hard wired, I had to disconnect the actual wiring from the oven back. . Positioning the oven and allowing for it to rest on a support bench was the most difficult part The oven is heavy. Eventually, removing the back and top panels of the oven revealed the sensor connection. I was then able to feed it through the oven and reconnect all the wiring harnesses.. Getting the oven back in the cabinet was equally a challenge. But it did seem to fix the problem with over heating.
Parts Used:
-
Ralph from Redding, CA
-
Difficulty Level:Difficult
-
Total Repair Time:1- 2 hours
-
Tools:Nutdriver, Screw drivers, Socket set
Was this instruction helpful to you?
Thank you for voting!