




















12791-1 General Electric Range - Instructions
Keep searches simple. Use keywords, e.g. "leaking", "pump", "broken" or "fit".
only the inner/smaller part of the dual burner is working
I ordered a new burner assuming As is turns out: nothing wrong with the burner.
Parts Used:
-
Albert from South Boston, VA
-
Difficulty Level:Really Easy
-
Total Repair Time:Less than 15 mins
2 of 5 people
found this instruction helpful.
Was this instruction helpful to you?
Thank you for voting!
Oven handle broke off
Couple of screws and it was done. Simple and inexpensive since I thought I was going to have to buy a new range.
Parts Used:
-
Maureen from Locust Valley, NY
-
Difficulty Level:Really Easy
-
Total Repair Time:Less than 15 mins
-
Tools:Nutdriver, Screw drivers
3 of 9 people
found this instruction helpful.
Was this instruction helpful to you?
Thank you for voting!
cooktop inner ring did not work
Dear PartSelect:
I am very impressed by your service and company. My order arrived in less than 24 hours. It was a perfect match and is currently in service. I am very satisfied with the entire experience and will use your company again.
I simply opened up the cooktop with a screwdriver and disconnected the wires to the affected burner. After the part arrived, I reconnected them. I had to swap over two brackets from the old burner, so don't throw it away until the new one arrives. It went back together very easily and worked immediately.
Matt Brennan
I am very impressed by your service and company. My order arrived in less than 24 hours. It was a perfect match and is currently in service. I am very satisfied with the entire experience and will use your company again.
I simply opened up the cooktop with a screwdriver and disconnected the wires to the affected burner. After the part arrived, I reconnected them. I had to swap over two brackets from the old burner, so don't throw it away until the new one arrives. It went back together very easily and worked immediately.
Matt Brennan
Parts Used:
-
Matthew from Lexington Park, MD
-
Difficulty Level:Really Easy
-
Total Repair Time:15 - 30 mins
-
Tools:Screw drivers
1 of 3 people
found this instruction helpful.
Was this instruction helpful to you?
Thank you for voting!
Two stage burner was not working on the outer part of burner.
Locate breaker box and turn off breaker to stove. Removed the two screw in front that hold the top in place. Raised the top and supported it with the box the new burner came in. Removed two screws that held the burner in place and the 5 wires one at a time an installed them on the new burner. Put new burner in place and installed two mounting screws. Reinstalled the two screws in the front to hold the top in place then turned the breaker back on and tested burner. Worked great. Received part in 2 days.
Parts Used:
-
Gregory from Pleasant Valley, MO
-
Difficulty Level:Really Easy
-
Total Repair Time:15 - 30 mins
-
Tools:Nutdriver, Pliers, Screw drivers
0 of 1 people
found this instruction helpful.
Was this instruction helpful to you?
Thank you for voting!
the paint started to chip off.
remove the door, removed about six screws and did a clean up on the glass. the replacement part was screwed back in place. so easy
Parts Used:
-
vanessa from runnemede, NJ
-
Difficulty Level:Really Easy
-
Total Repair Time:15 - 30 mins
-
Tools:Wrench set
0 of 1 people
found this instruction helpful.
Was this instruction helpful to you?
Thank you for voting!
No water inlet
Removed the screws around the inner part of the door. Removed the knob from the door latch, then pulled back the inner door panel. The hardest part was tracing the lost voltage wthout a wiring diagram. I got a tip from a friend so I checked the rocker switch (heated dry switch) and it was intermittently open, also one of the 1/4" plugs that plug onto it had been hot. I replaced the switch and the connector and now it works fine.
Parts Used:

-
Billy from Conway, AR
-
Difficulty Level:A Bit Difficult
-
Total Repair Time:30 - 60 mins
-
Tools:Screw drivers
0 of 2 people
found this instruction helpful.
Was this instruction helpful to you?
Thank you for voting!
Orignal oven door handle had multiple fractures and was fast becoming useless.
-
Gerald from Omaha, NE
-
Difficulty Level:Really Easy
-
Total Repair Time:15 - 30 mins
-
Tools:Screw drivers
2 of 8 people
found this instruction helpful.
Was this instruction helpful to you?
Thank you for voting!
Small burner not working, outside was fine
Followed directions that I found on the internet and it was easy to remove the old burner and replace it with the one I ordered from you. There was no problems at all.
Parts Used:
-
Lynda from Burdock, SD
-
Difficulty Level:Really Easy
-
Total Repair Time:15 - 30 mins
-
Tools:Screw drivers
Was this instruction helpful to you?
Thank you for voting!
Bad Burner
I simply removed the 2 anchor screws in front of the stove and wrote down the wiring order on the instillation diagram, removed the old burner, removed the two studs, made sure they were installed on the right numbers place them in the new burner, wired the new burner, placed the springs respectively. Placed them in the correct holes in the frame to be sure that the burner was aligned properly. Put the washers on the studs and replaced the frame screws, lowered the cook top and returned the screws to lock the cook top in place.
Parts Used:
-
Roosevelt from Waggaman, LA
-
Difficulty Level:Really Easy
-
Total Repair Time:15 - 30 mins
Was this instruction helpful to you?
Thank you for voting!
Trim has tendancy to rust on range oven door
-
Carole from San Diego, CA
-
Difficulty Level:Really Easy
-
Total Repair Time:Less than 15 mins
-
Tools:Screw drivers
Was this instruction helpful to you?
Thank you for voting!
8 inch burner was burnt out
replacement was easy. pulled away the stove from wall. unplug the stove. open oven door. remove the two hex head screws holdings stove top. raise the stove top in the front. supported stove top with a 16 inch piece of wood. place New Burner under old burner. remove old burner remove wires remove old burner and place it on top of new burner connected the wires from burner to new burner. install new burner. remove support lowered top down. plugged in stove tested. .burner. burner w.ork fine. reinstall hex head screws back top. pushback stove back into the wall. testes over again. all the stove work done.
Parts Used:
-
Luis from Kissimmee, FL
-
Difficulty Level:Really Easy
-
Total Repair Time:Less than 15 mins
-
Tools:Nutdriver, Screw drivers
Was this instruction helpful to you?
Thank you for voting!
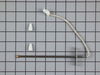
uneven heating of oven
This repair was super easy. I removed the two screws holding the oven sensor in place, pulled the sensor from the oven wall to expose the two wires attached to the sensor cut and spliced in the new sensor as per instructions. The supplied wiring kit made this splice very easy. I then reinserted the wires and sensor from the oven wall, put the screws back in place tested the oven. Oven now works like new and I got bonus points from a happy wife!
Parts Used:
-
John from Sandstone, MN
-
Difficulty Level:Really Easy
-
Total Repair Time:Less than 15 mins
-
Tools:Pliers, Socket set
Was this instruction helpful to you?
Thank you for voting!
Trim part on bottom of door was rusty
I ordered the part, It came a few days later,,Within 15-20 minutes, I had it installed..Pretty easy...Thanks
Parts Used:
-
Richard from Euclid, OH
-
Difficulty Level:Easy
-
Total Repair Time:15 - 30 mins
-
Tools:Nutdriver
Was this instruction helpful to you?
Thank you for voting!
A large burner (haliant Burner 8" ) went out on my Hotpoint Electric Range
I ordered the part on a Monday and Tuesday afternoon I received it! I went a route I often take first. I read the instructions of others before starting my job and opened the top of the range. There are two screws under the range top in front near the oven door, one on either side, that must be removed. After this I opened the top of the range and positioned a piece of 2X2 about 20 inches long at an angle to hold the top up while I worked on the burner. I then used my phone to take a close up picture of the old burner while in place in my range so I could refer to it when putting the new one in place. I then took a pair of needle nose pliers and pulled off the wiring, then removed lock washers under the burner and removed the old burner, being careful not to lose the washers and springs. I took the new burner and layed it along side the old one to see exactly how it would be placed under the glass cover. I replace the springs and lock washers then referred to my photo and replace all the wires to the burner as they had been. Then lowered the top in place and put the screws back in place. That was it. I'm a 67 year old female, if I can do this, anyone can!
Parts Used:
-
Ruth from Potosi, MO
-
Difficulty Level:Easy
-
Total Repair Time:15 - 30 mins
-
Tools:Screw drivers, Wrench set
Was this instruction helpful to you?
Thank you for voting!
The range kept giving an F2 alarm
When I got the part I removed the tin cover (two screws)on the back of the range. I removed the sensor by removing the two screws inside the oven and pulled out the sensor. taking the instructions advise, I checked the sensor with my ohm meter and although it read 1.1 ohms as compared with the recommended 1.09 ohms at room temperature in the instructions, went ahead and changed the unit. The connector did not fit my particular model so I spliced the wiring and using the two included wire nuts made the connection. I reinstalled the sensor, reattached the gas line, plugged it in and tried the oven before I put it back in place. The oven works great now and it was super easy.
Parts Used:
-
Les from Coal Creek, CO
-
Difficulty Level:Really Easy
-
Total Repair Time:30 - 60 mins
-
Tools:Screw drivers, Socket set
Was this instruction helpful to you?
Thank you for voting!